Composition of Views Using Custom Structures
By now you should have six pages in your FavouriteThings app:
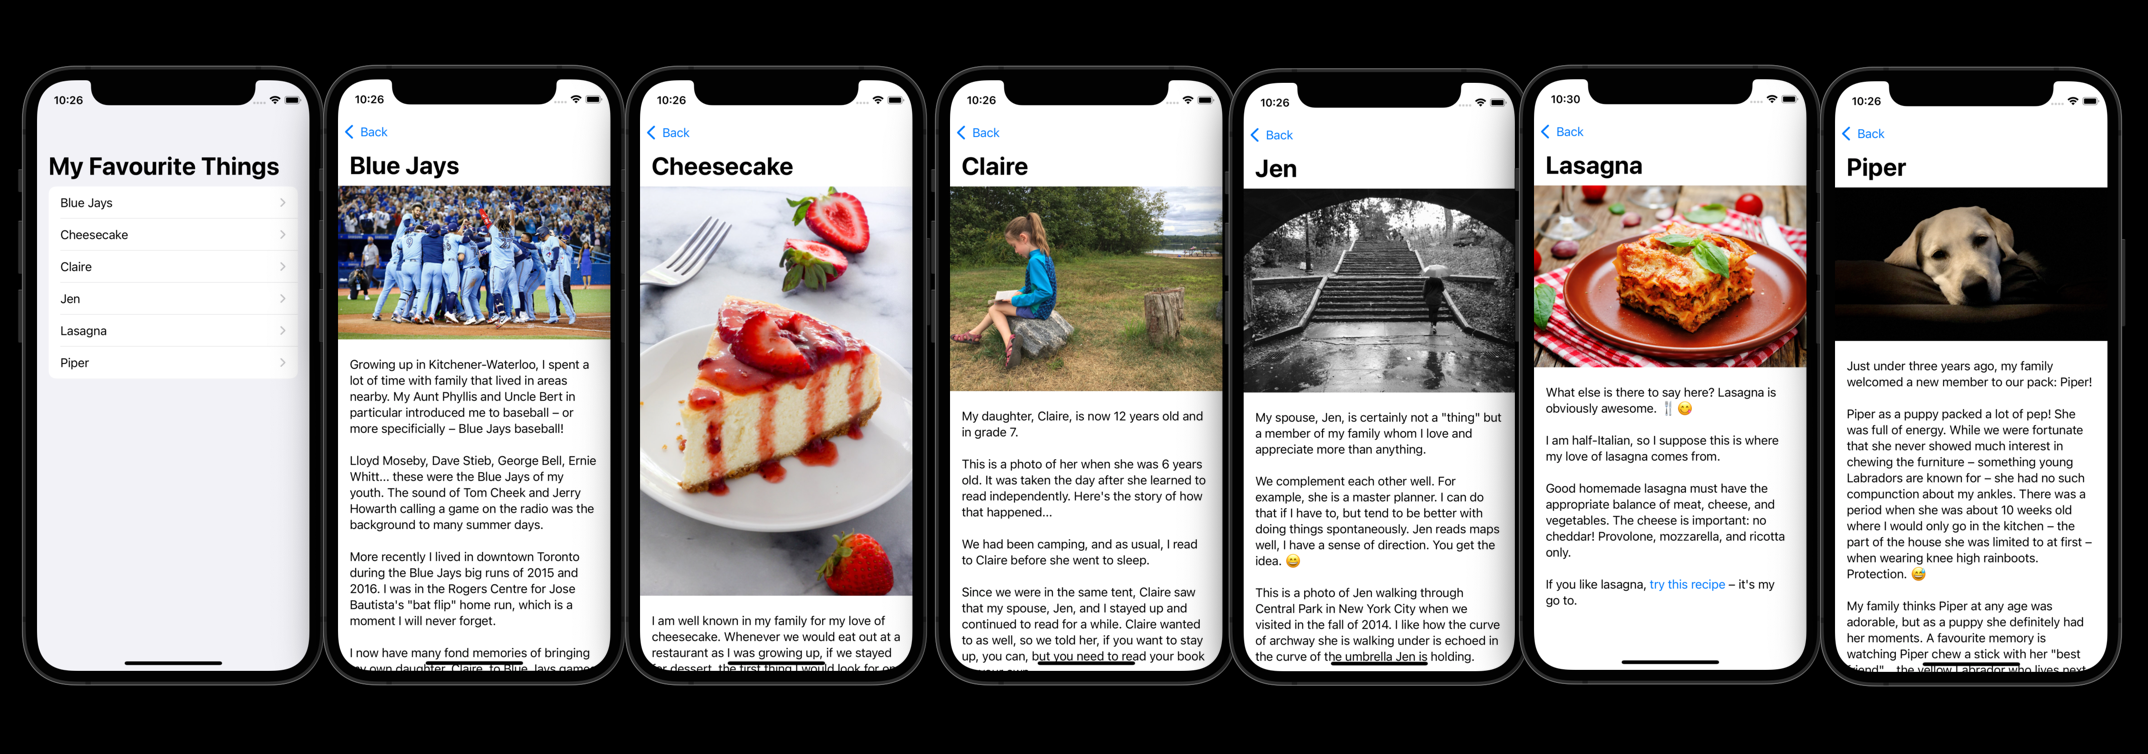
∙ To follow this lesson, it is easiest if the format of all your FavouriteThings pages match the structure of what is shown above (a title, a photo, some text).
∙ If you wish, you can download a Zip file of Mr. Gordon's FavouriteThings project as it is shown above.
∙ Double-click the Zip file to expand it on your computer, then from the resulting folder, open the blue Xcode project file.
∙ After completing this lesson you can try applying the concepts explained here in your own project.
What if we wanted to adjust the way a view looks on each of these pages?
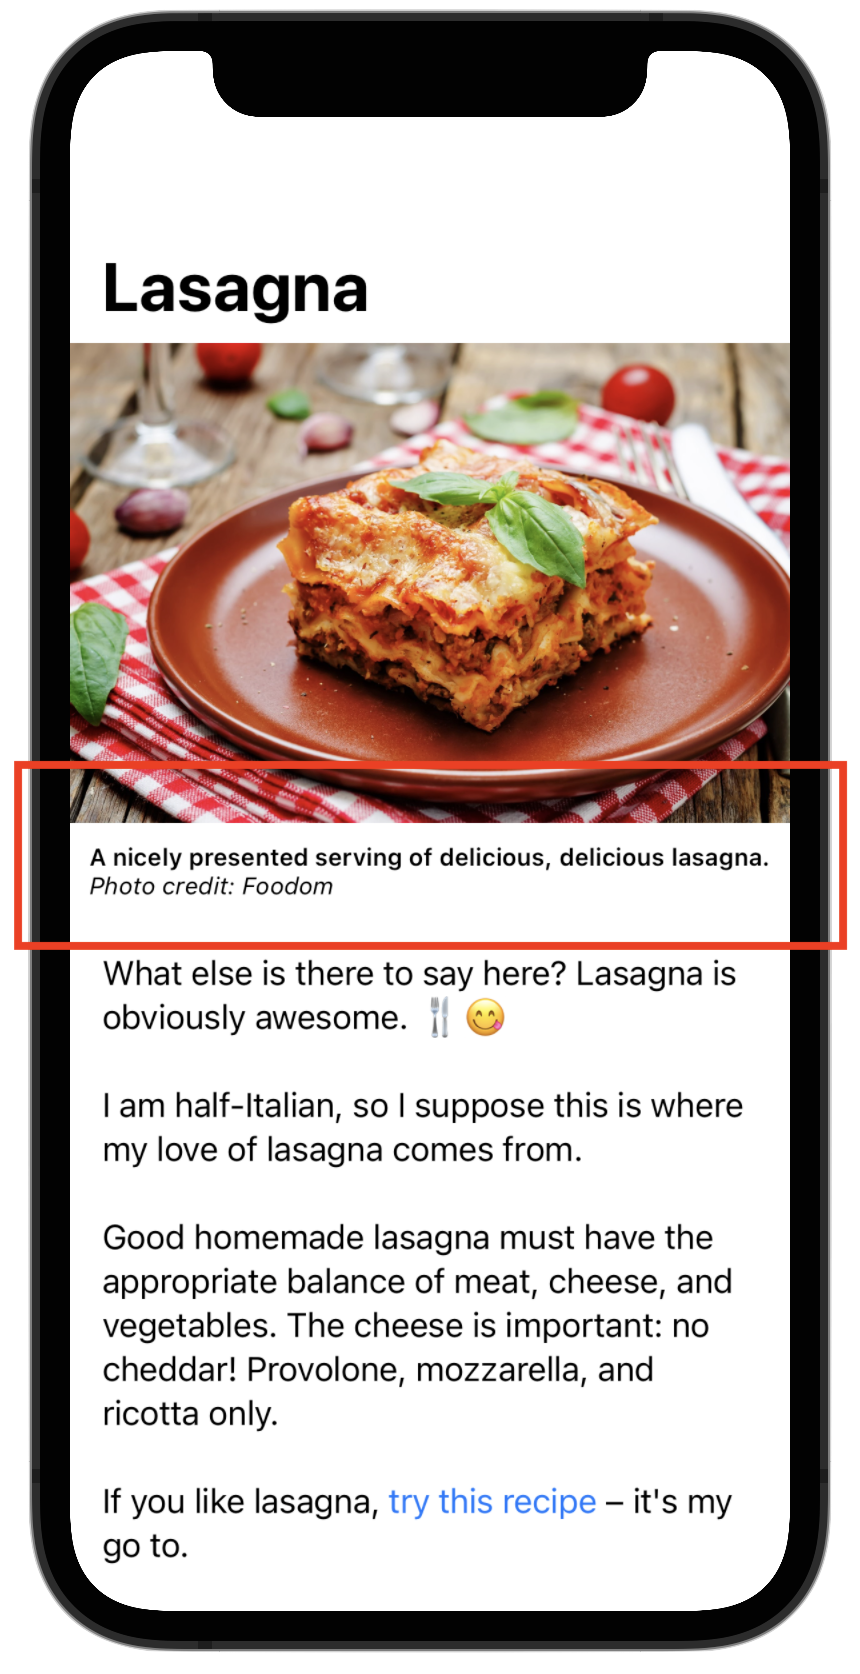
Say, for example, to add a caption and a credit below every photo on every page?
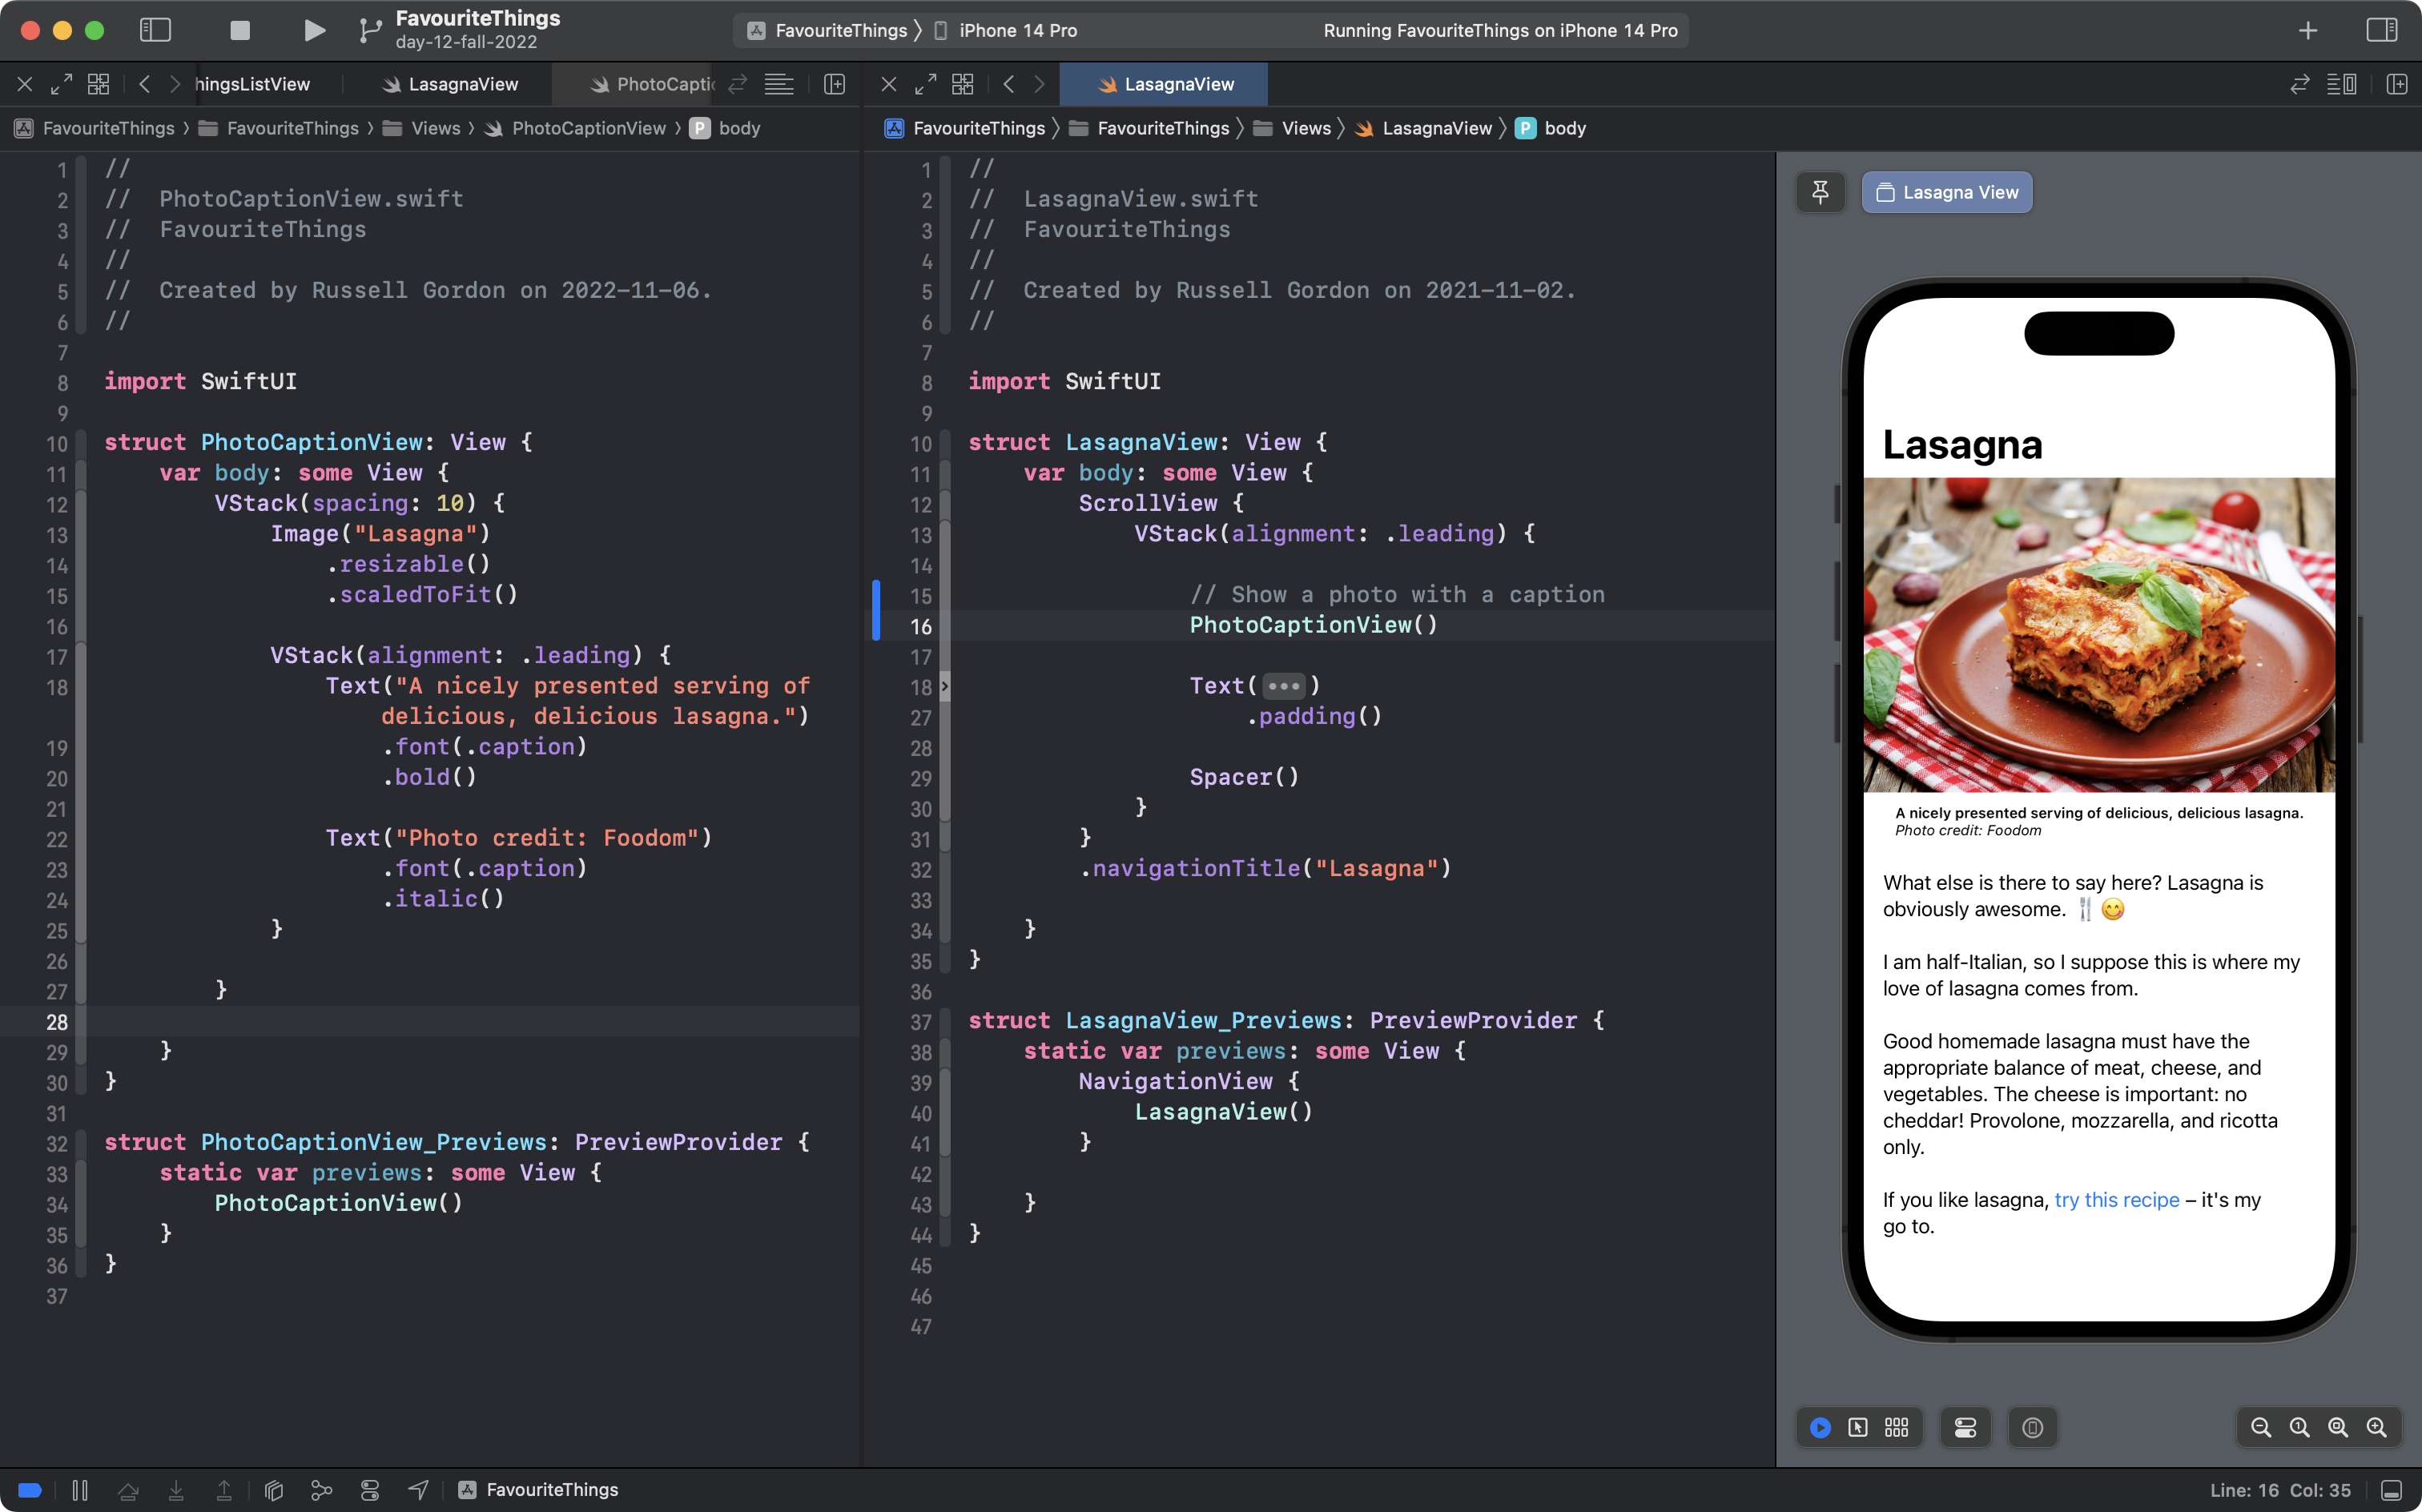
Here's an example of what this could look like for the Lasagna page:
Please do this now... make a similar edit to one of the pages in your FavouriteThings app:
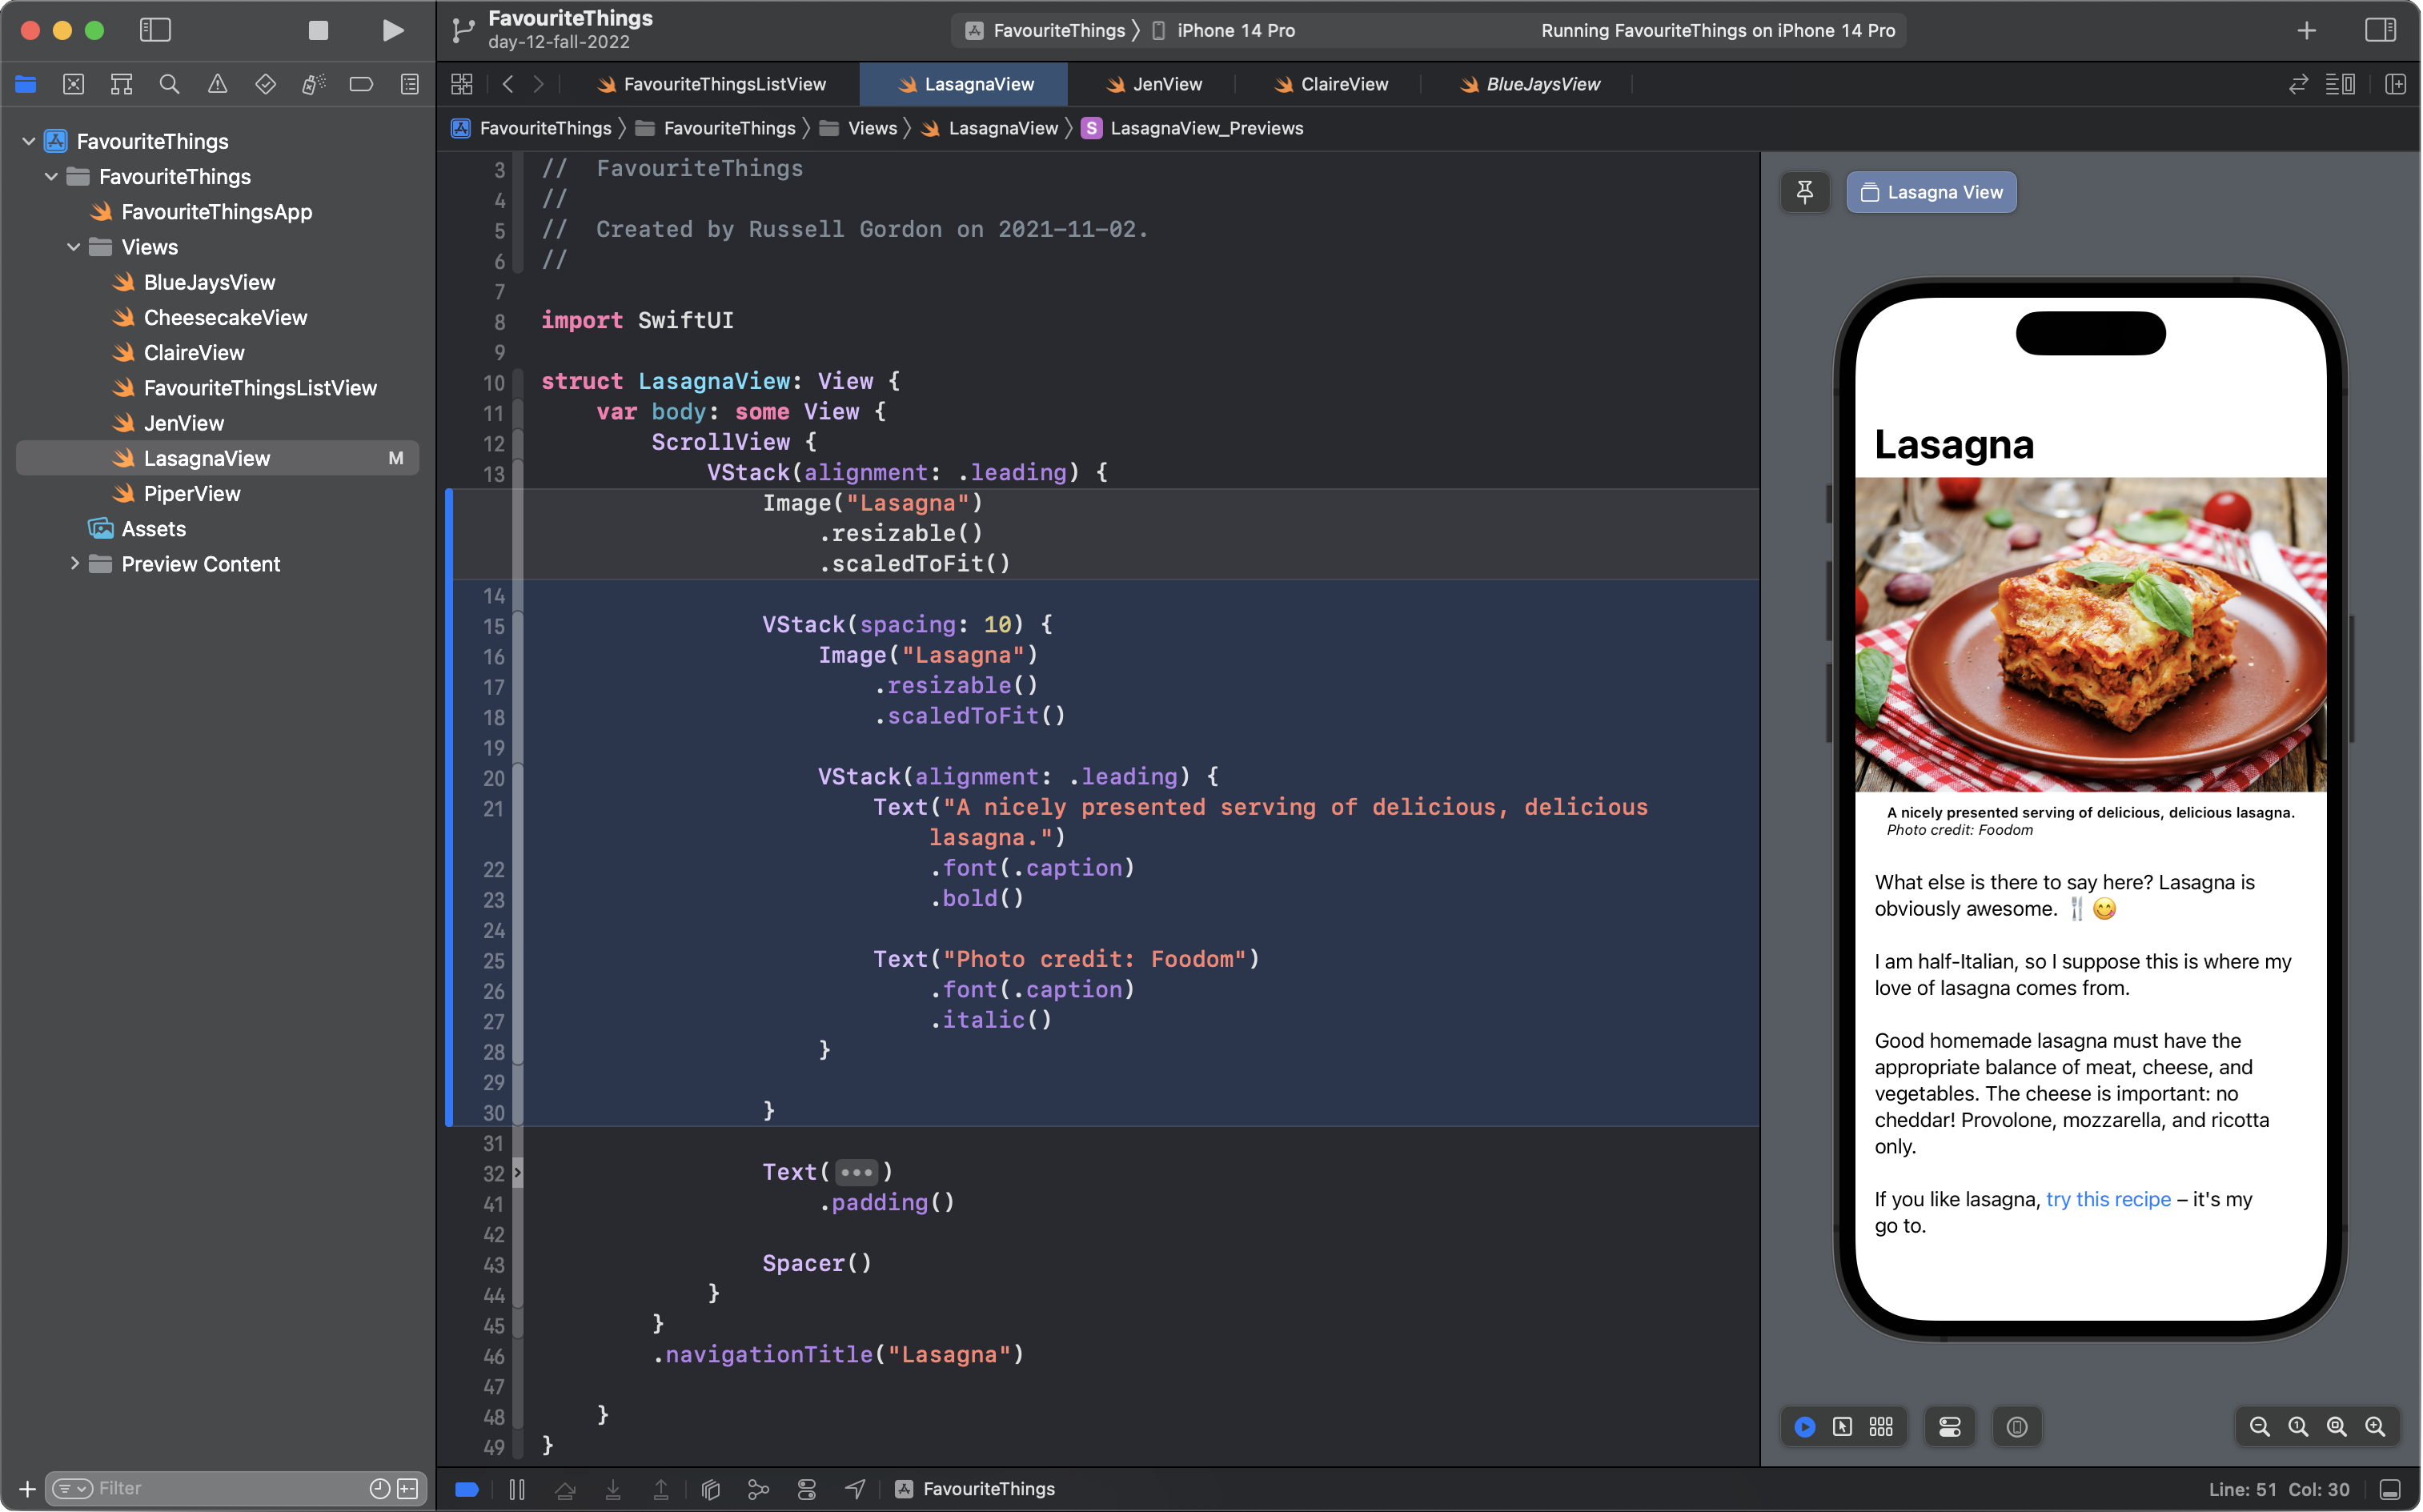
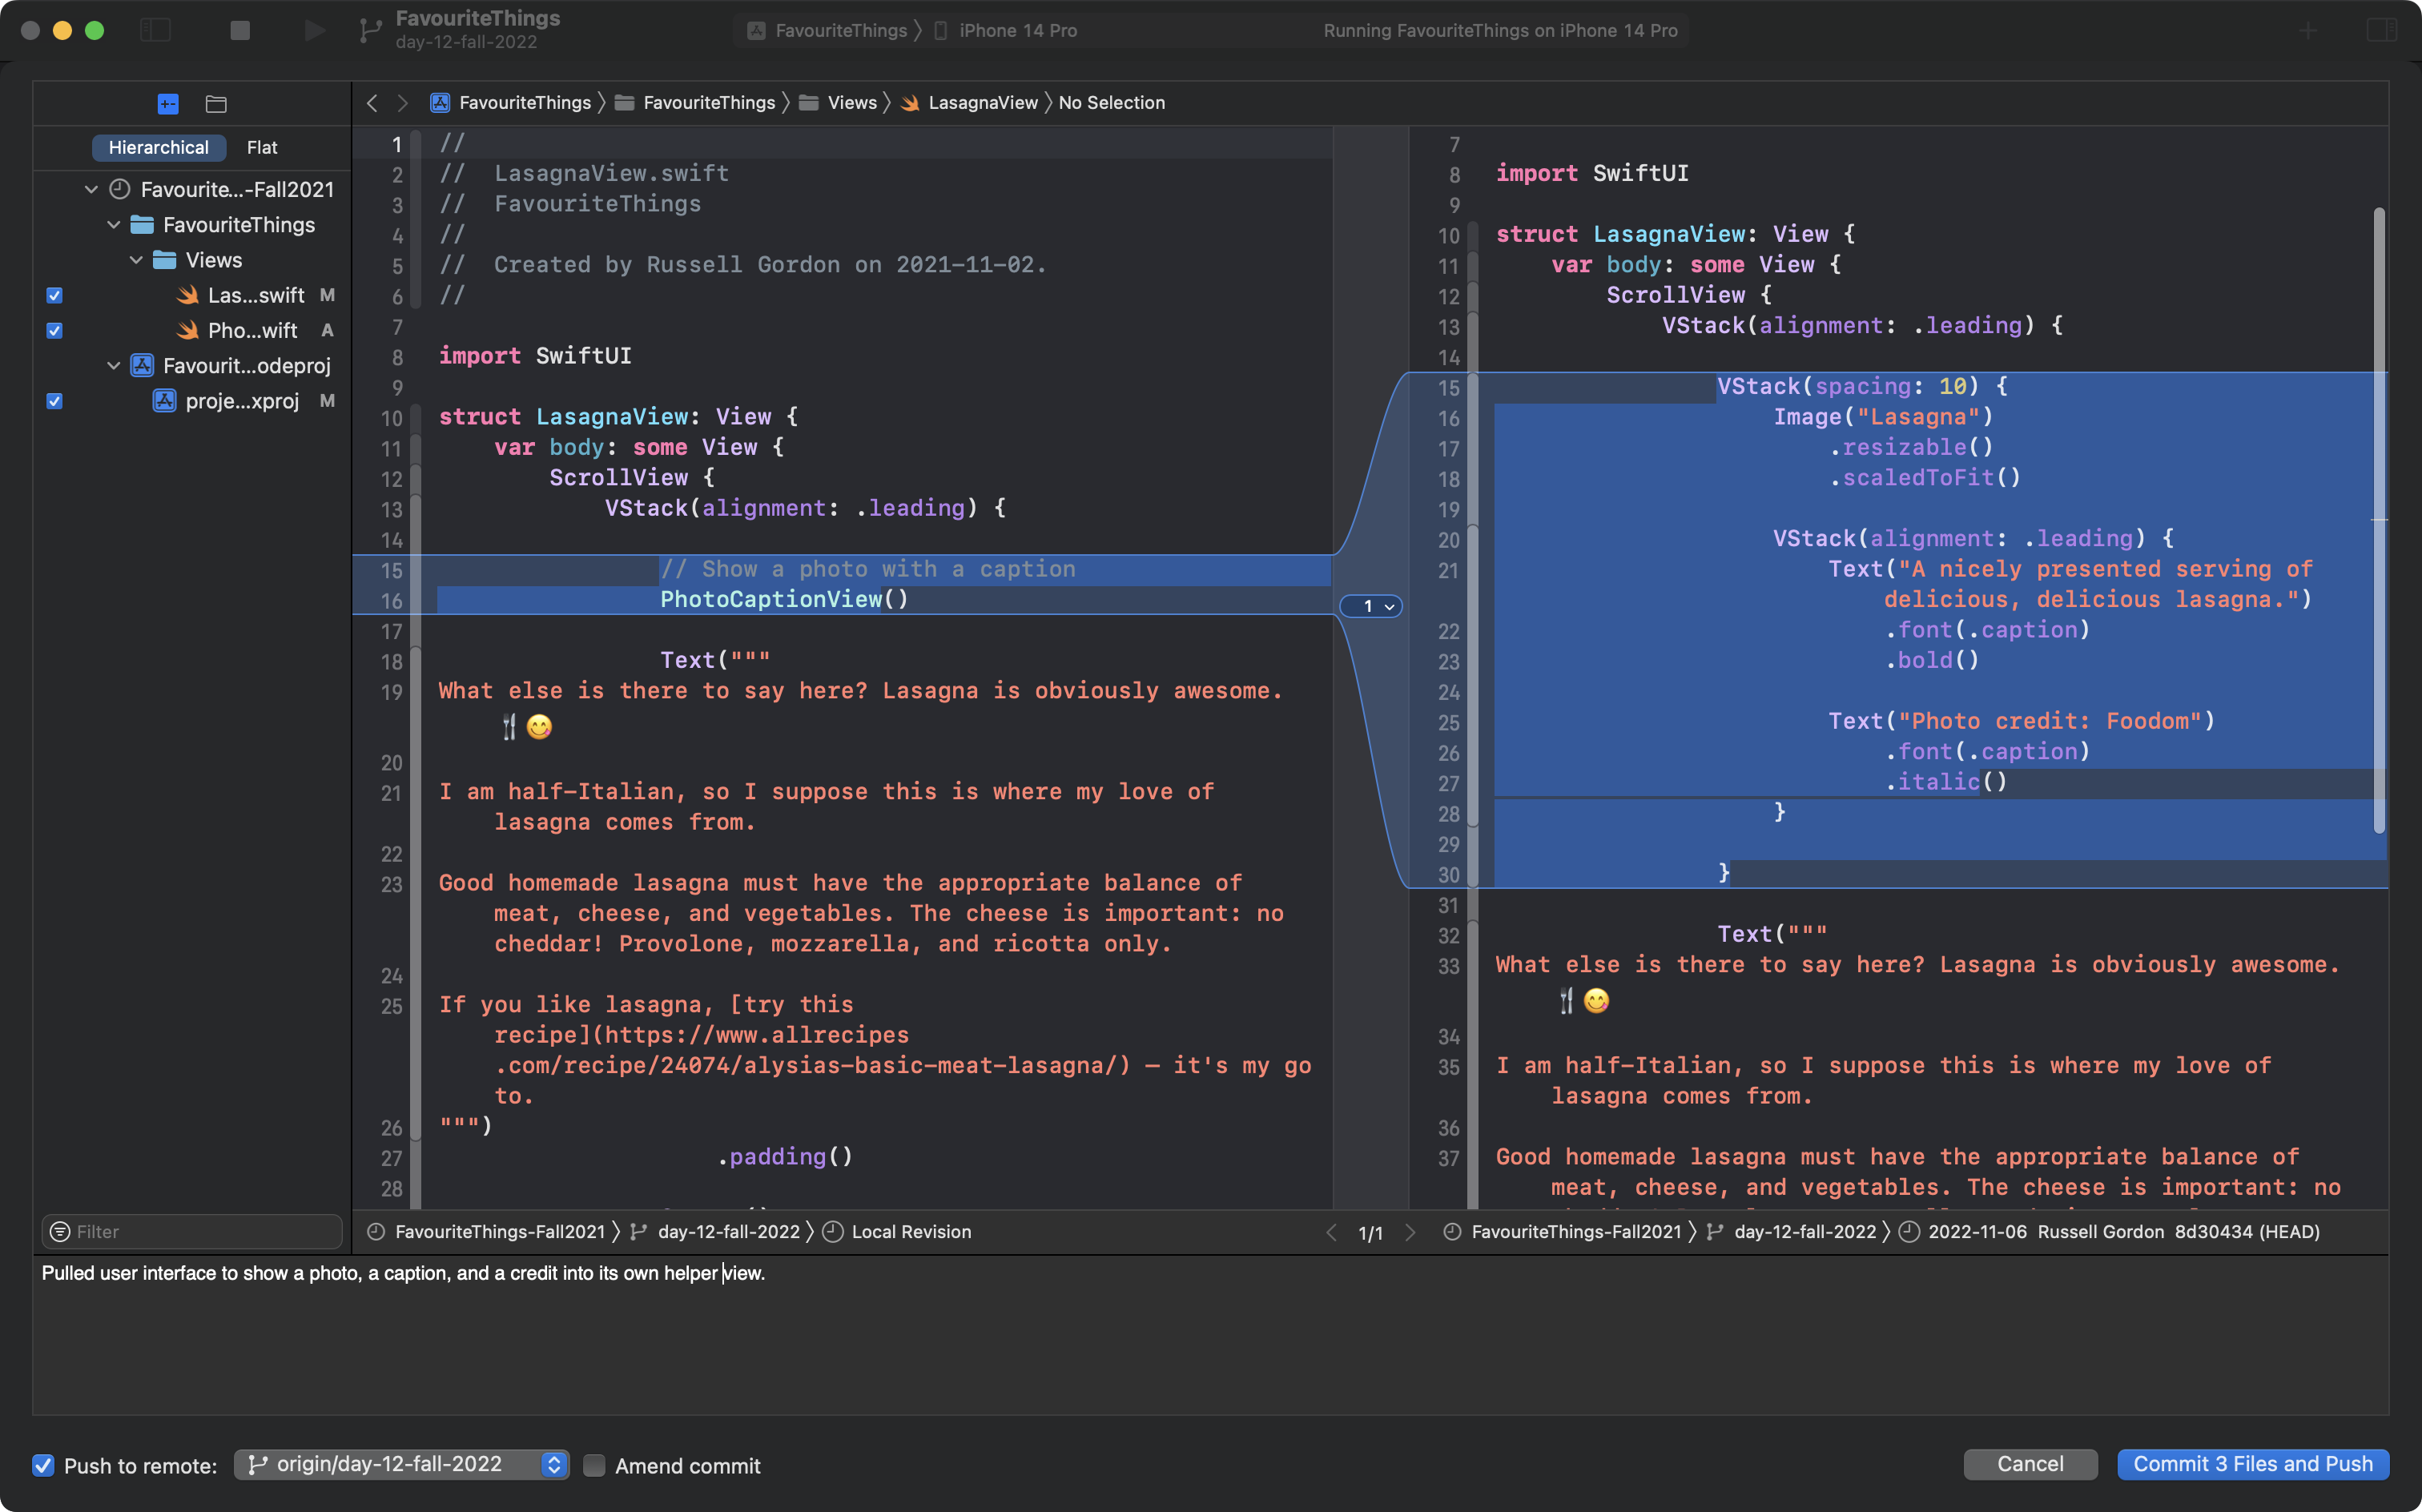
Code that was present before is highlighted above in grey, and the new code is highlighted in blue.
Take note of the use of the spacing and alignment parameters to control the position of elements within the VStack structures.
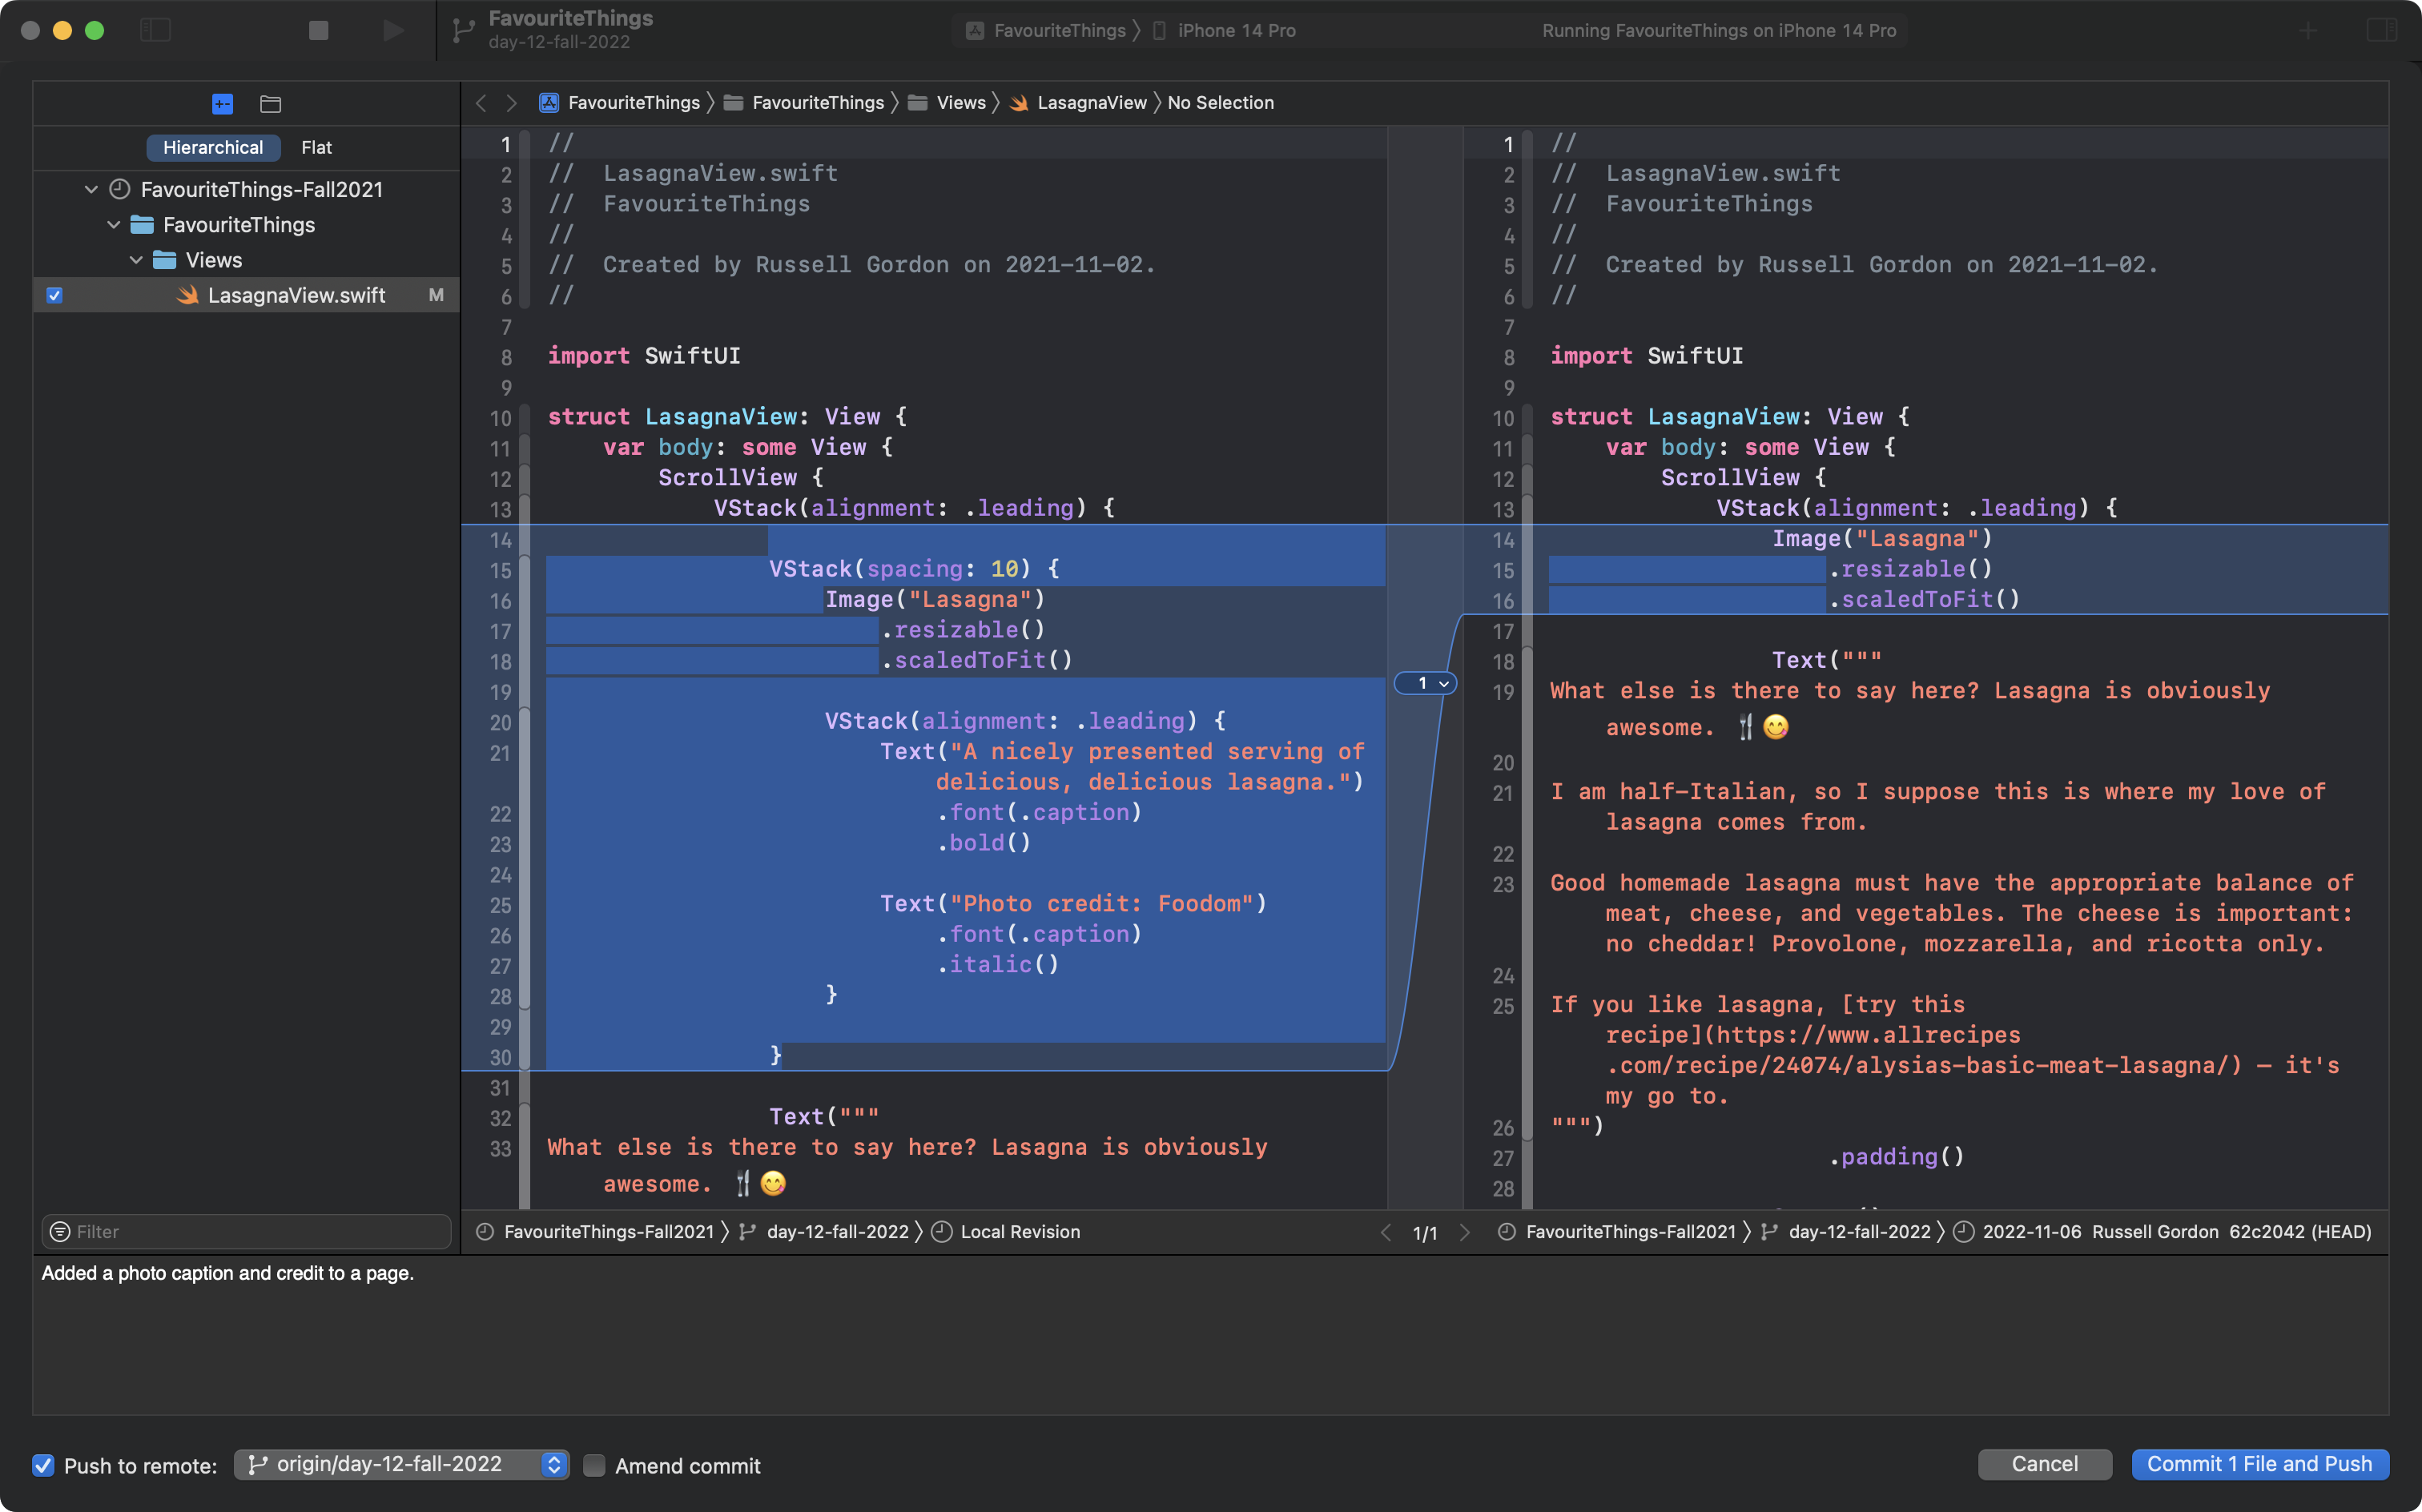
This is a nice and useful change we don't want to lose, so please go ahead and commit and push your changes now:
If we had to make that same change to each and every page, it would a tedious exercise.
Instead, we can write our own custom structure that conforms to the View protocol. 🎉
Once we write a structure, in the future, we can use it just like the built-in structures that Apple provides through the SwiftUI framework, like VStack, HStack, ScrollView, et cetera.
To do this, we'll make use of the Xcode interface to arrange two files side-by-side.
First, hide the Project navigator by pressing Command-0:
Then, show only the editor, and add a second editor on the right:
Now we are viewing the same file in both editor windows.
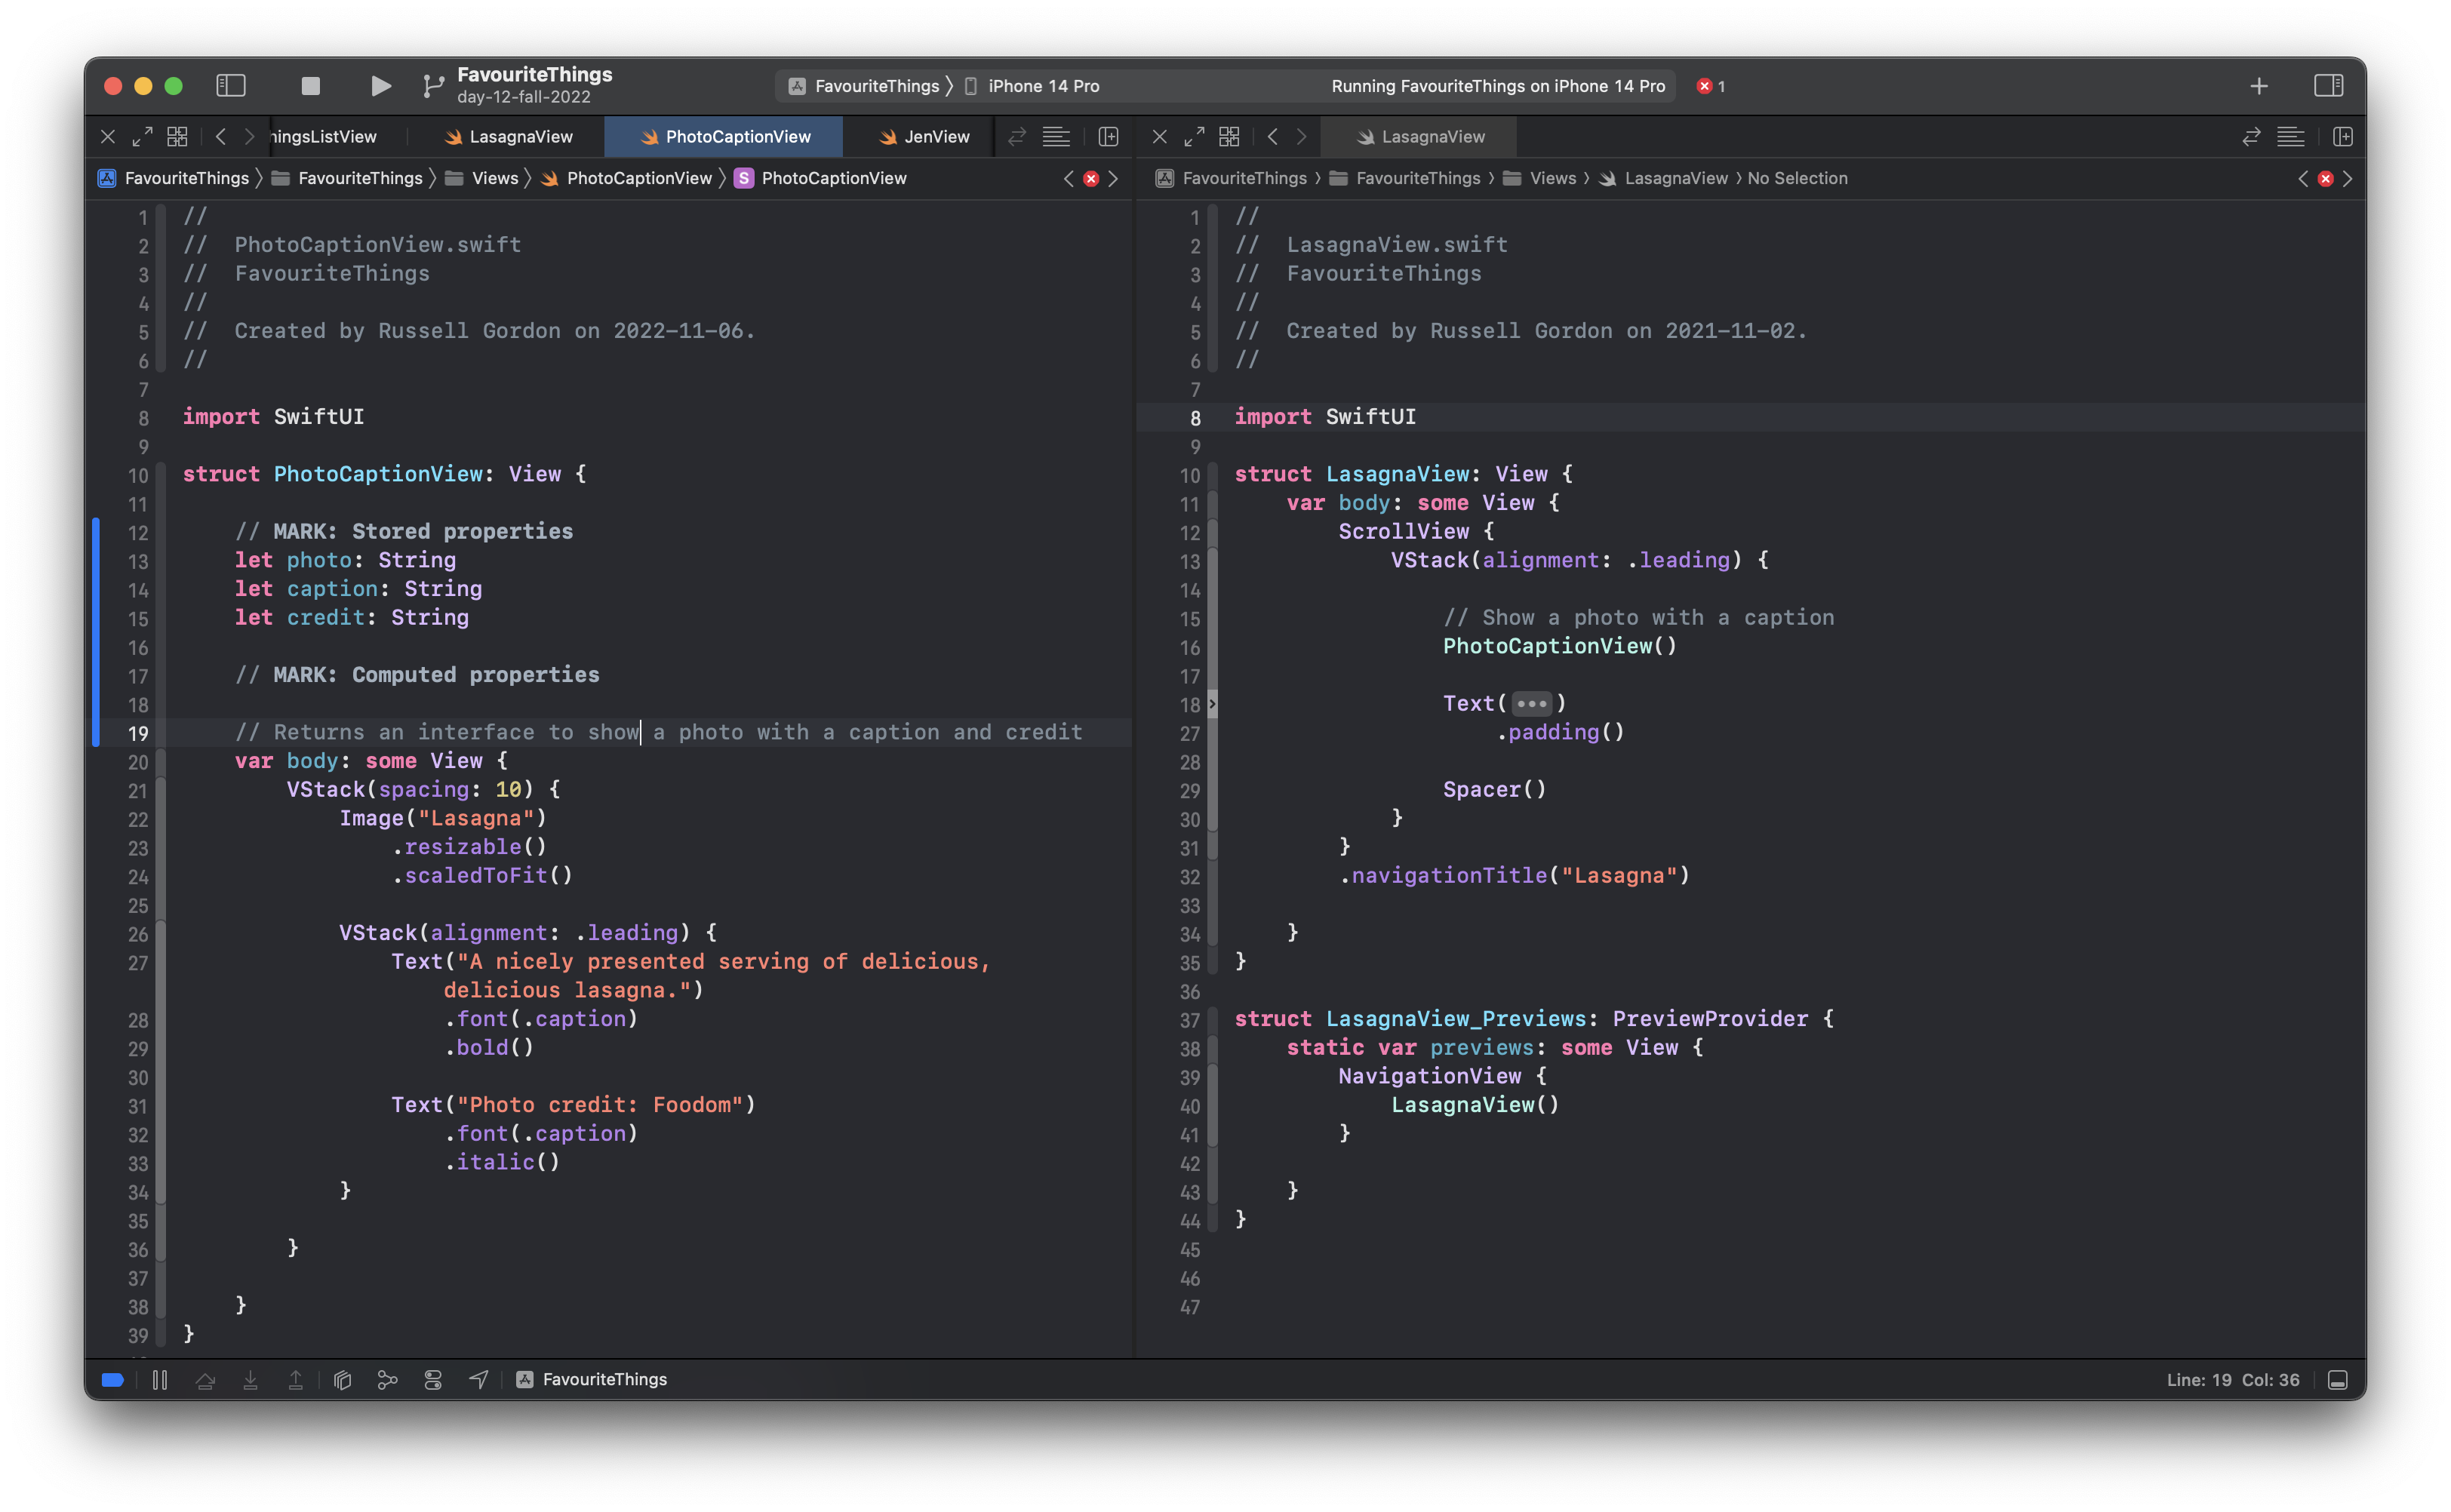
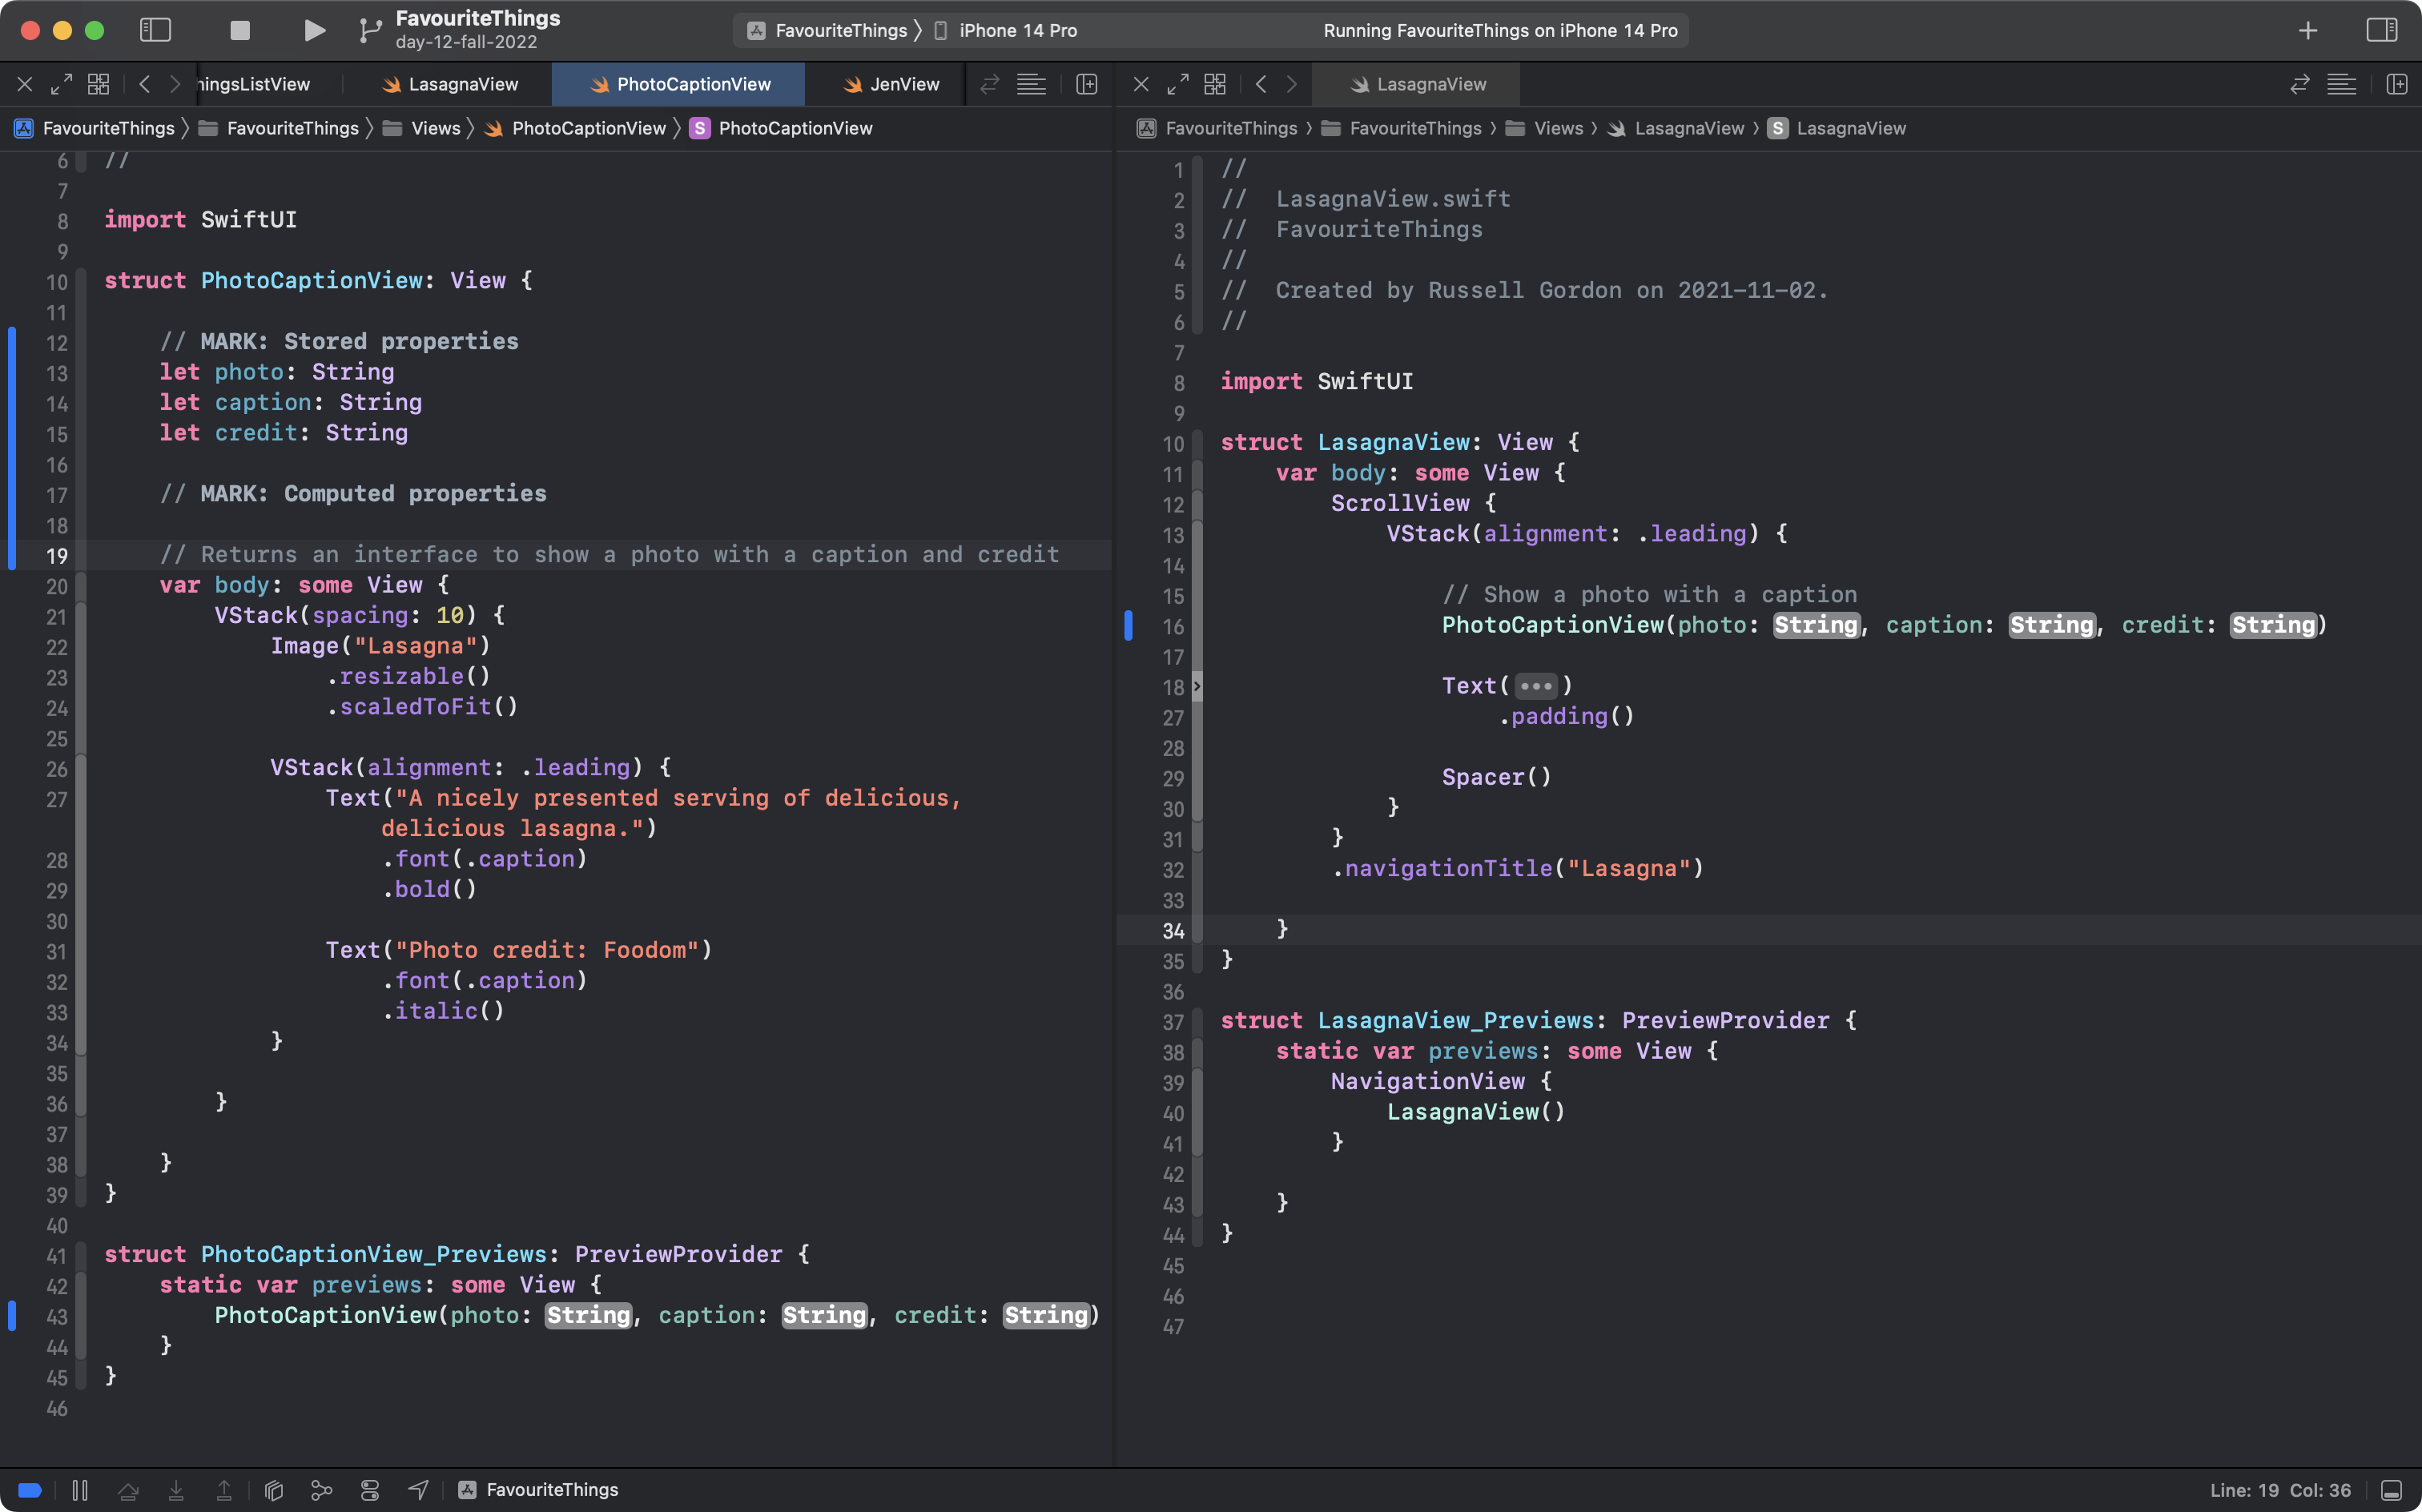
Next we will create a new view named PhotoCaptionView and edit that in the space on the left:
On the right is our existing view that shows a photo with a caption.
On the left is our new custom view named PhotoCaptionView.
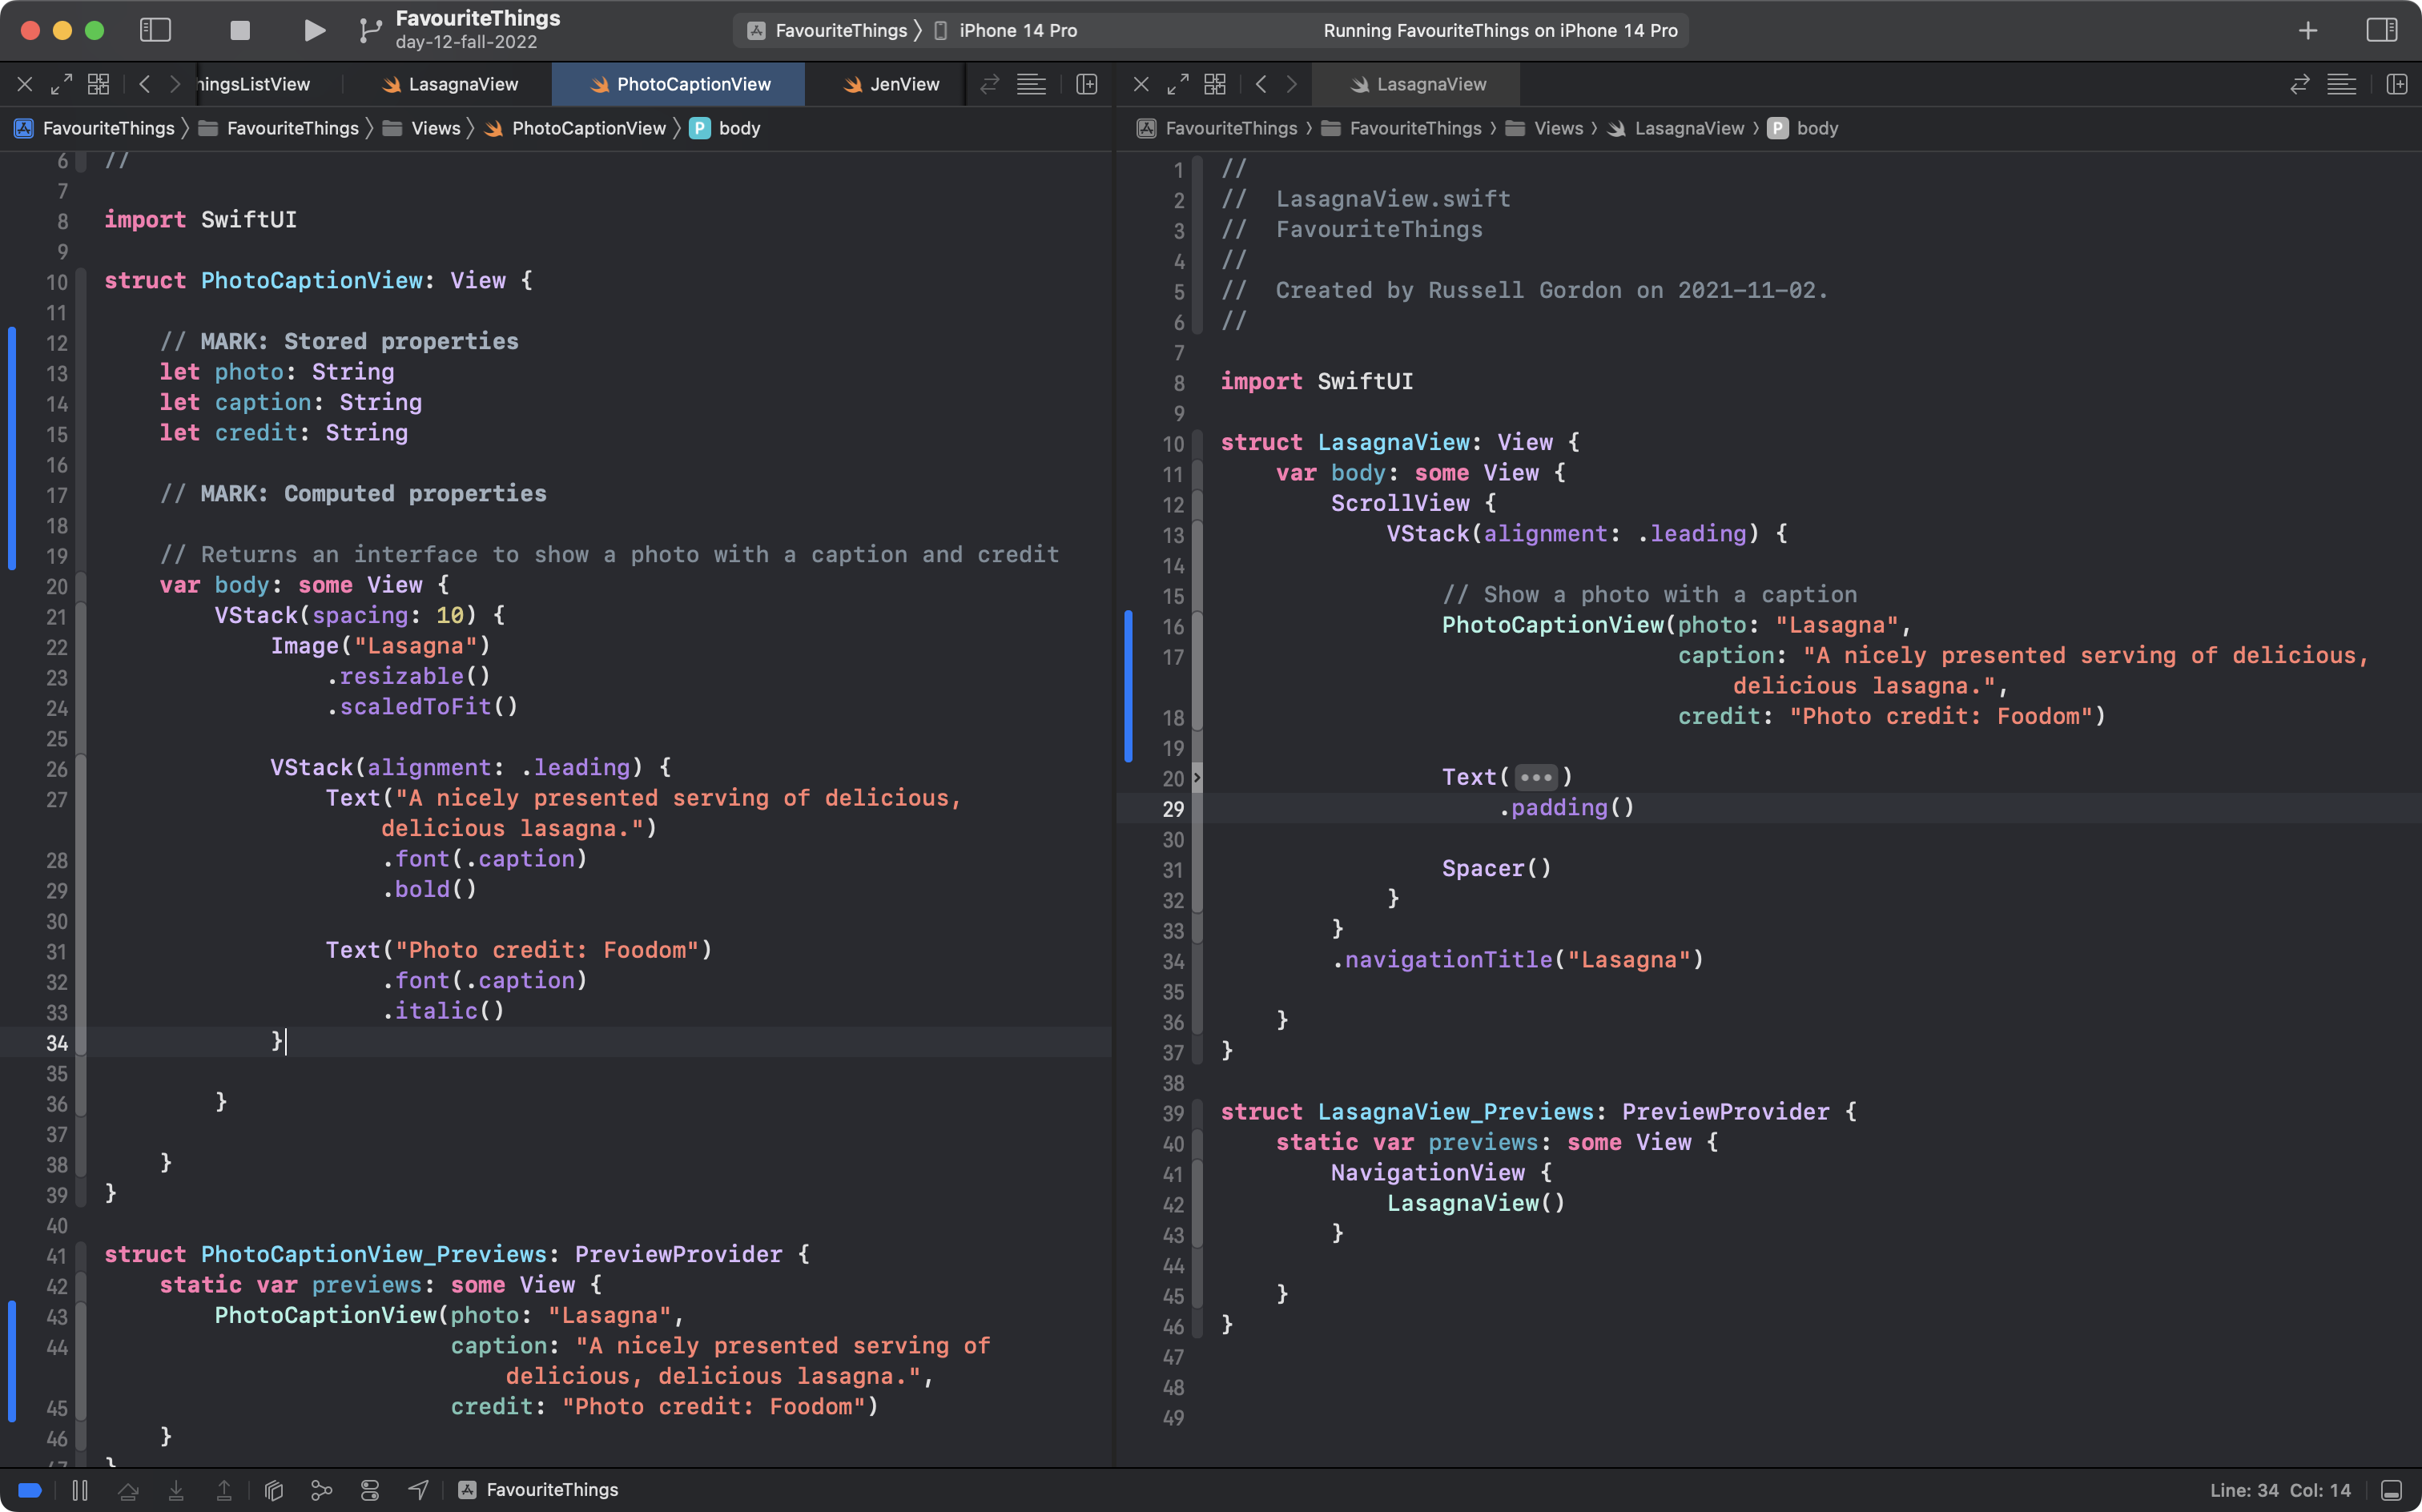
Copy and paste the parts of the user interface that we want to re-use from the existing view on the right to our new view on the left:
Since we finished that step by creating an instance of the new view, PhotoCaptionView inside of the existing view on the right, everything looks the same as it did before in the user interface:
This is a good time to commit and push your work, as some nice progress has been made:
However, as it currently stands, our new PhotoCaptionView is not yet very useful.
Can you predict why?
What would happen if we used PhotoCaptionView on all six of our existing FavouriteThings pages?
Think about this for a moment before scrolling down.
If you answered:
"Because it will always show the same photo and caption!"
... then you are correct.
In order to make this truly useful on all six of our existing pages, and for any new pages we might author, then when an instance of PhotoCaptionView is created, it needs to "ask" for some information.
Specifically, it needs to know:
- what photo to show
- what the caption should be
- what the credit is
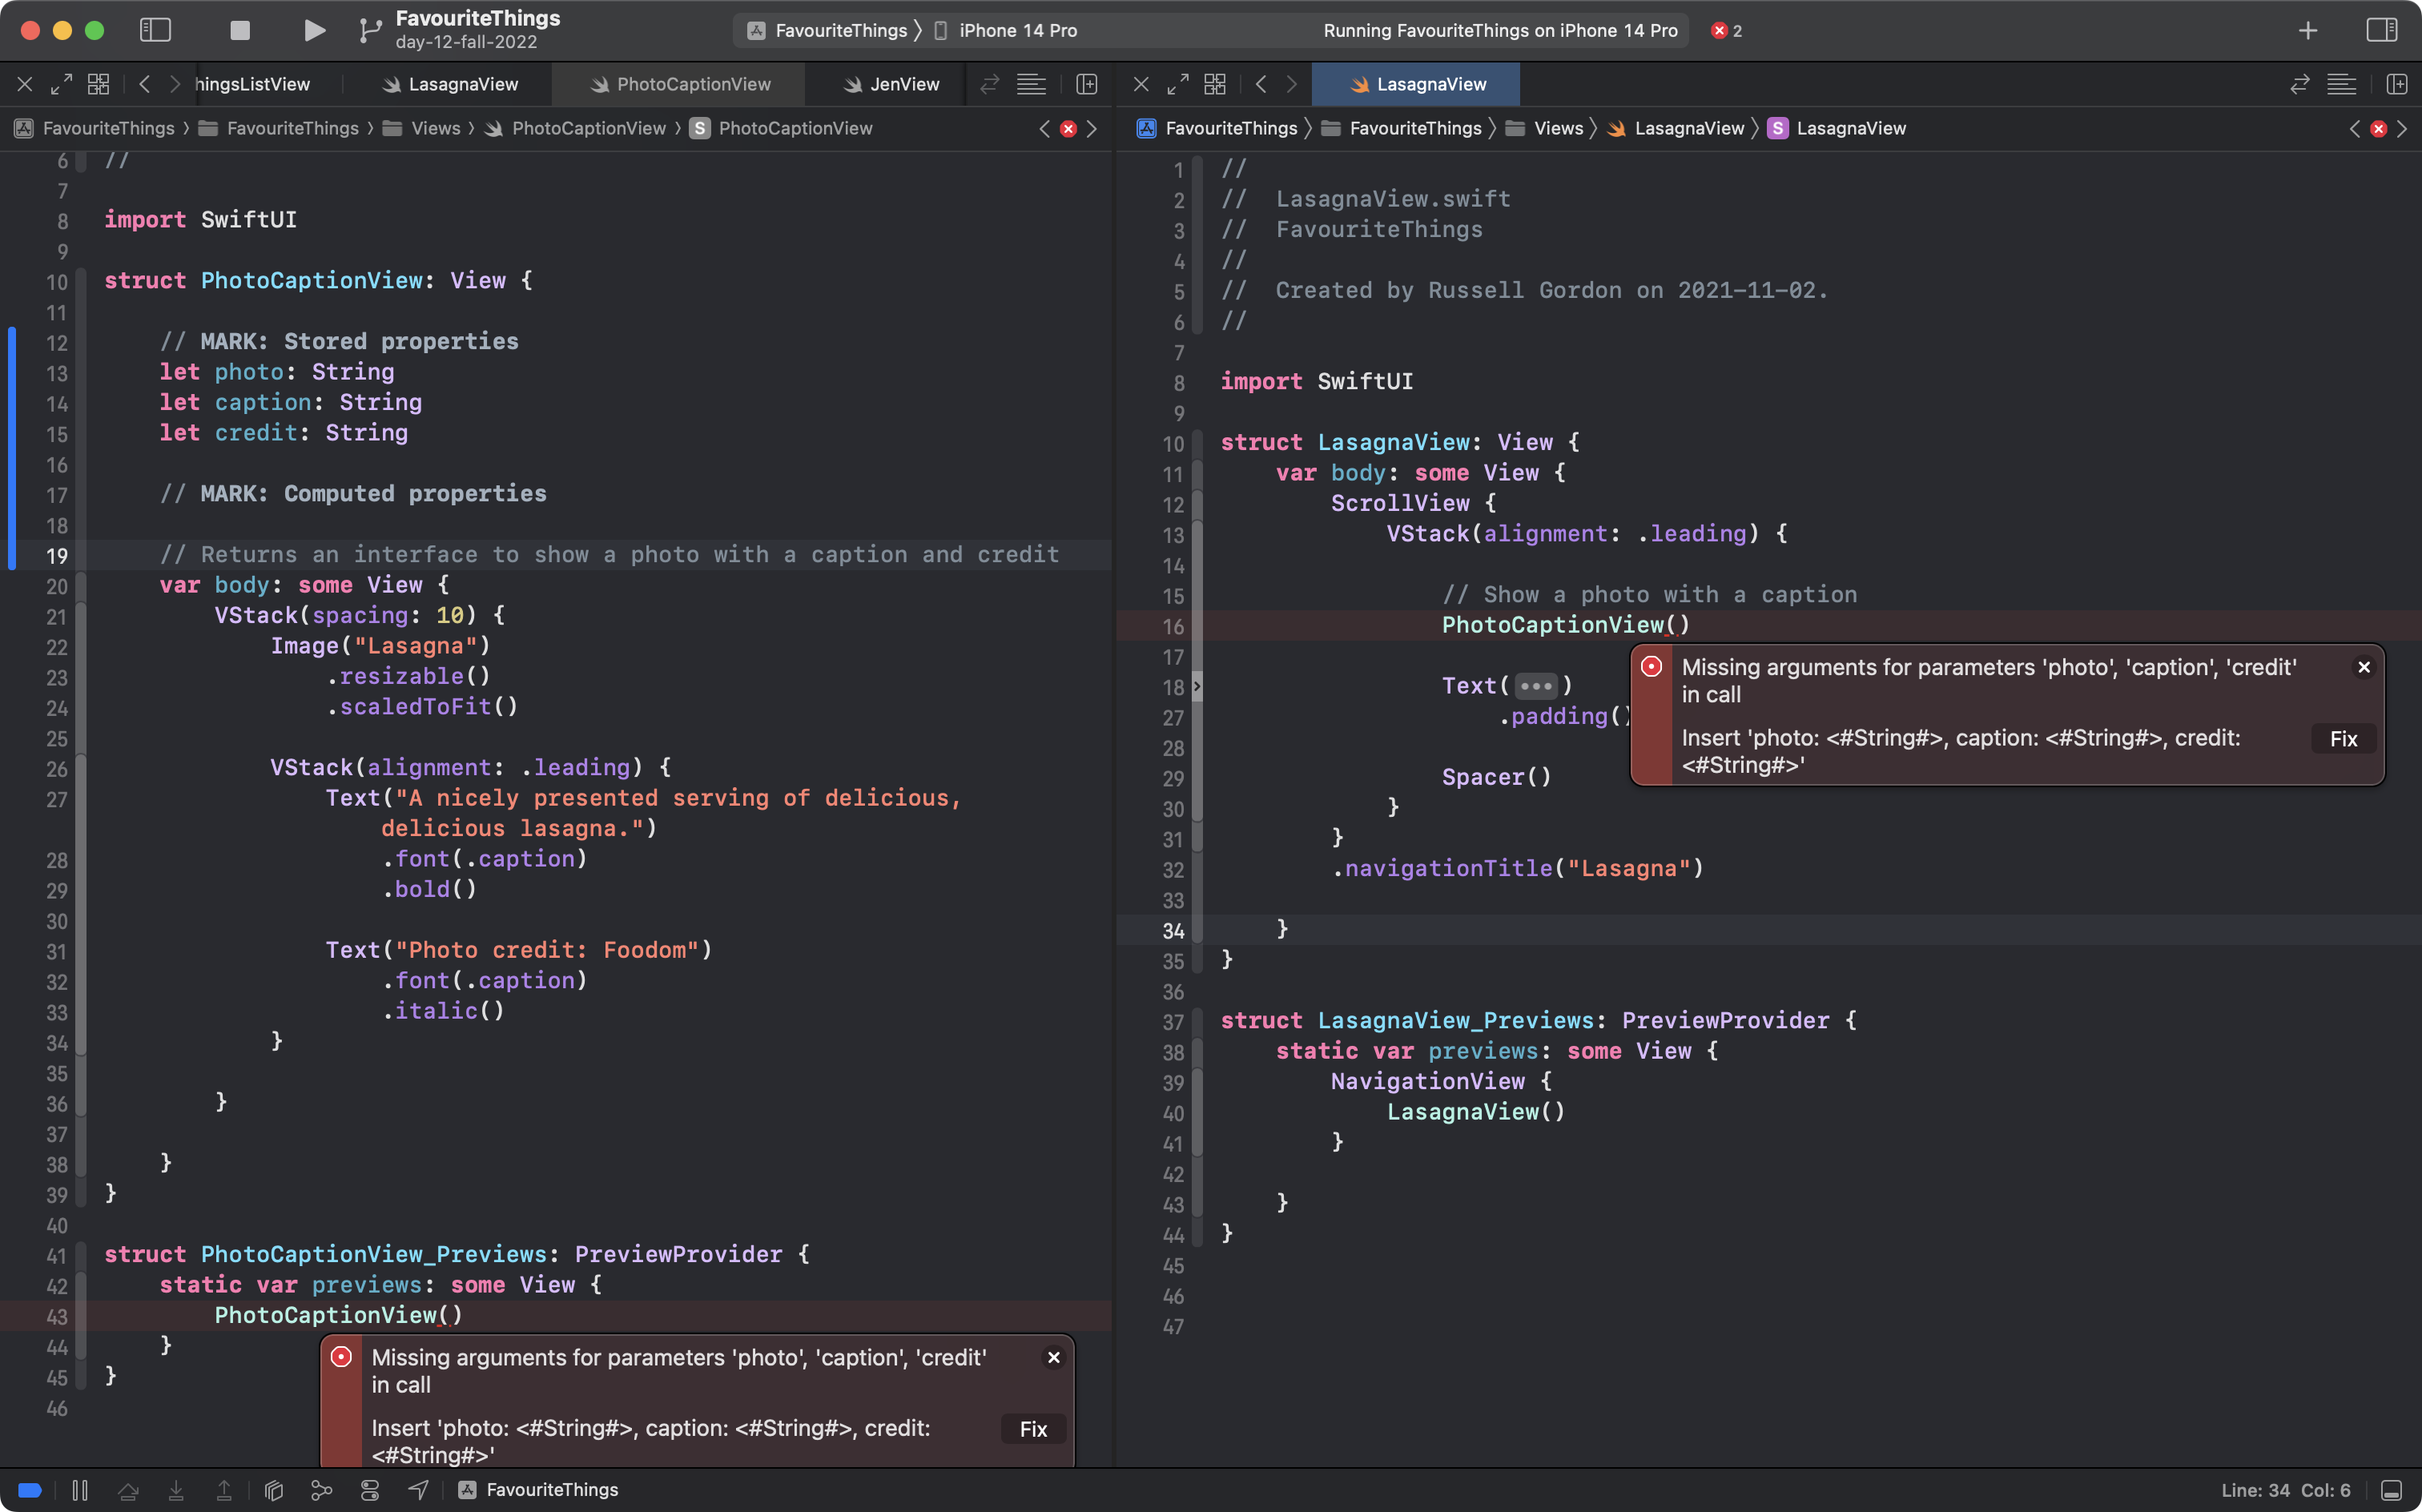
So, go ahead and make the following edits to PhotoCaptionView – look for the blue bars at left to see where new code was added:
By adding these stored properties to PhotoCaptionView we are listing some questions, or parameters, that need to receive arguments, or answers, when we create instances of PhotoCaptionView.
That is why we now see the "red bubbles" in our project where PhotoCaptionView is being used:
Use the Fix button to insert placeholders:
Then, replace the placeholders with arguments:
We are now providing "answers" to the "questions" that PhotoCaptionView asks for.
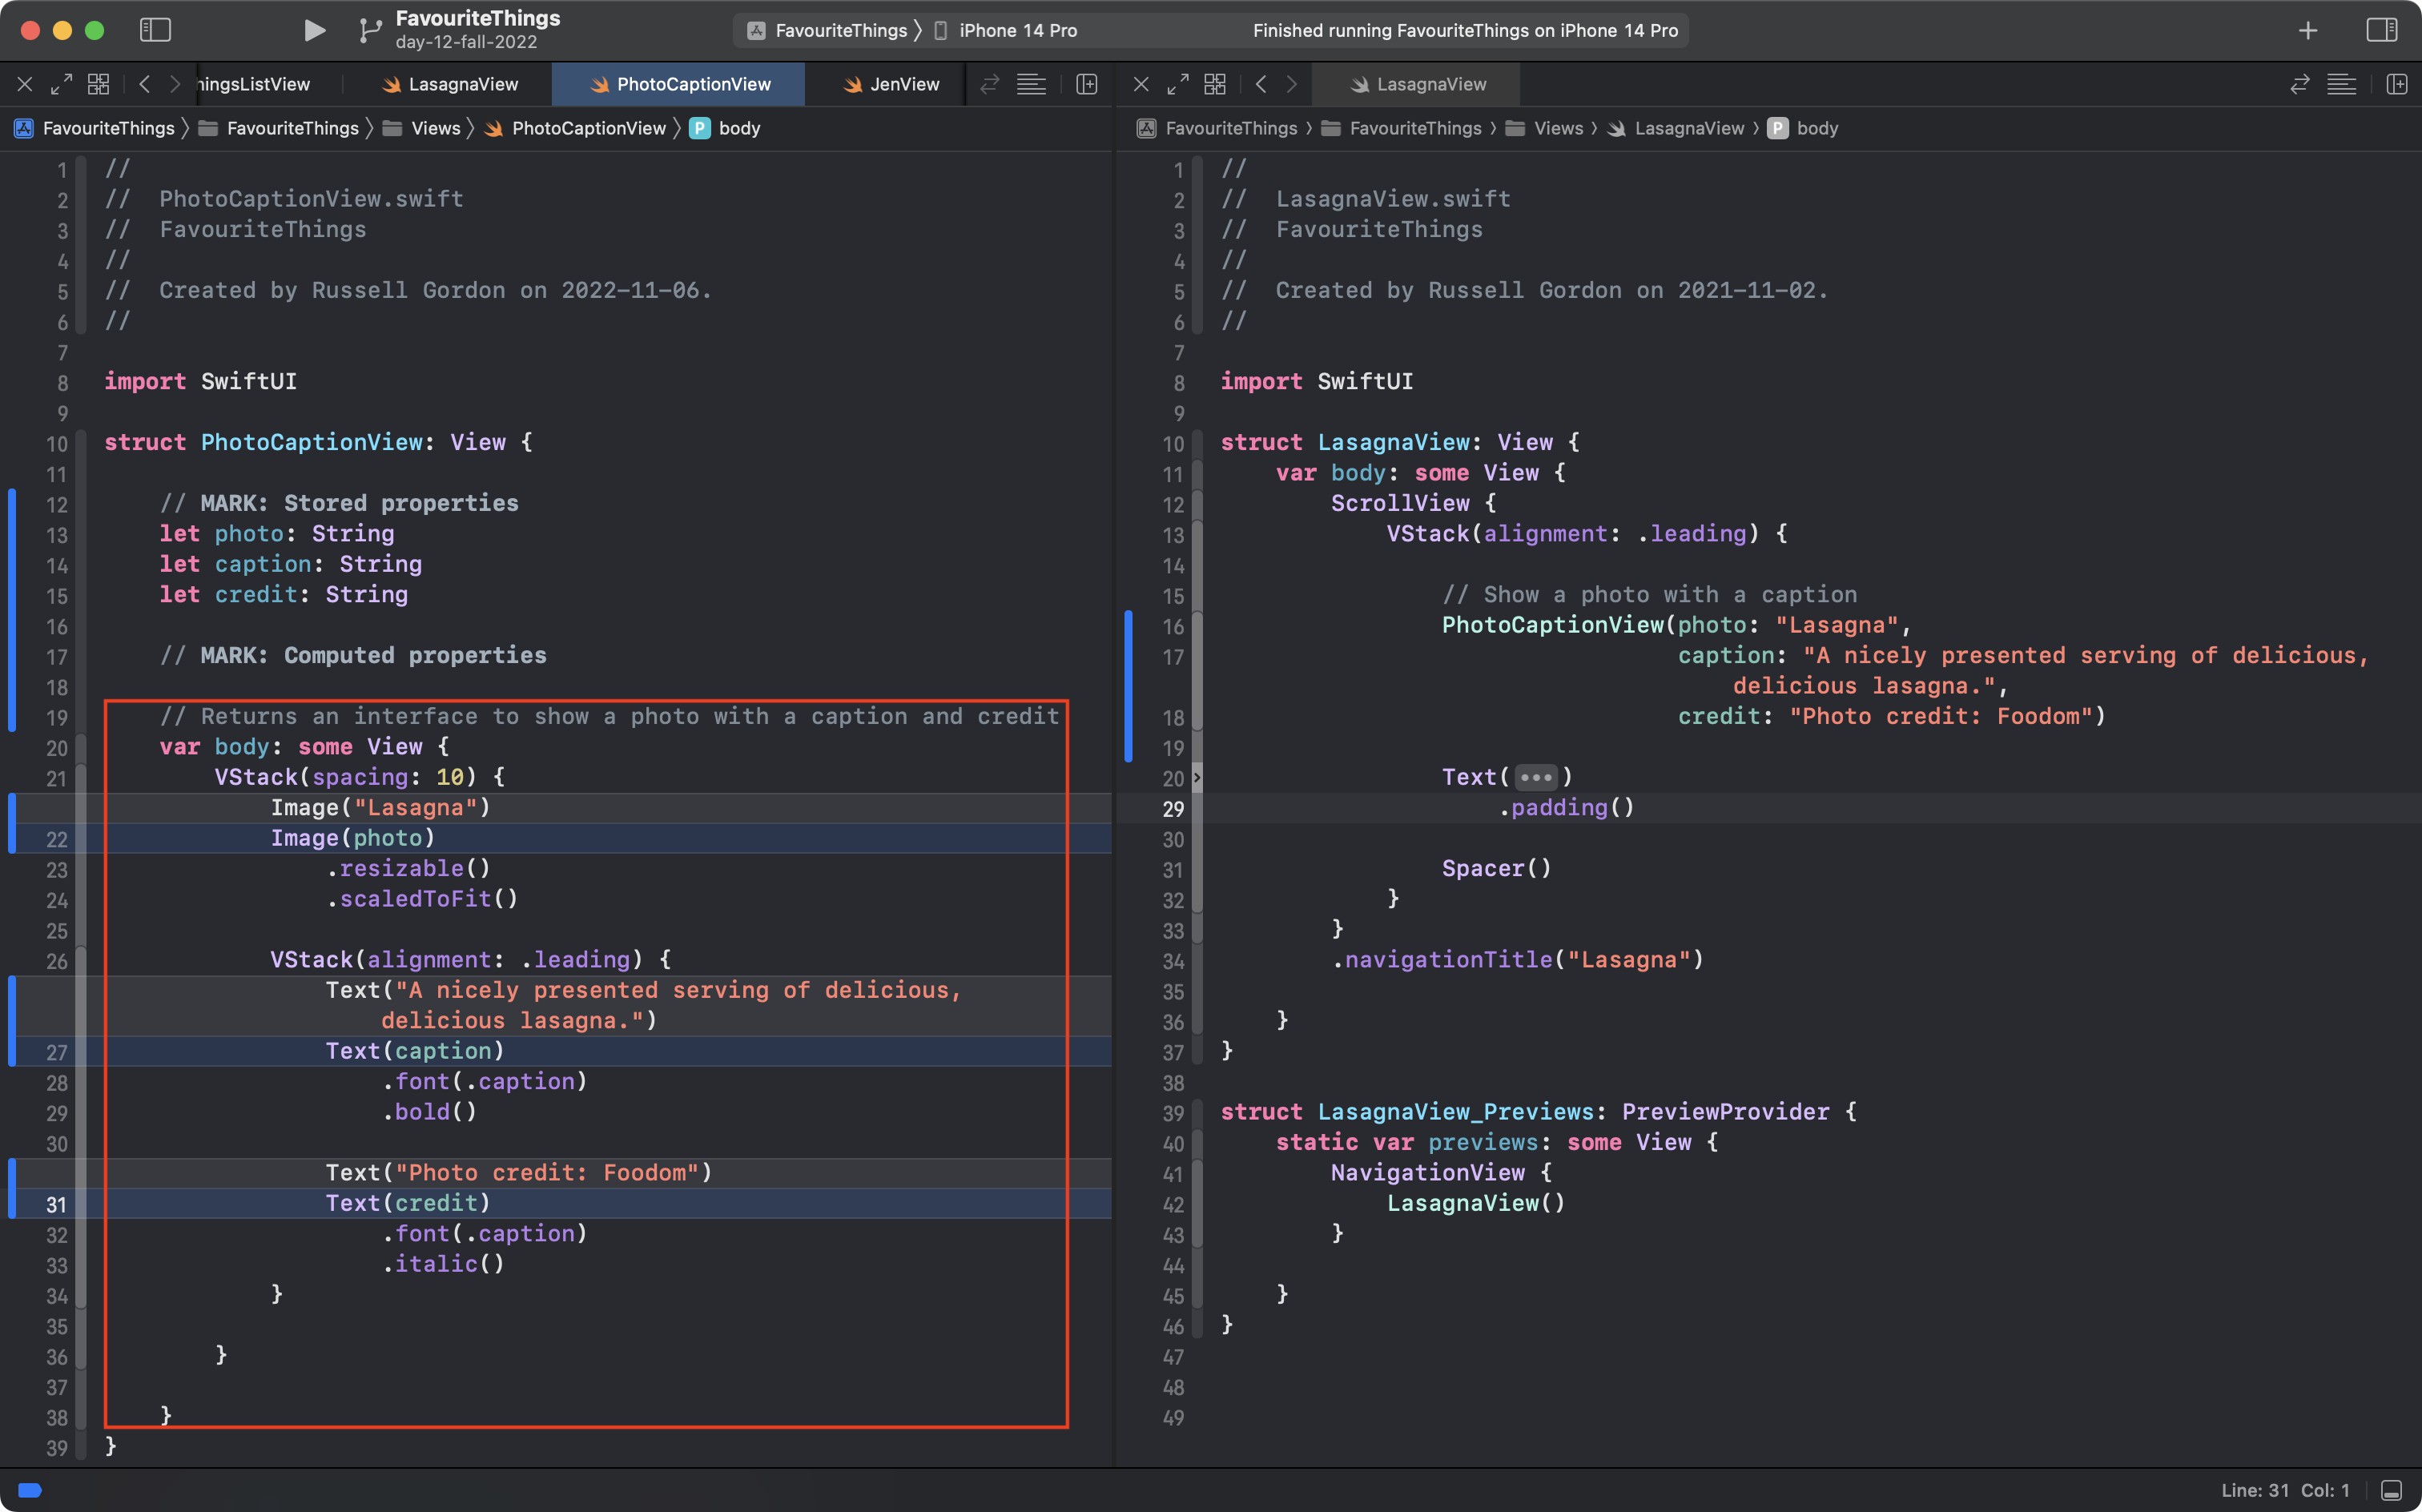
Finally, we need to actually use the answers from the stored properties inside our computed property.
The computed property named body is what actually shows the photo and caption.
So, make this final set of edits inside the body property:
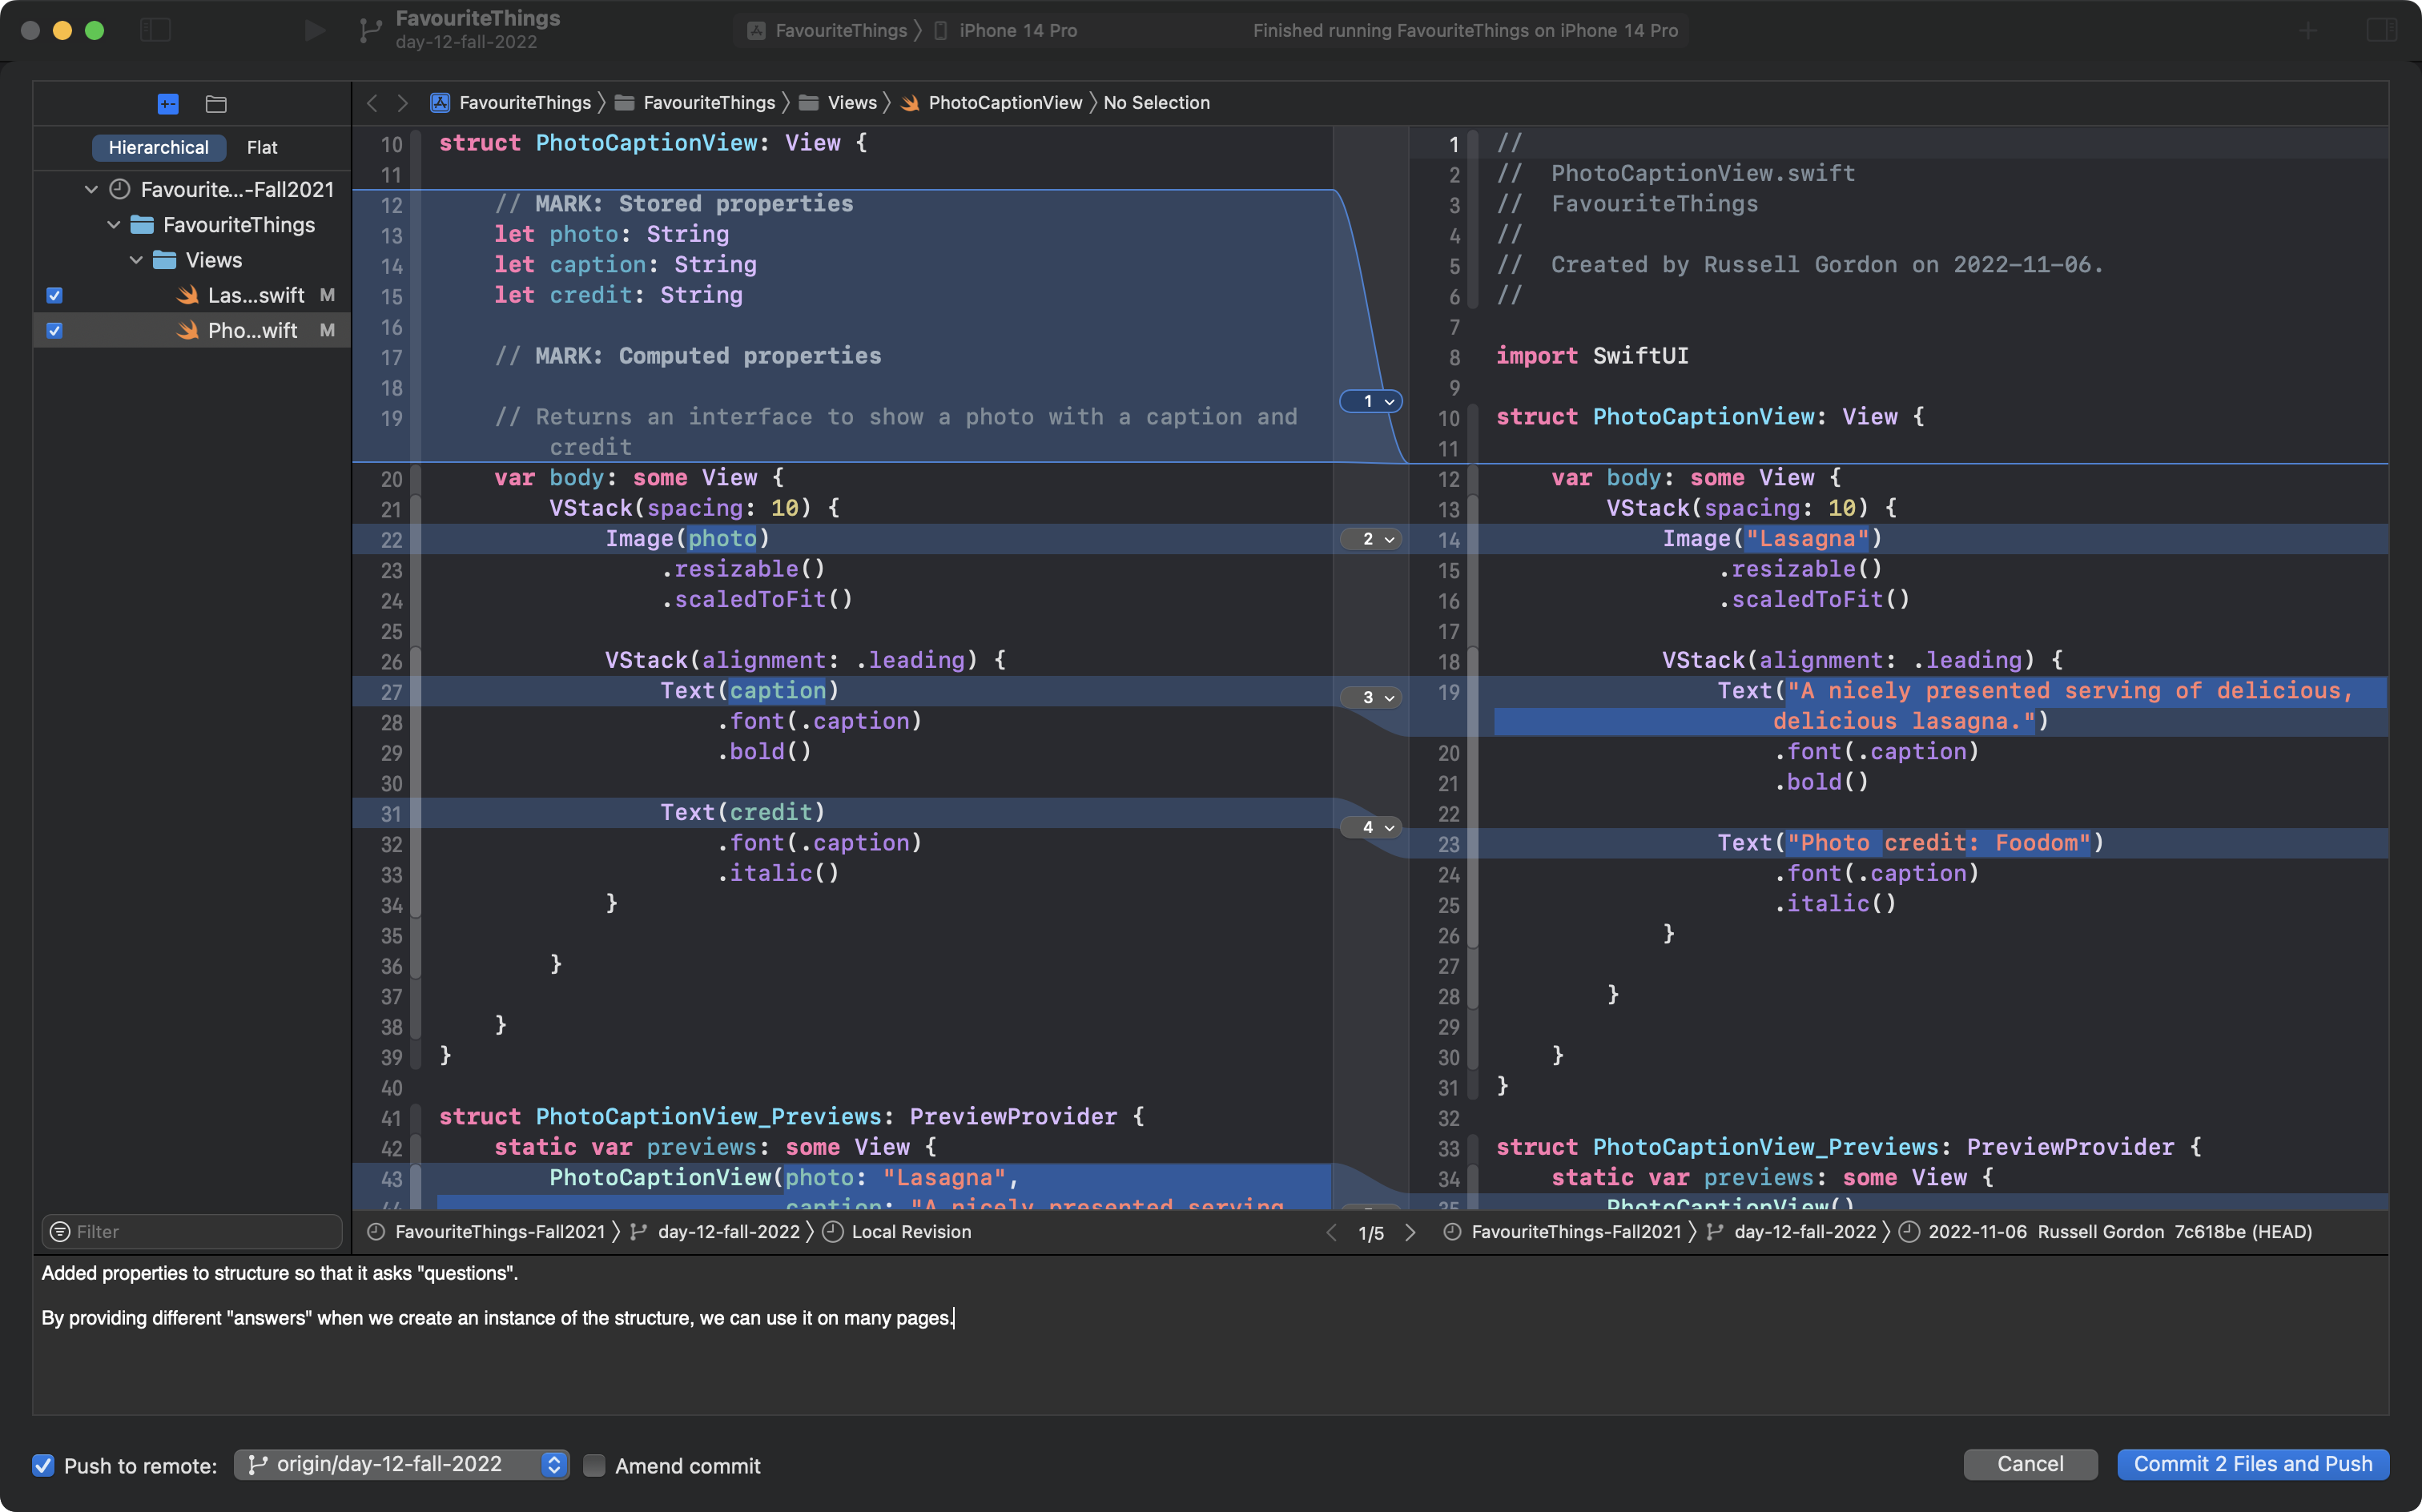
Now, our new PhotoCaptionView structure is all set to be a "helper" view in our project.
This is a good time to save our work. Commit and push your changes:
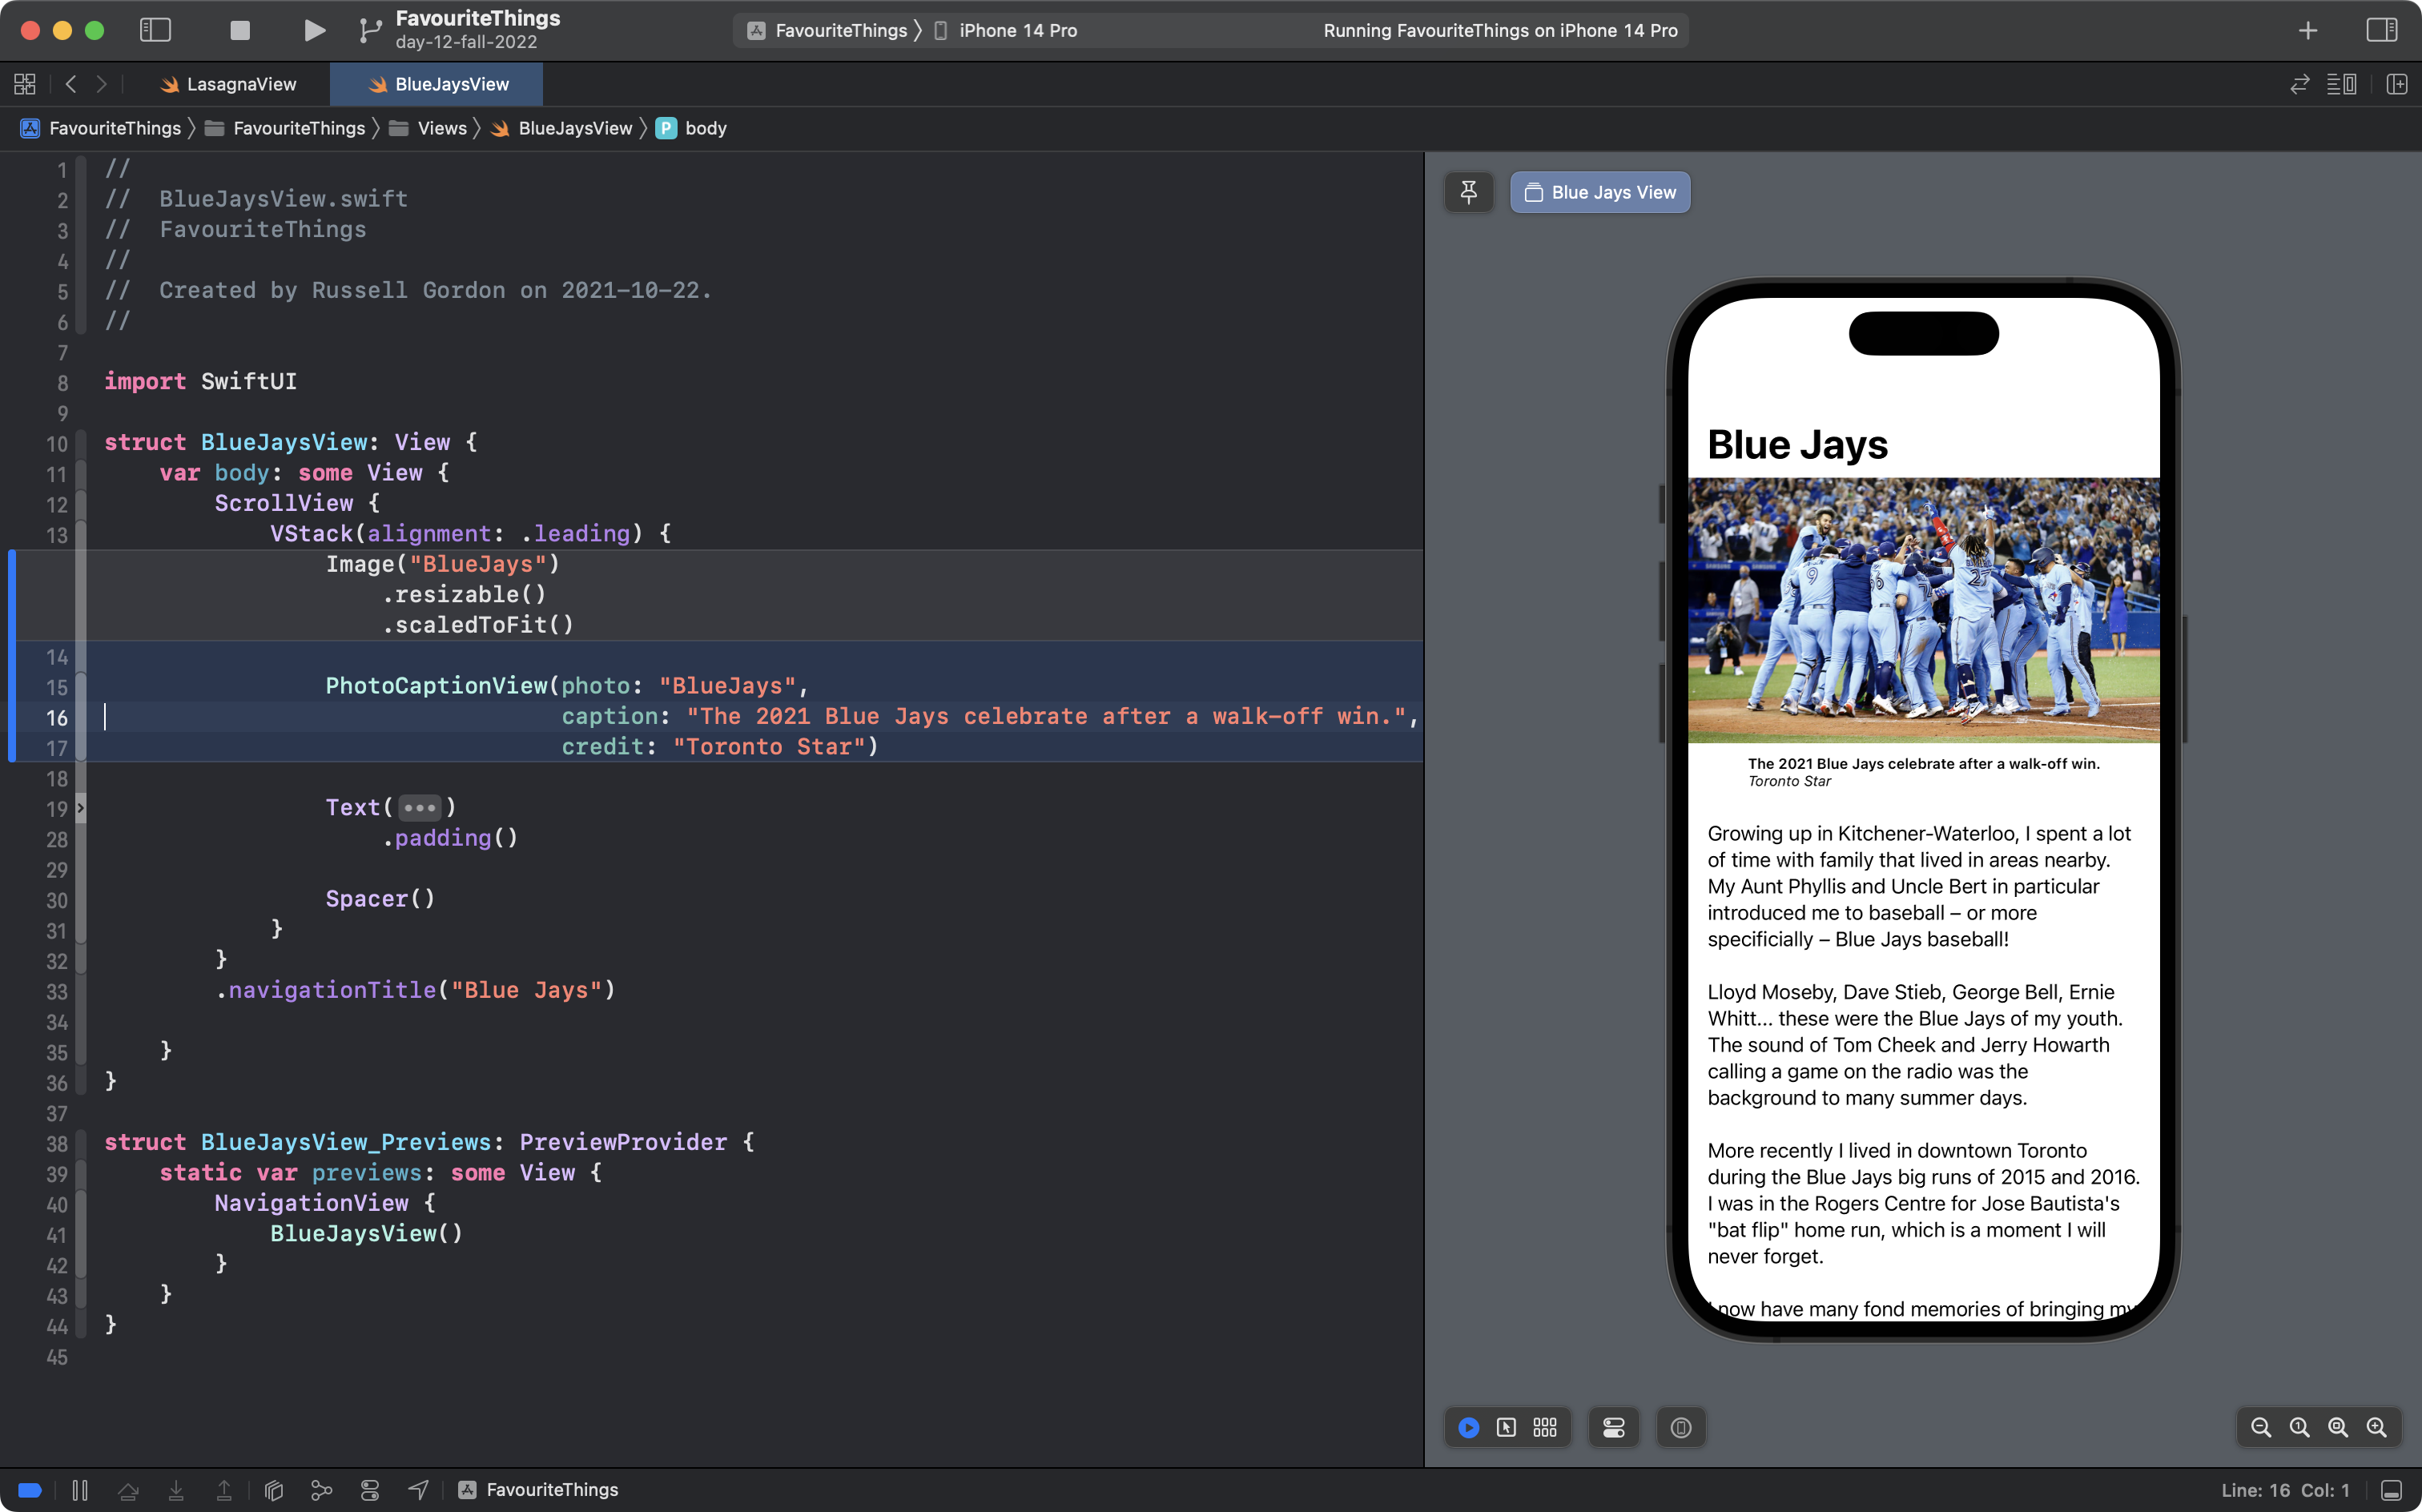
Finally, the new structure can be used to add a photo caption and credit to every existing page.
Here's how this could be done, for example, on the Blue Jays page:
To close the split-screen view, you can just press the ╳ button at the top left of an editor window:
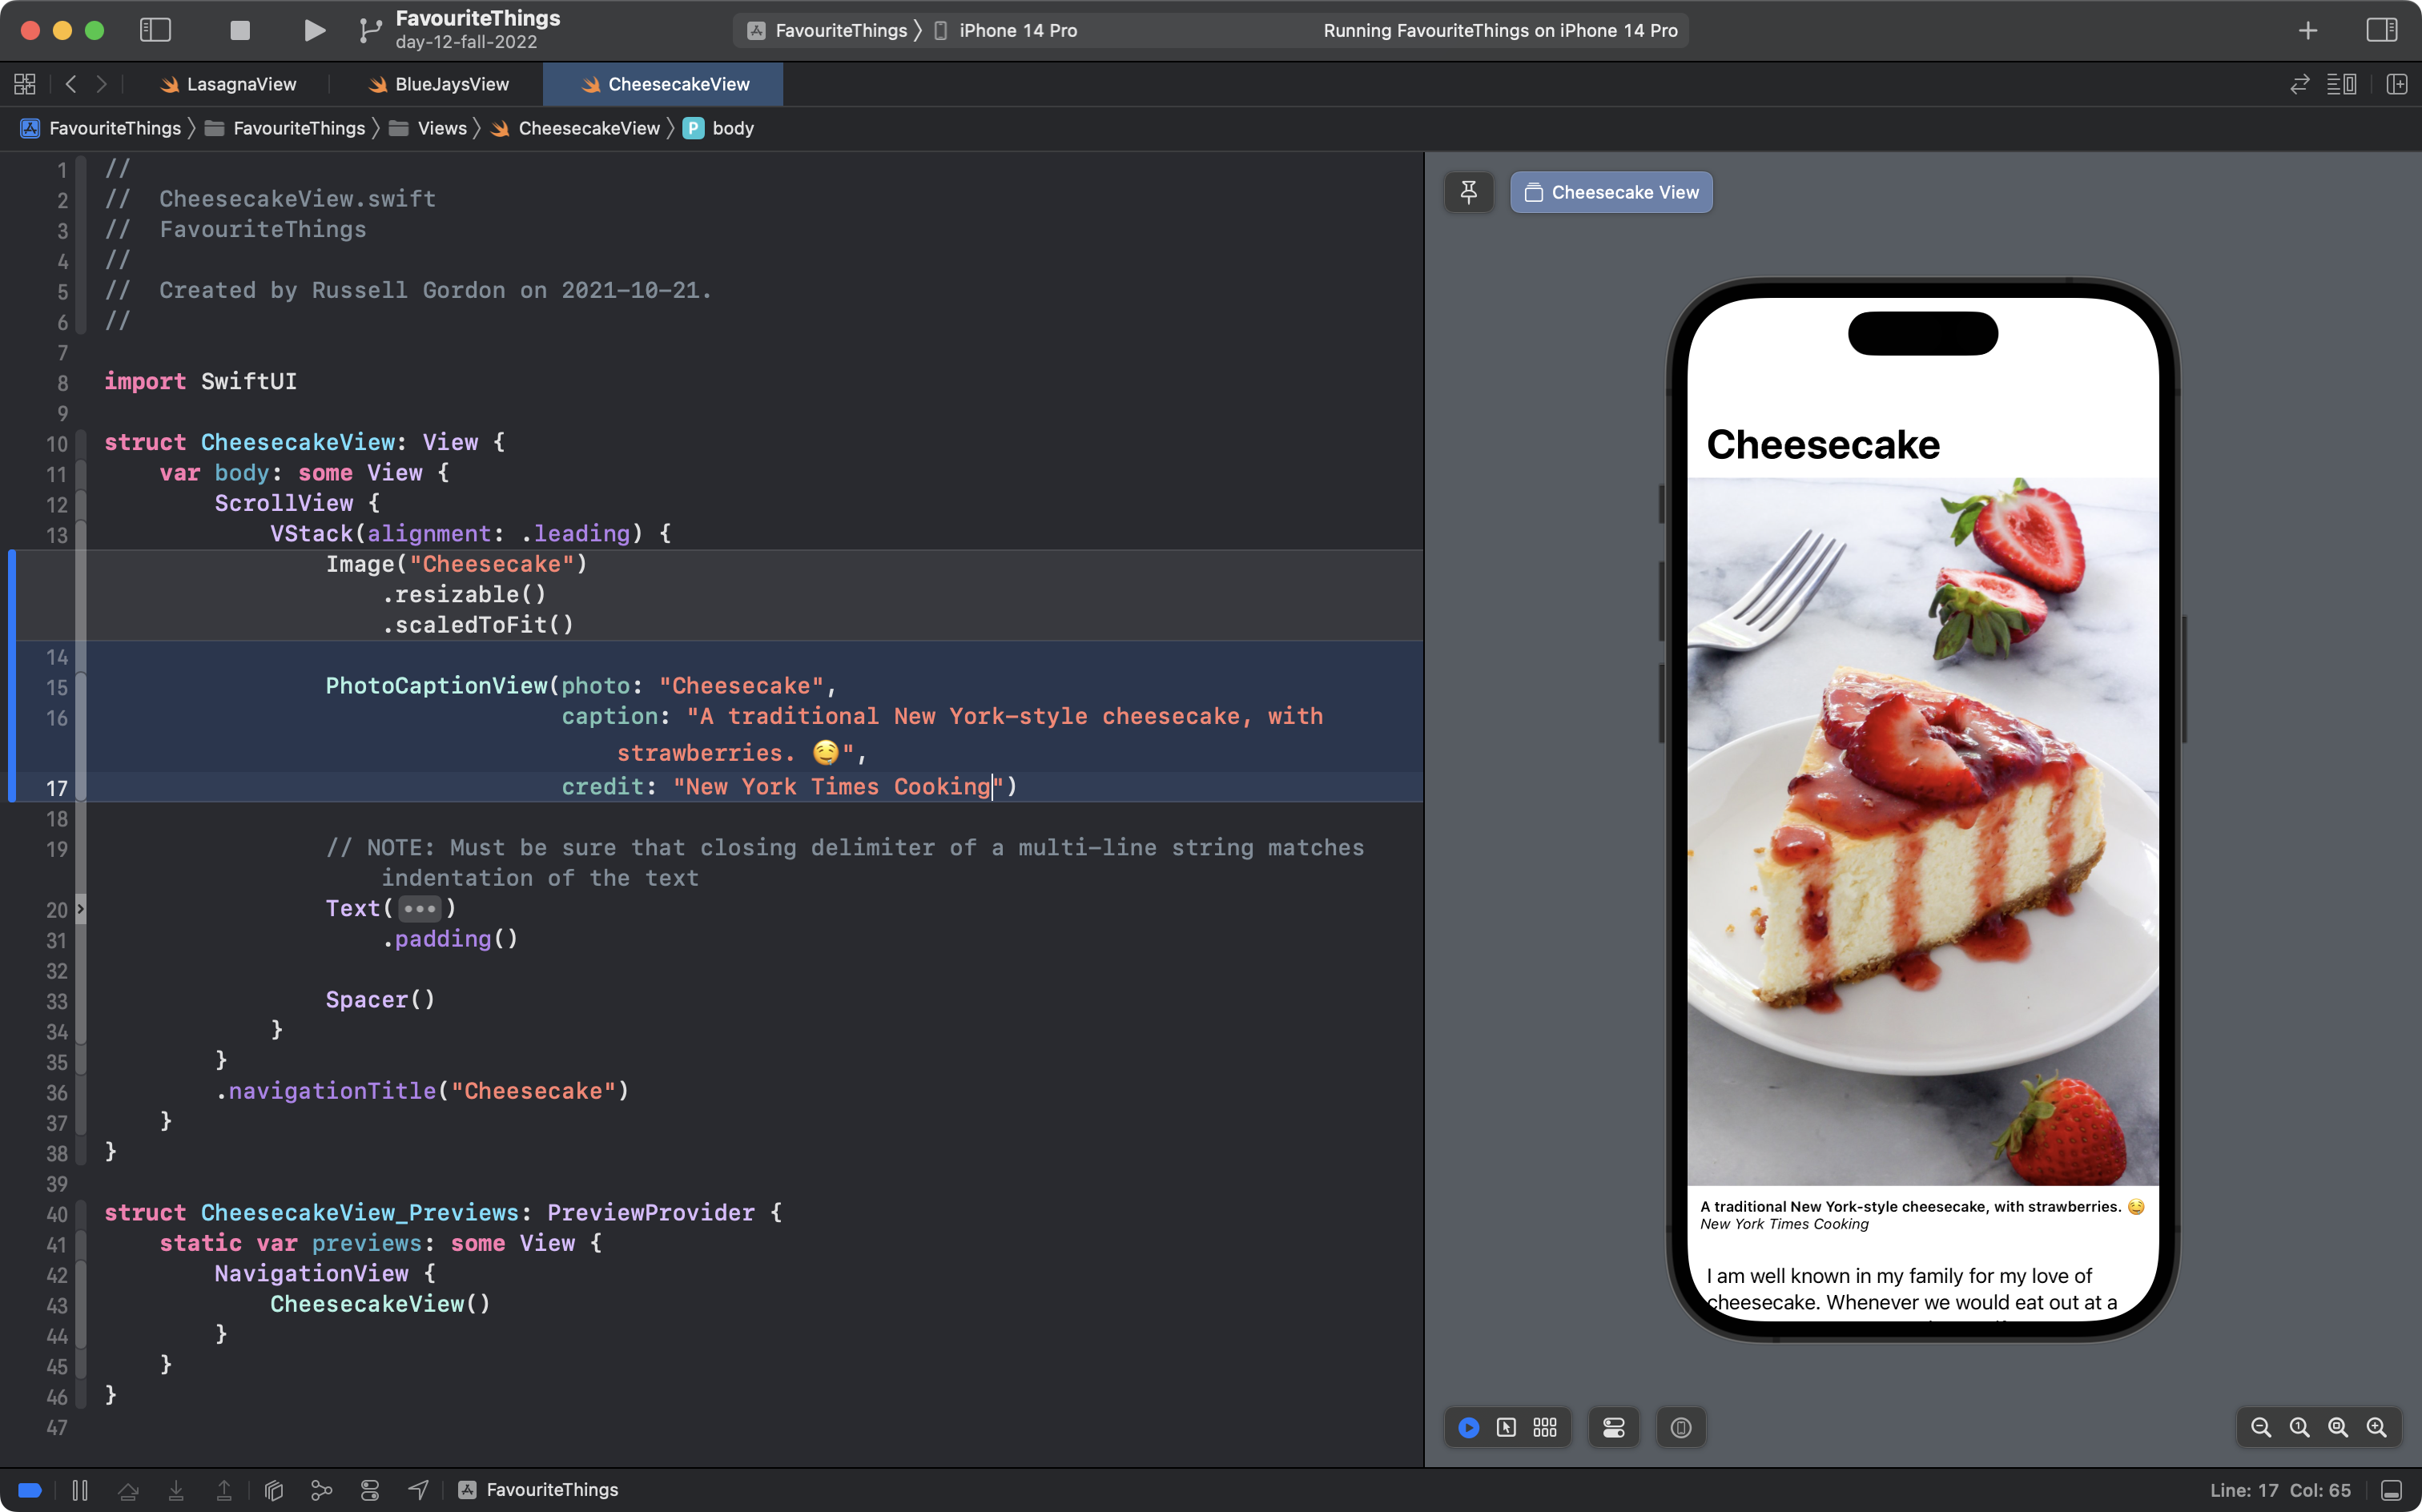
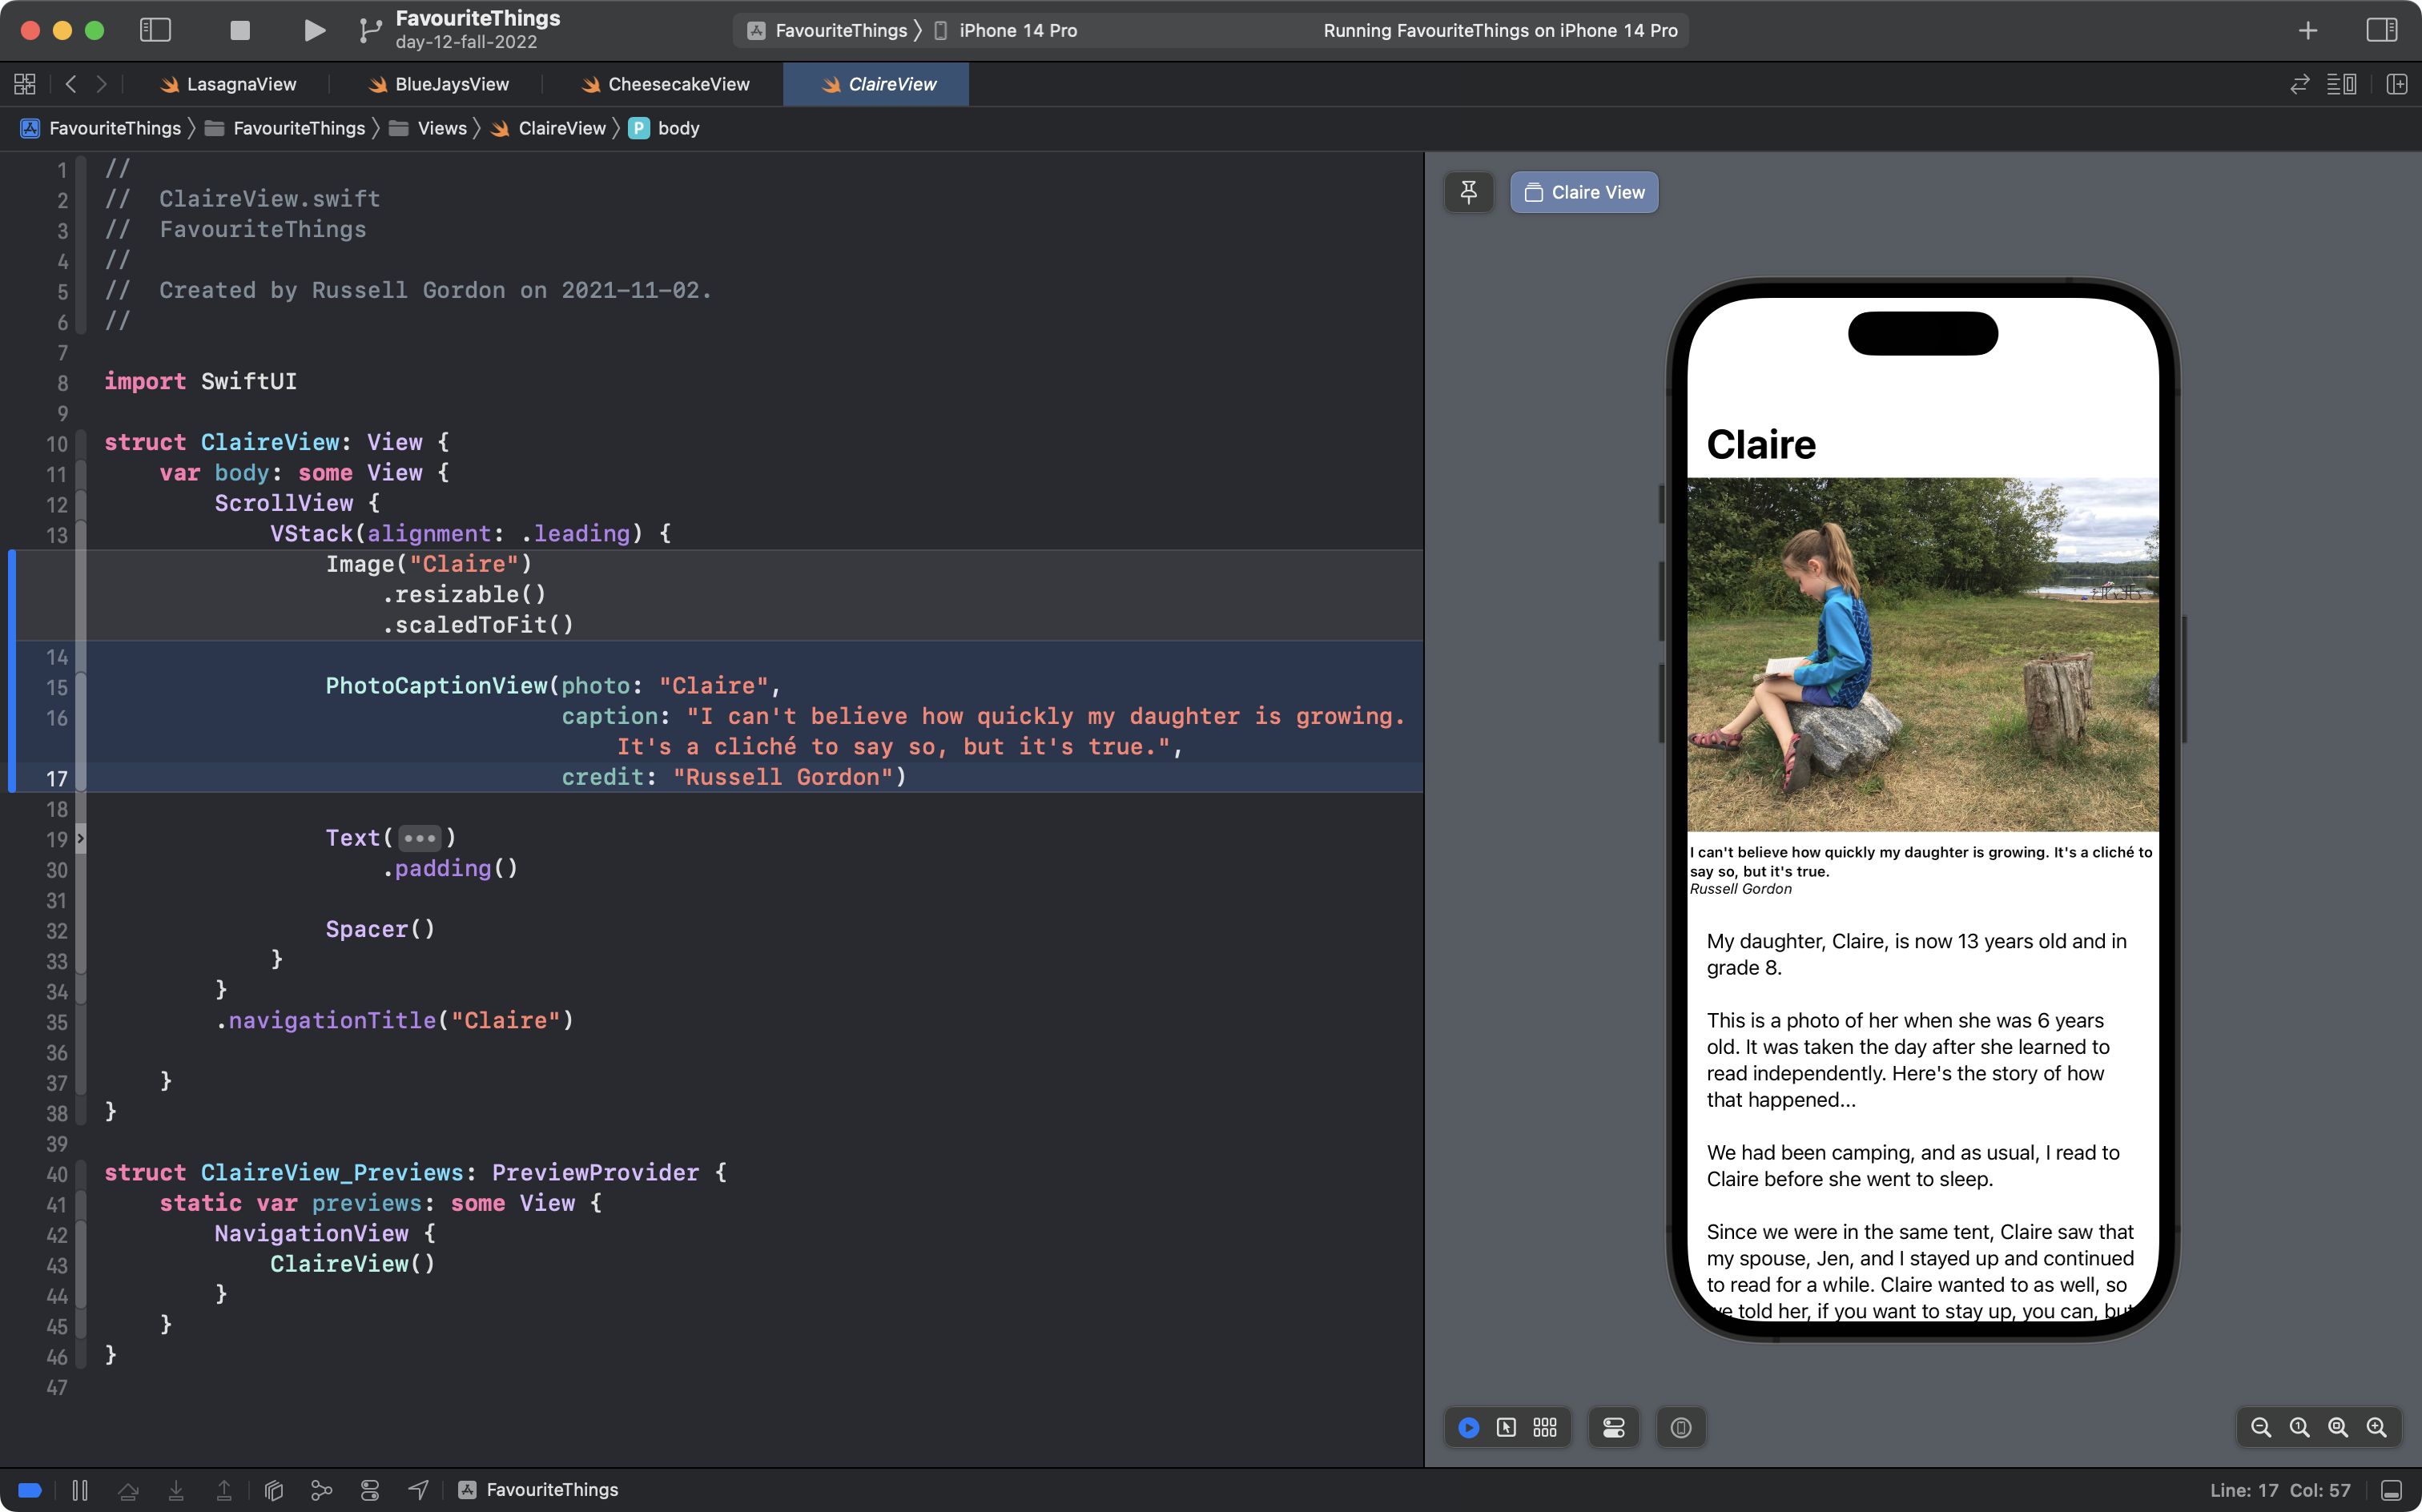
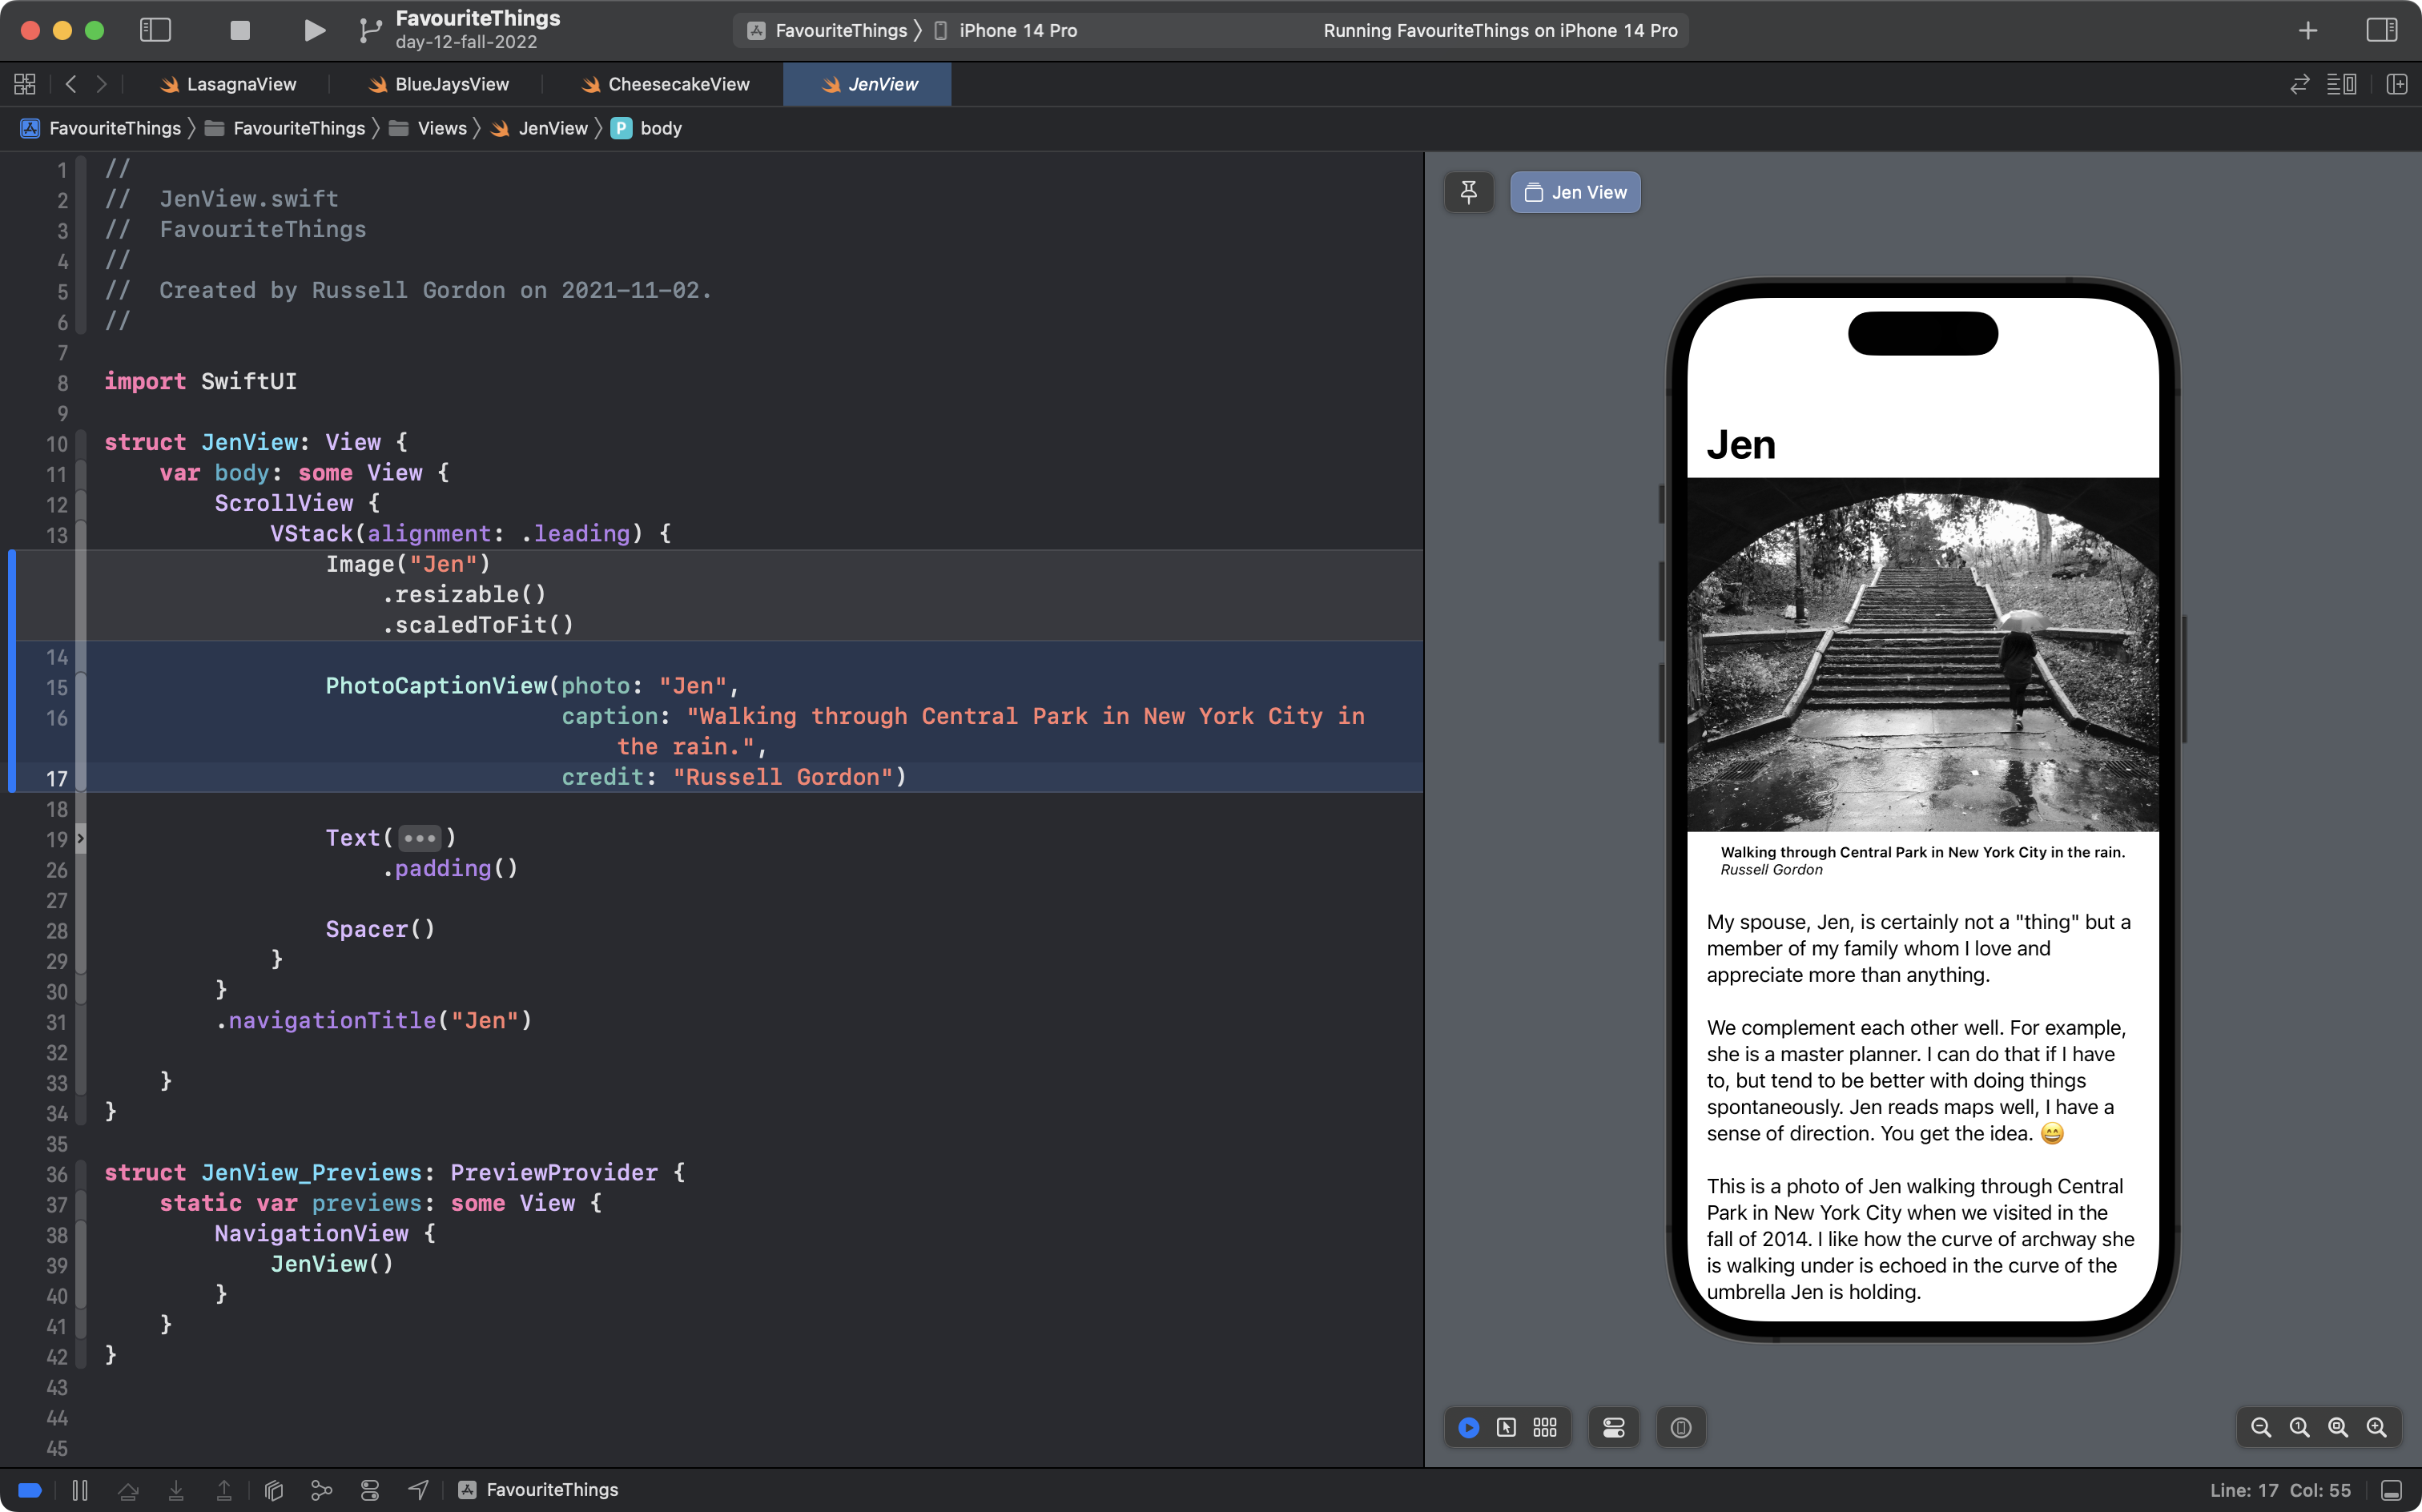
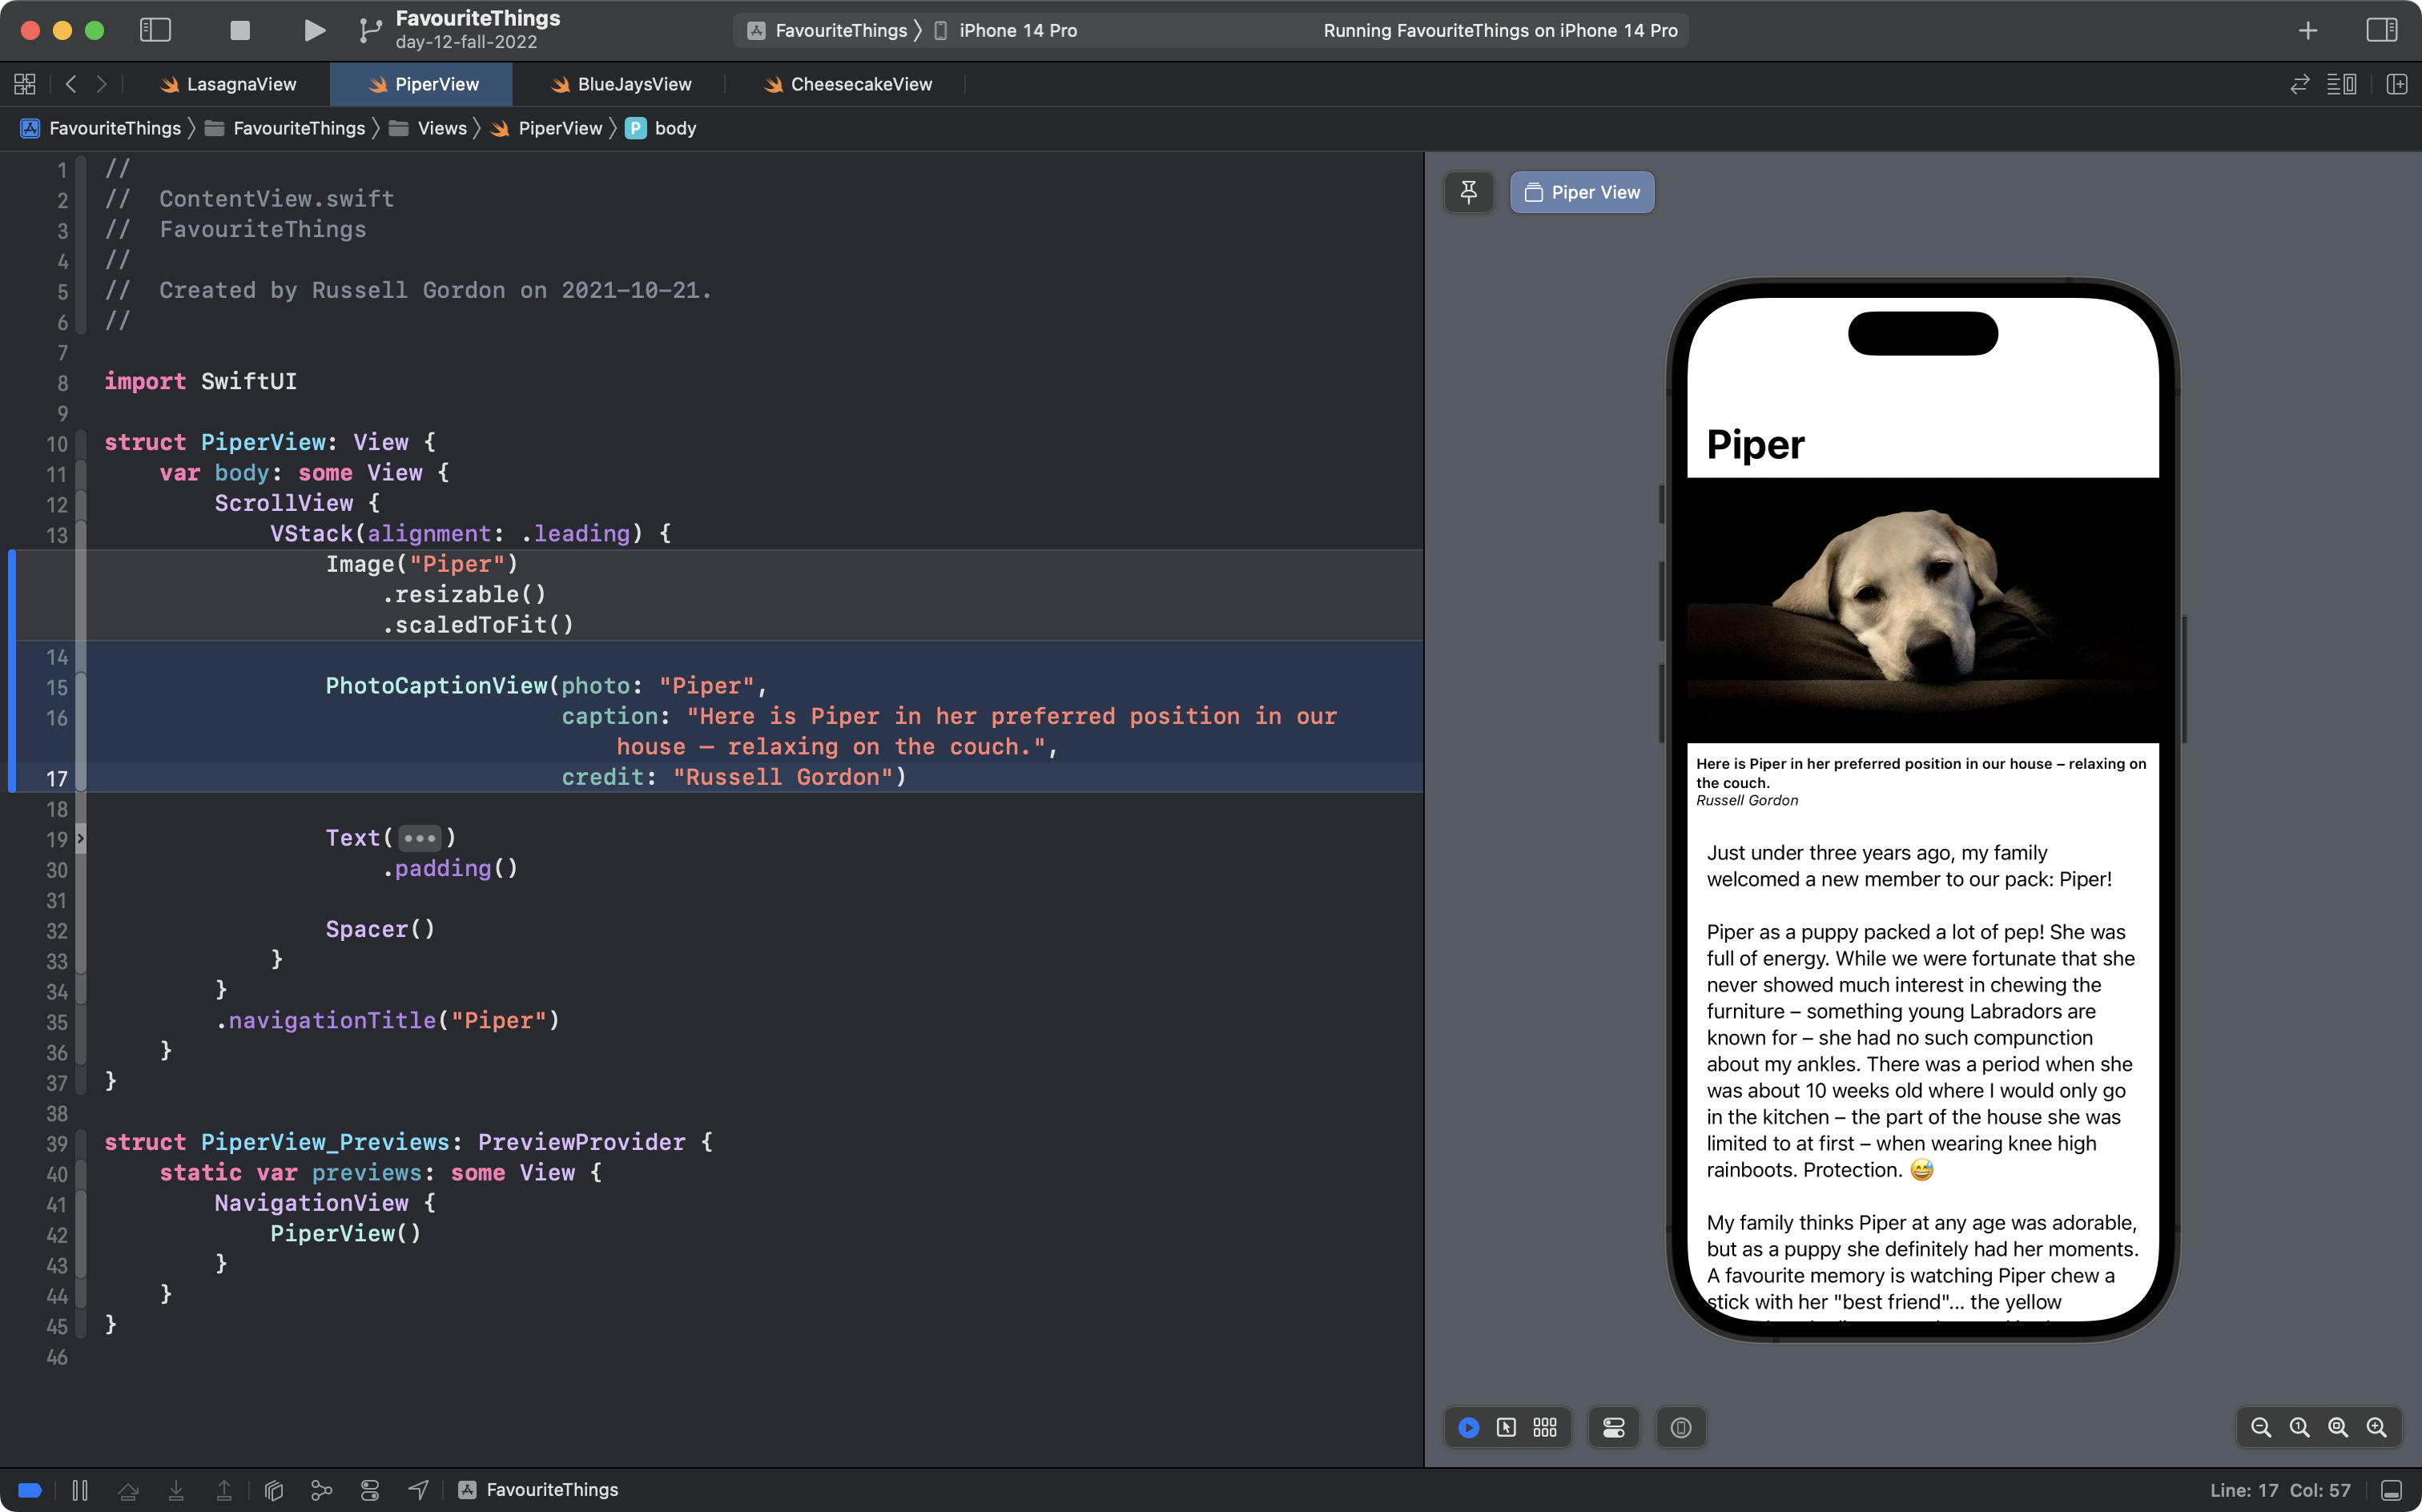
Finally, here is what the edits would look like for all remaining pages:
Old code is highlighted in grey, new code is highlighted in blue.
By adding PhotoCaptionView as a "helper" view, there is no need to copy and paste large chunks of code around.
We can just create an instance of PhotoCaptionView, answer the questions it asks by providing arguments for the required parameters, and it does the job that we designed it to do – show a photo, a caption, and a credit.
The formal name for the process we've just applied is abstraction and we'll be doing this a lot this year – it will soon be second nature to you as an app developer.
Exercise: Sweating the Details
If you compare the screenshots at the end of this lesson to one another, and then compare them to the original goal shown at the top of this lesson, you may spot some minor layout issues with the captions.
What are these issues? Describe them in a short post on Spaces in your portfolio.
Then, can you make some edits to PhotoCaptionView to correct these issues? It might help to refer to these excerpts from SwiftUI Views Quick Start.
Once you fix the issues, share your solution in another post on Spaces in your portfolio.