Dynamic Lists
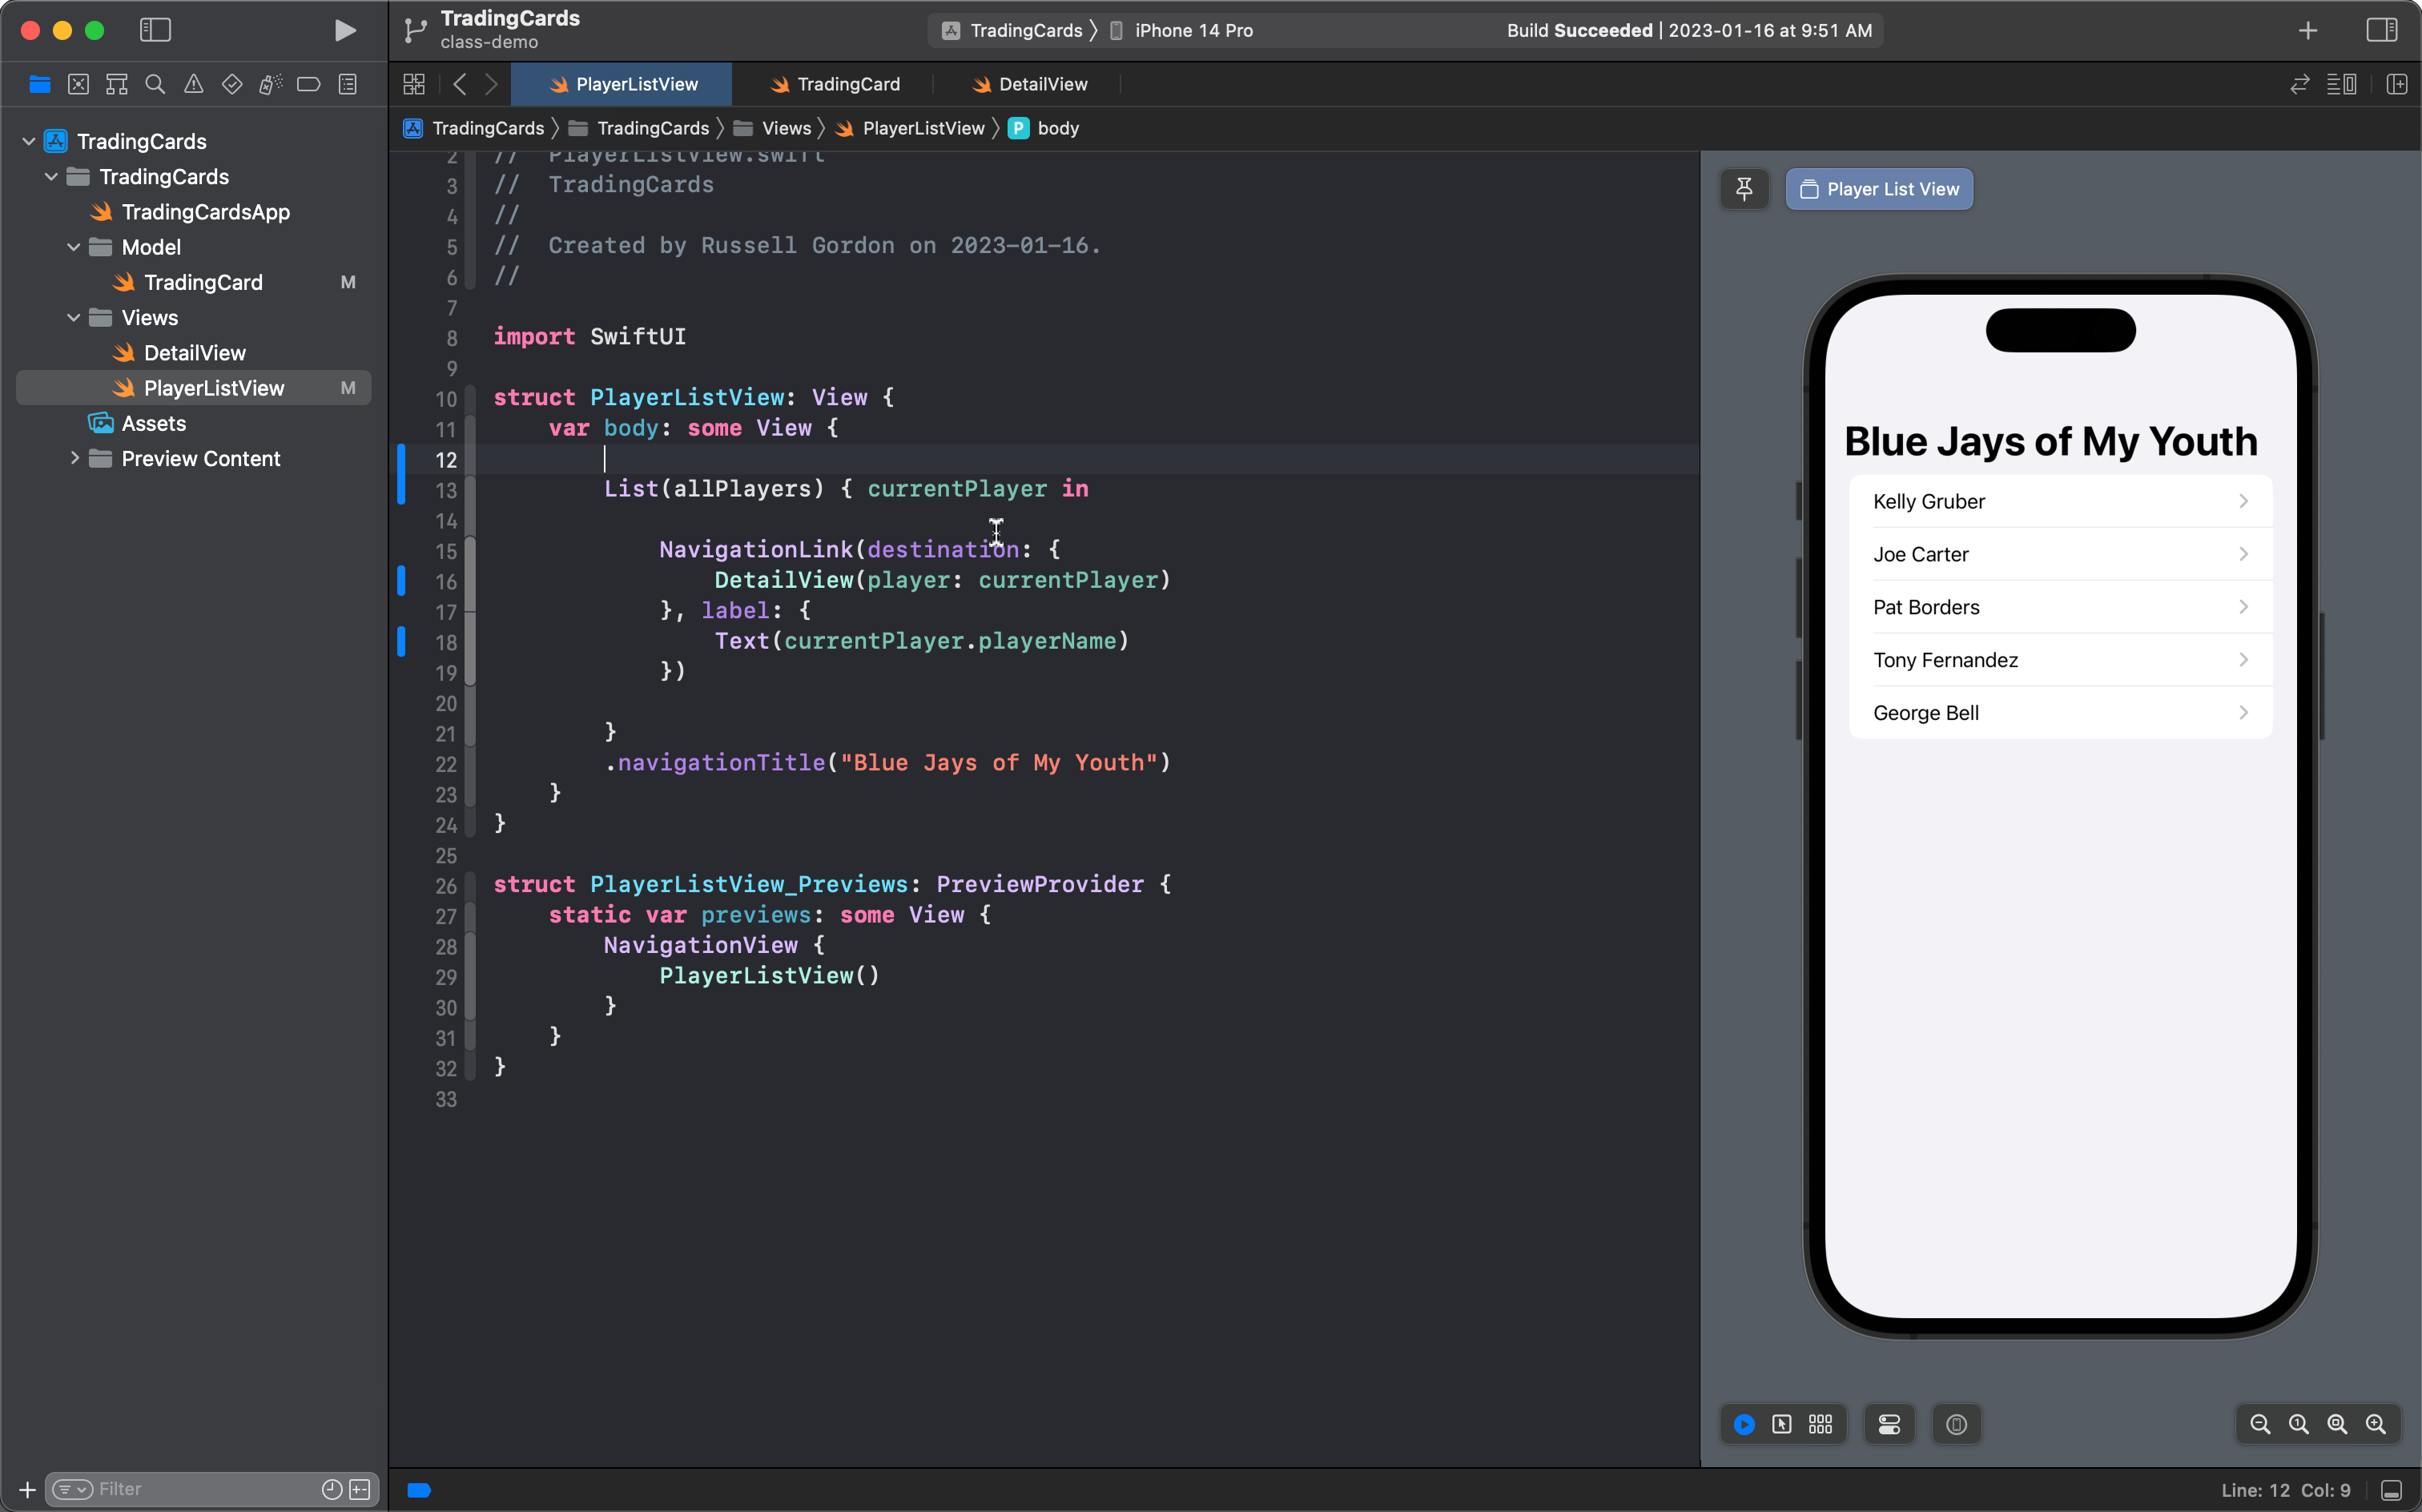
So far we have made lists that hold a set number of values, like in the Trading Cards app:
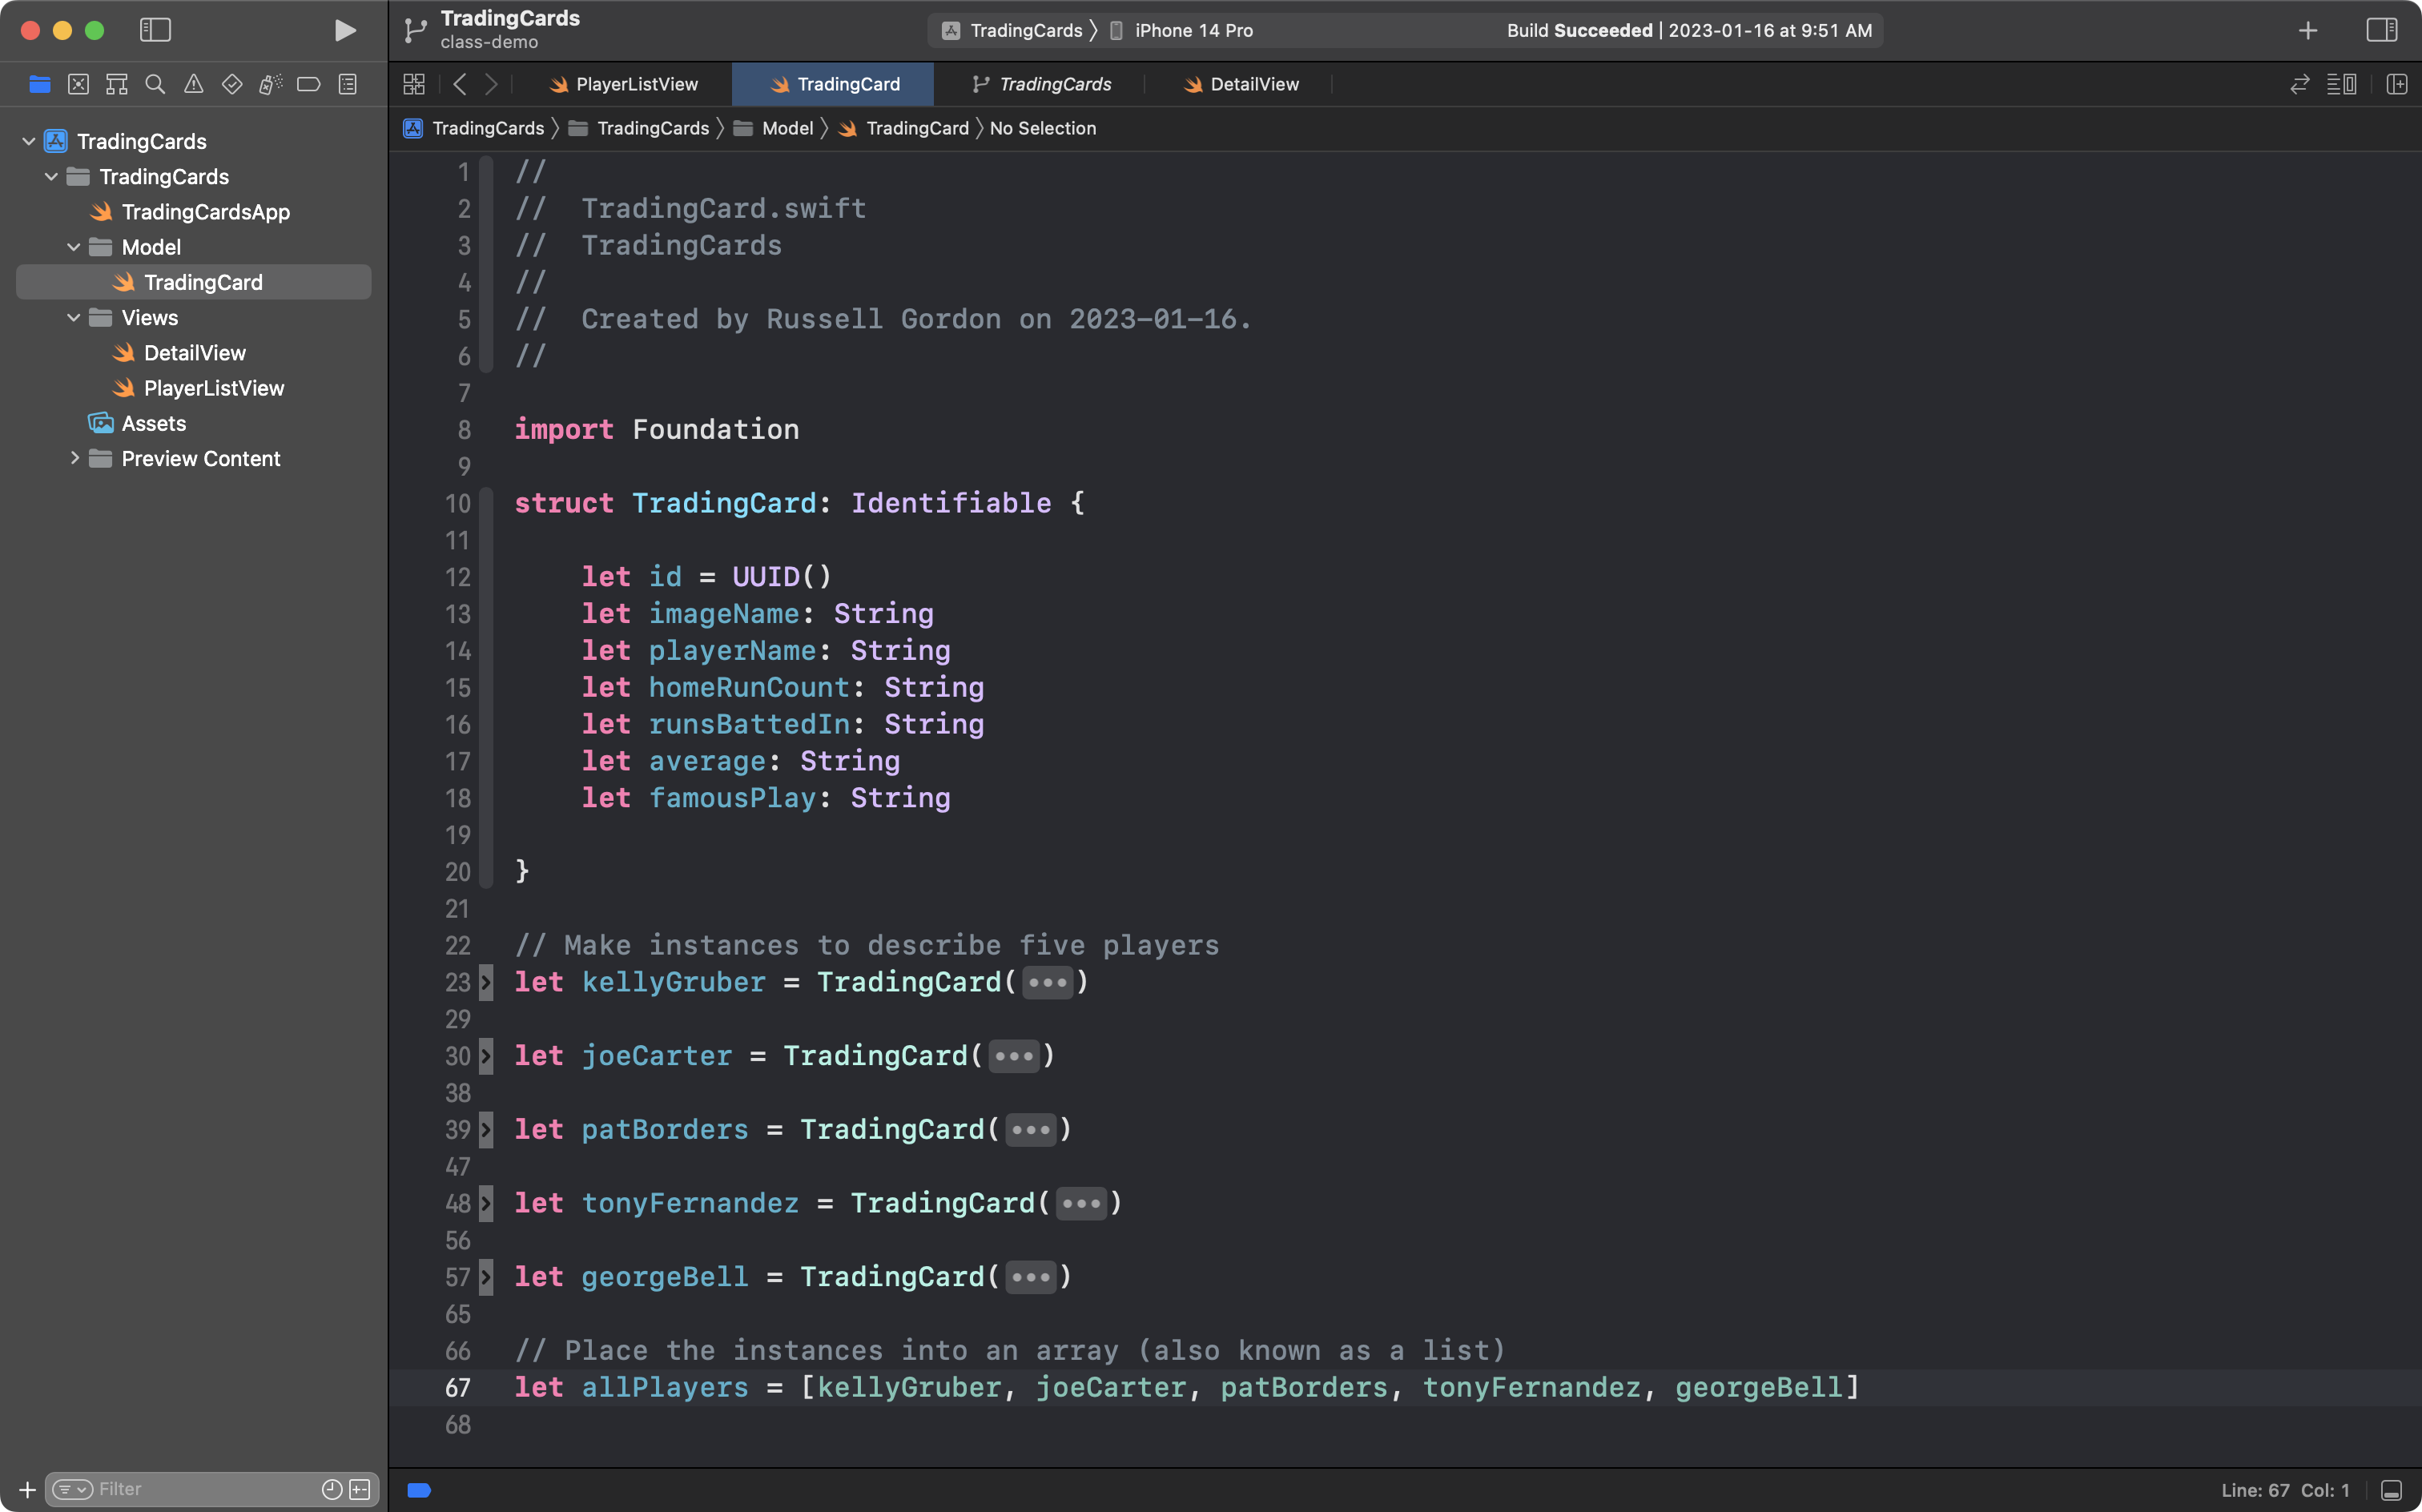
In the screenshot above, on line 67, a list (also called an array) named allPlayers was created and holds five elements, with indices from 0 to 4:
| Index | Element |
|---|---|
| 0 | kellyGruber |
| 1 | joeCarter |
| 2 | patBorders |
| 3 | tonyFernandez |
| 4 | georgeBell |
However, a great deal of the utility of using a list comes from its flexibility: the number of elements can be increased (or decreased) while our program runs.
Storing a history of results
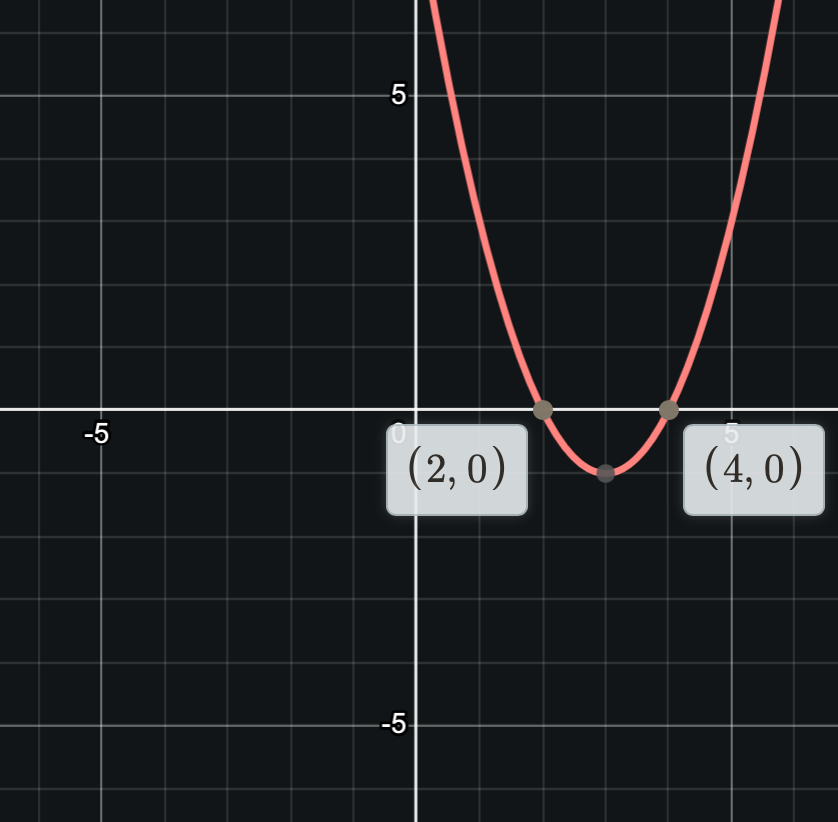
Imagine you wish to find the horizontal intercepts of a quadratic relation:
In this case, the relation is relatively straightforward to factor to determine the intercepts:
We could also graph the relation and determine the intercepts that way:
However, a relation such as:
... cannot be factored over the integers.
Rather than graph, you might reach for your calculator, and use the Quadratic Formula:
This is a reasonable approach.
Standard form for a quadratic relation is:
So, we know that for the relation:
The co-efficients are:
We can then substitute and evaluate:
However, applying the Quadratic Formula is somewhat tedious and error-prone.
Perhaps you have gotten past the part of high-school math where it is important that you learn how to apply the Quadratic Formula, and instead, you just want to know what the horizontal intercepts are to solve a bigger problem.
Or perhaps you want to check your answers after having manually applied the Quadratic Formula.
In these cases, an app that, given the
... might be very useful indeed.
More than that, wouldn't it be nice to see a history of prior calculations you had made?
That's where lists – and their ability to store more and more elements while an app runs – can be very useful.
Let's build this app together now. 🚀
Building the static interface
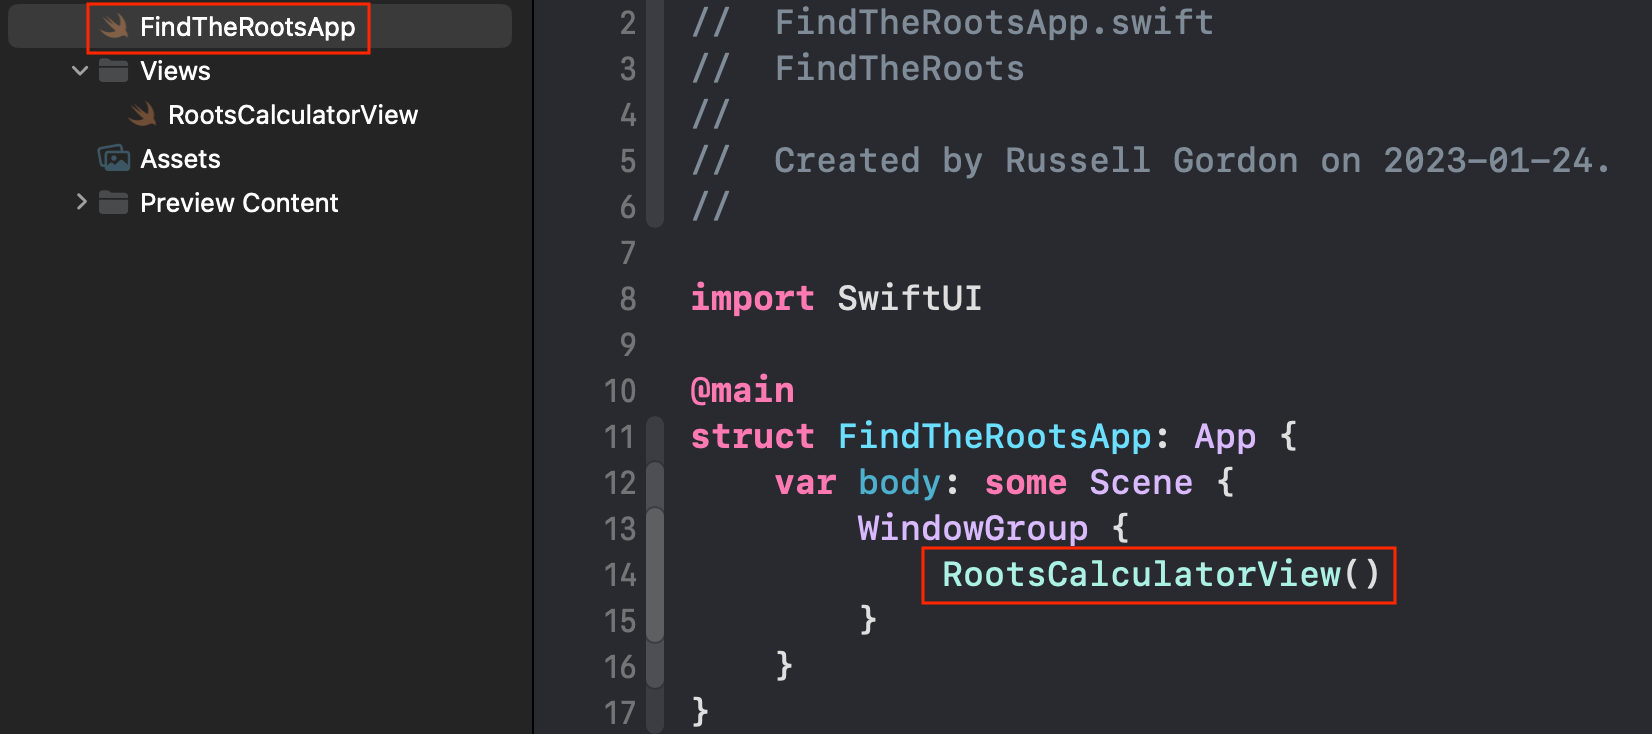
Create a new project in Xcode named FindTheRoots.
Then create a remote on GitHub in the Source Control navigator.
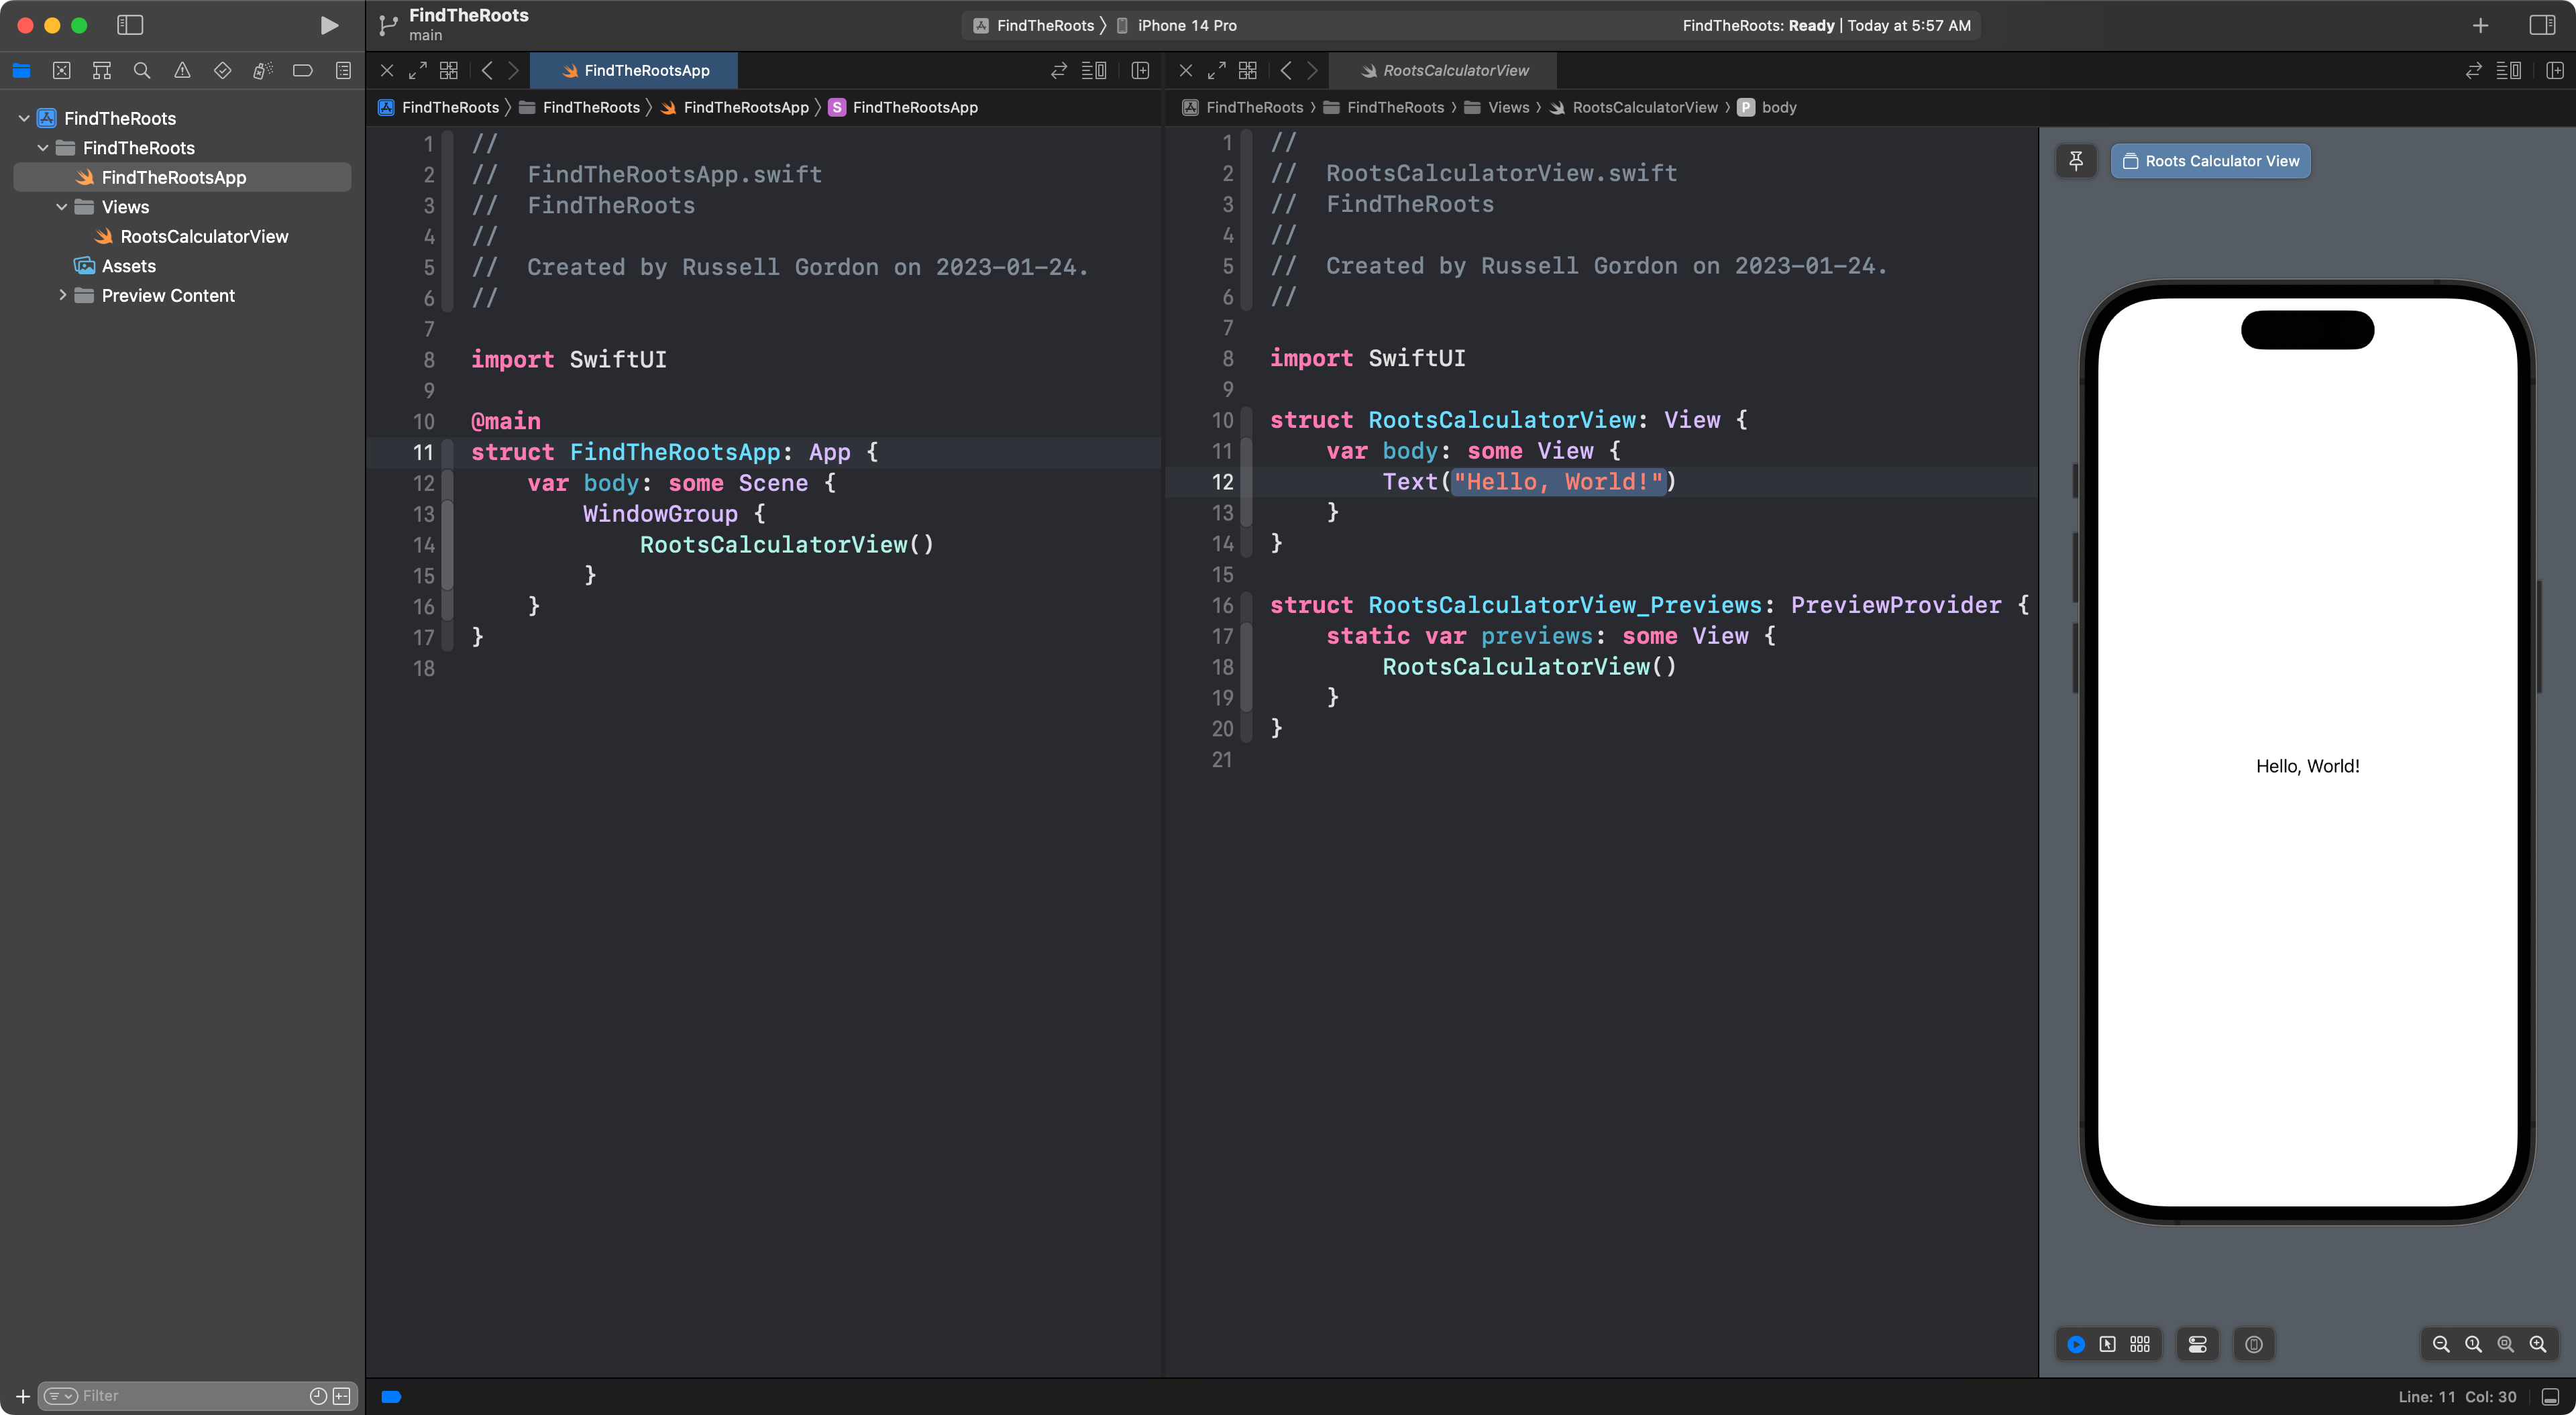
Next, create an empty view named RootsCalculatorView:
Remember, when starting a new app, it's good practice to:
- set up a group named Views to hold all the structures that describe user interface within your app
- to delete
ContentView - to create a new structure and be thoughtful about how you name it – the name should be meaningful and convey the purpose of the structure
Don't forget to change the app entry point file to refer to your new file:
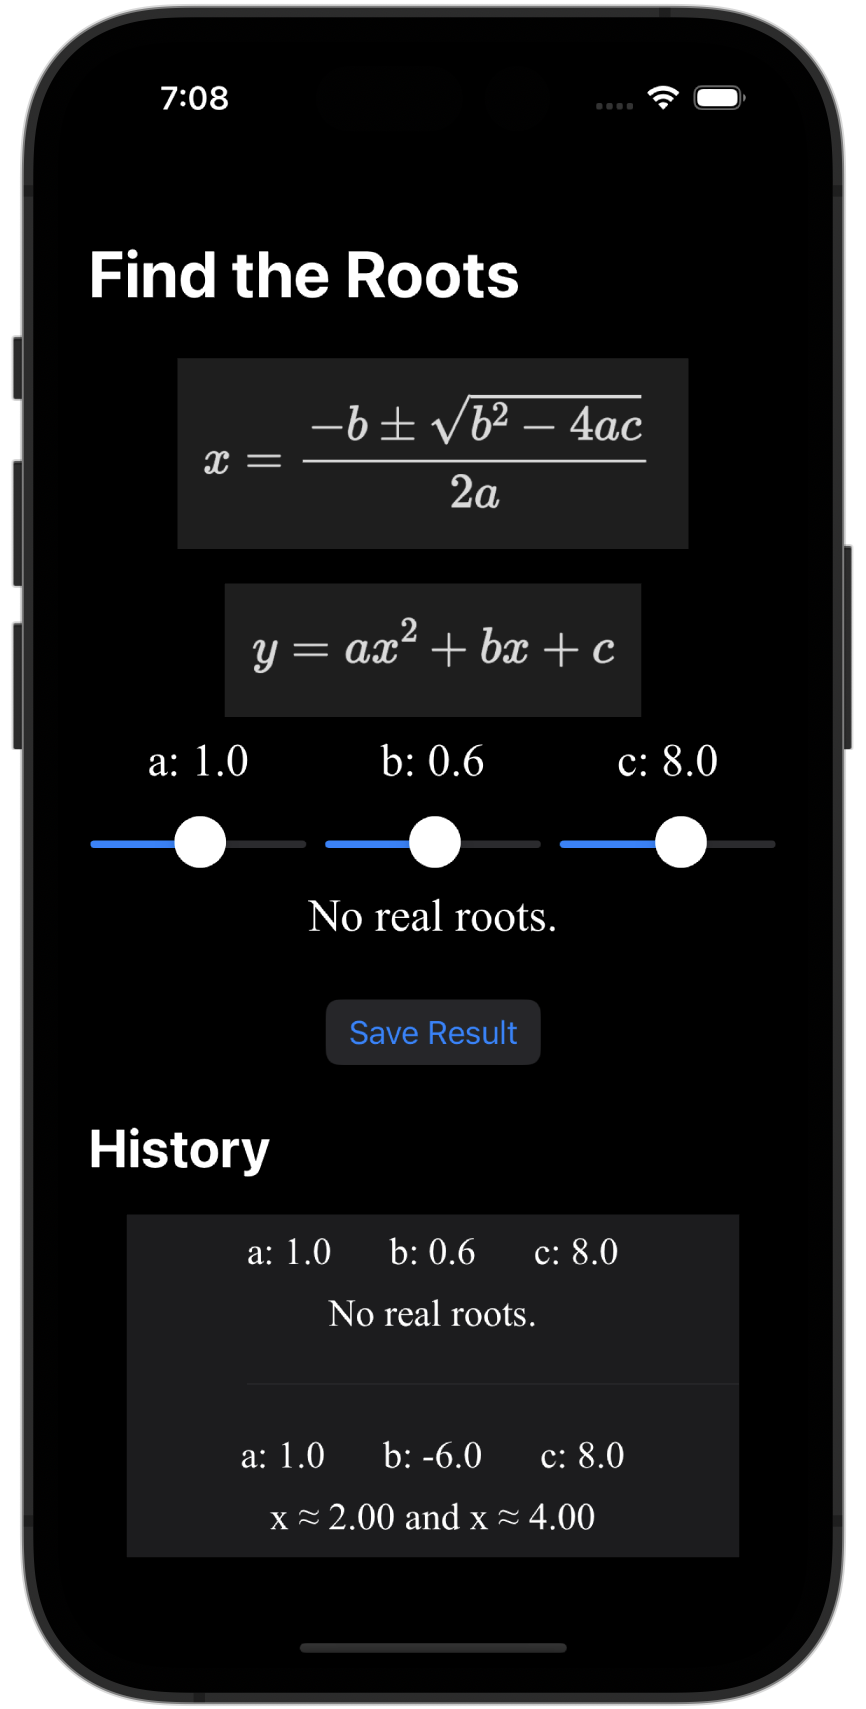
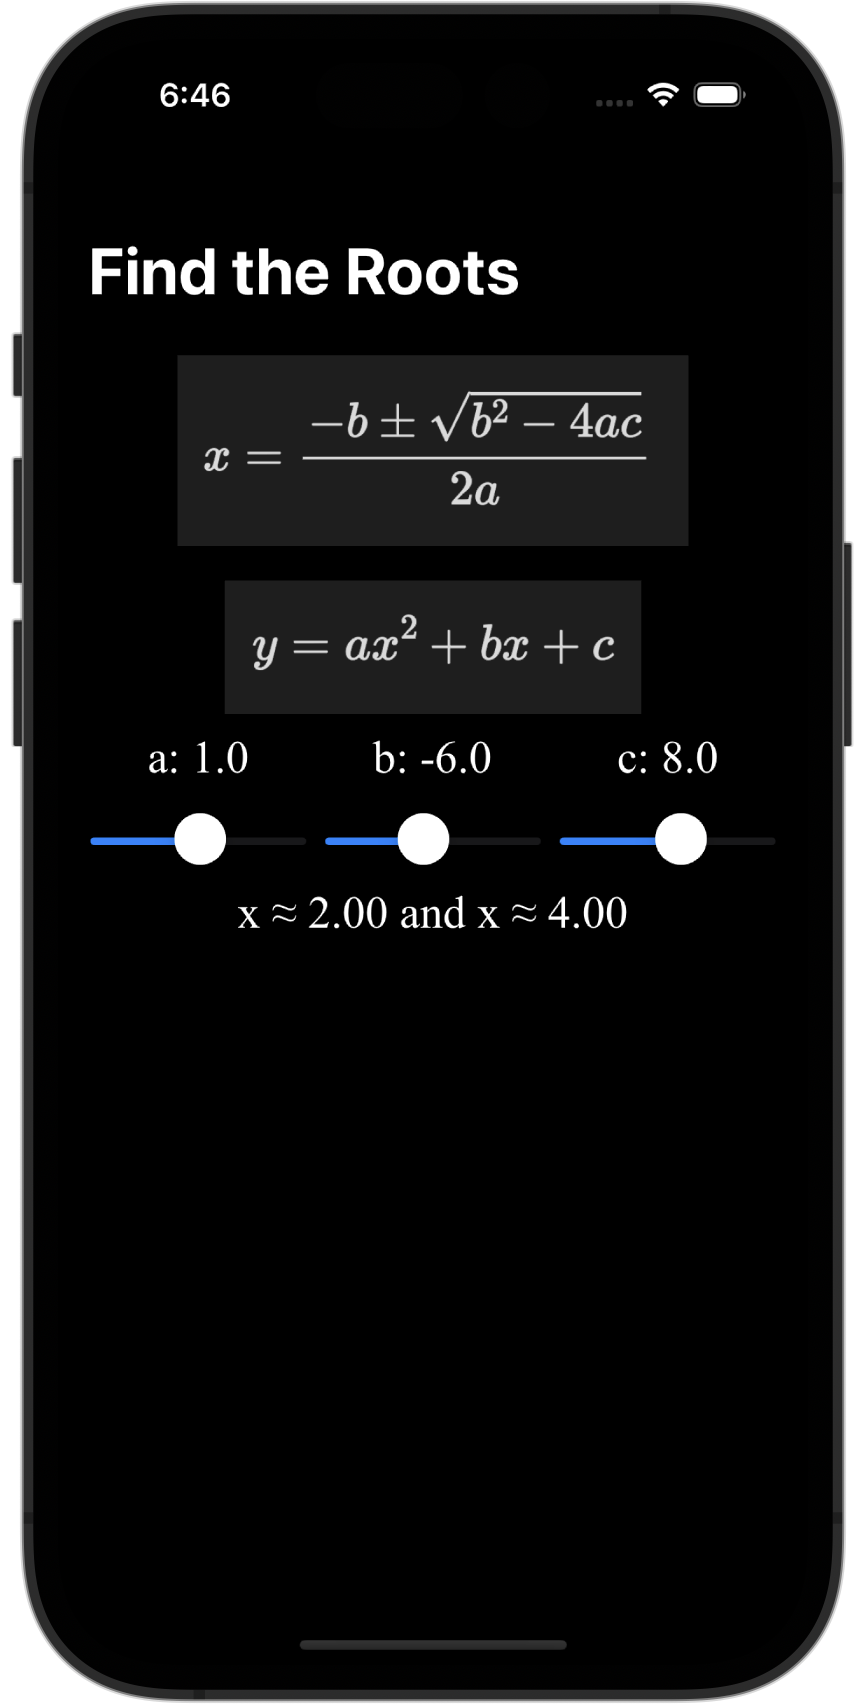
Now build out this interface, as shown:
The view modifier required to change the font is:
  .font(Font.custom("Times New Roman",
                     size: 24.0,
                     relativeTo: .body))
To get the Quadratic Formula and the standard form equation into your interface, take screenshots of those expressions from earlier in this tutorial, then move those screenshots into your Assets folder in Xcode.
To get the ≈ sign, use Control-Command-Spacebar and search for "almost equal to" in the Emoji and Symbols picker that appears:
.png)
The app does not need to be in dark mode – I was just writing this tutorial at night. ☺️
– Mr. Gordon
Calculate the result
Our input values a, b, and c are of type Double.
The output value, while it shows numeric information, will in fact be a String.
The purpose of this lesson is not really to review the mathematics of this app, but some explanation will likely be helpful.
You are likely aware that a quadratic relation can be positioned in only a few ways with regard to the horizontal axis:
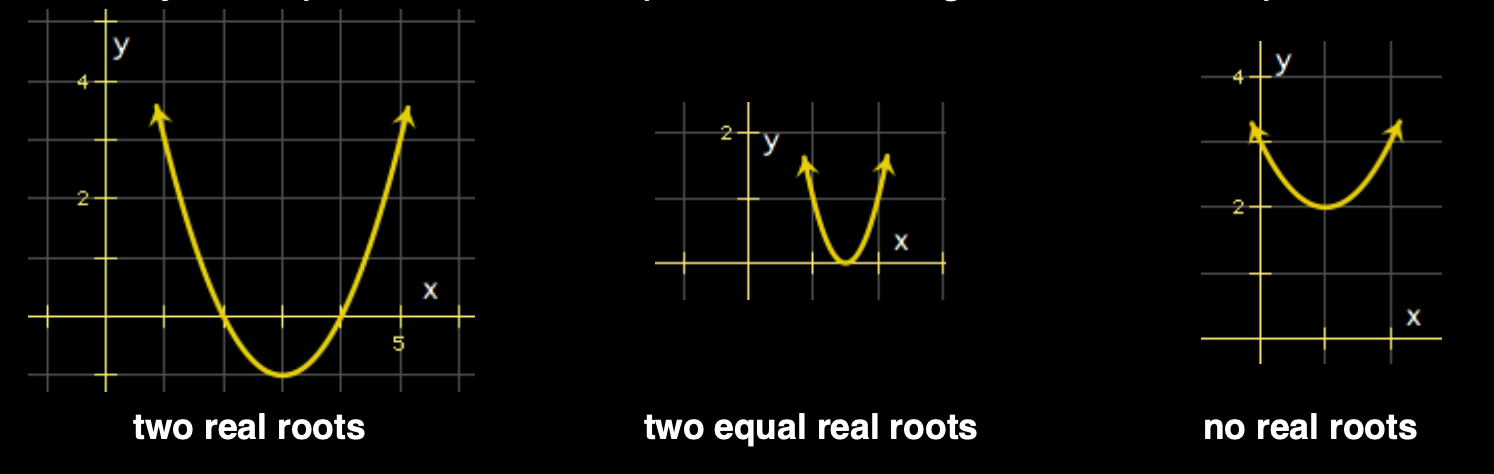
That is, a quadratic relation can:
- cross the horizontal axis twice (so there are two roots or solutions)
- touch the horizontal axis at its vertex (two equal roots or solutions)
- not touch the horizontal axis at all (no roots)
When the quadratic relation does not touch the horizontal axis, the discriminant:
... will be negative, or less than zero.
The discrimiant is the part of the Quadratic Formula that is under the square root symbol:
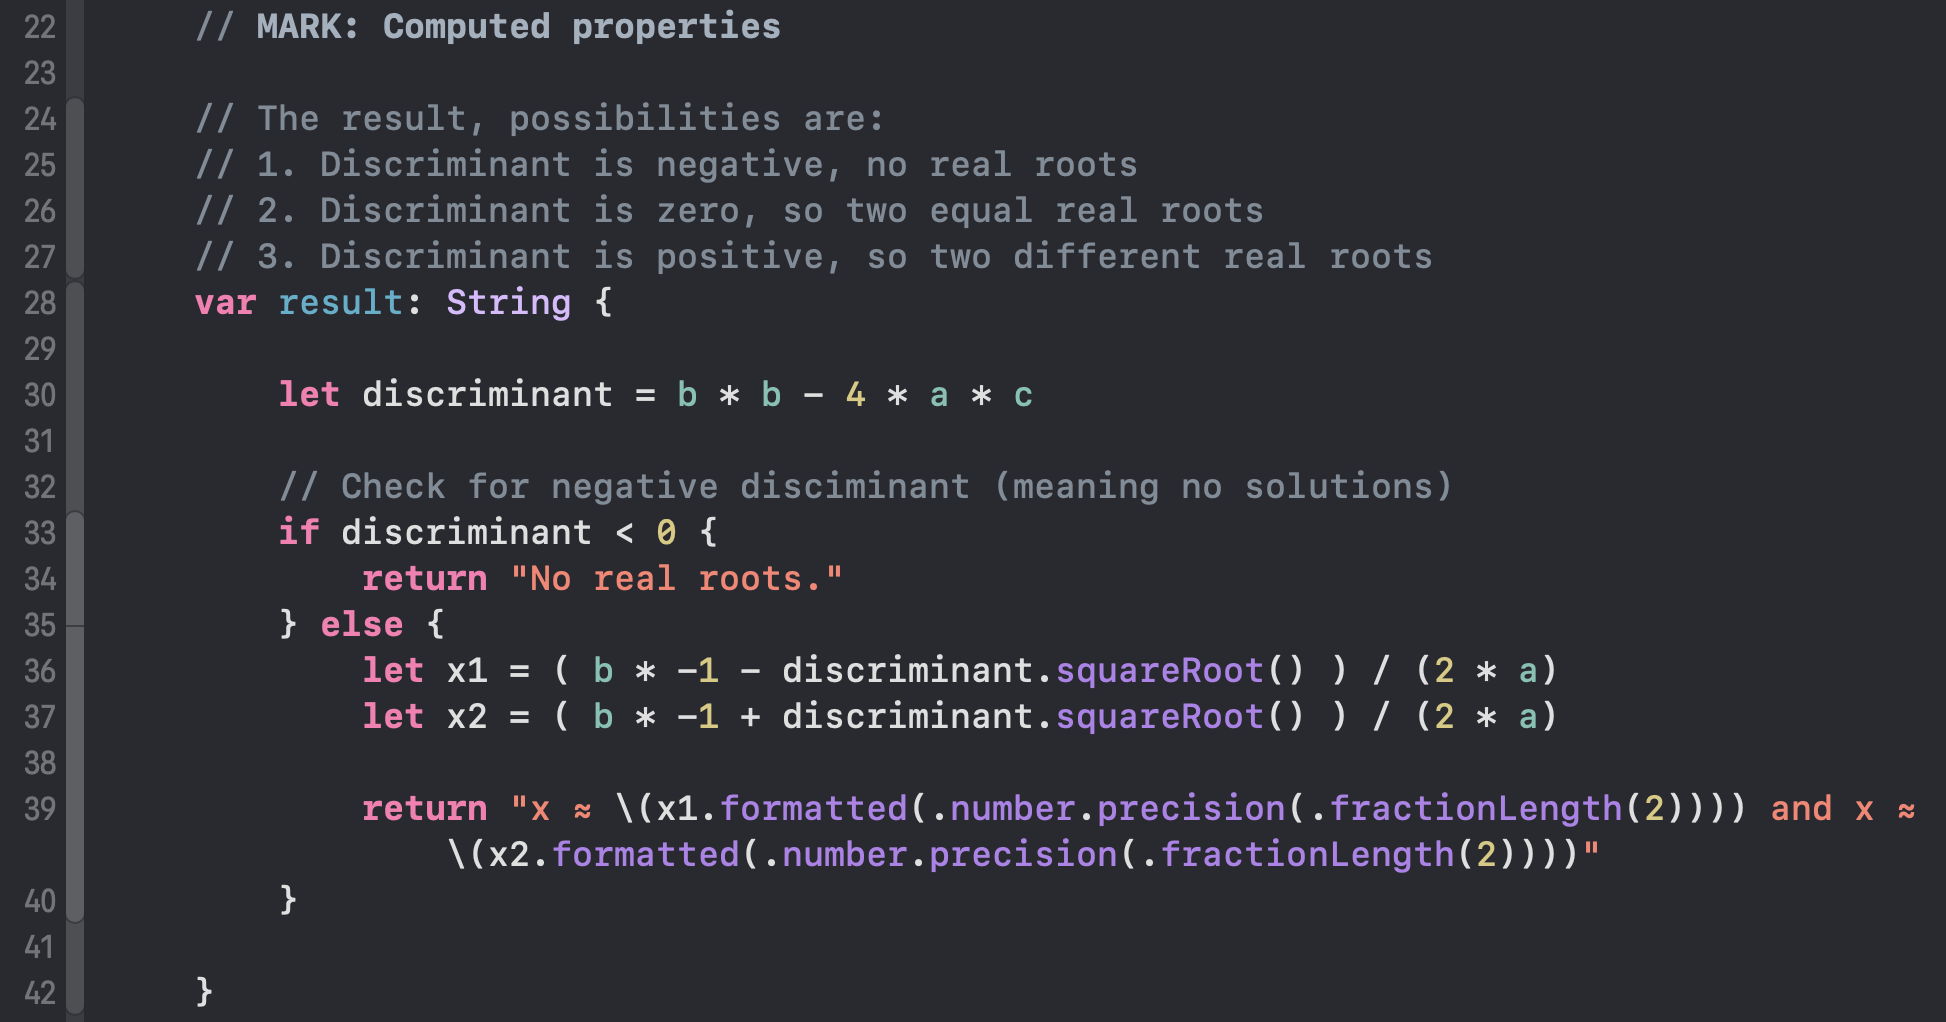
We can use this fact to determine when a given quadratic relation does not cross the horizontal axis. When this occurs, we will return an appropriate message. Otherwise, we will return the solutions – where the quadratic touches the horizontal axis.
This will be done by creating a computed property that returns a data type of String.
Here is the logic – add this computed property to your app now:
Note that this logic makes use of a selection statement.
A selection statement allows code to be run only under certain conditions.
In this case, the type of selection statement we are using is an if statement.
If you'd like to understand more about how selection statements work, please review this summary.
Use the computed property to display the output of your app:
Save a history of results
We've now built a fairly useful app.
However, when working on many problems that involve the Quadratic Formula, it might be nice to keep a history of prior results:
Now that you have an initial understanding of lists (also known as arrays) you might be surprised to learn how straightforward this is to do.
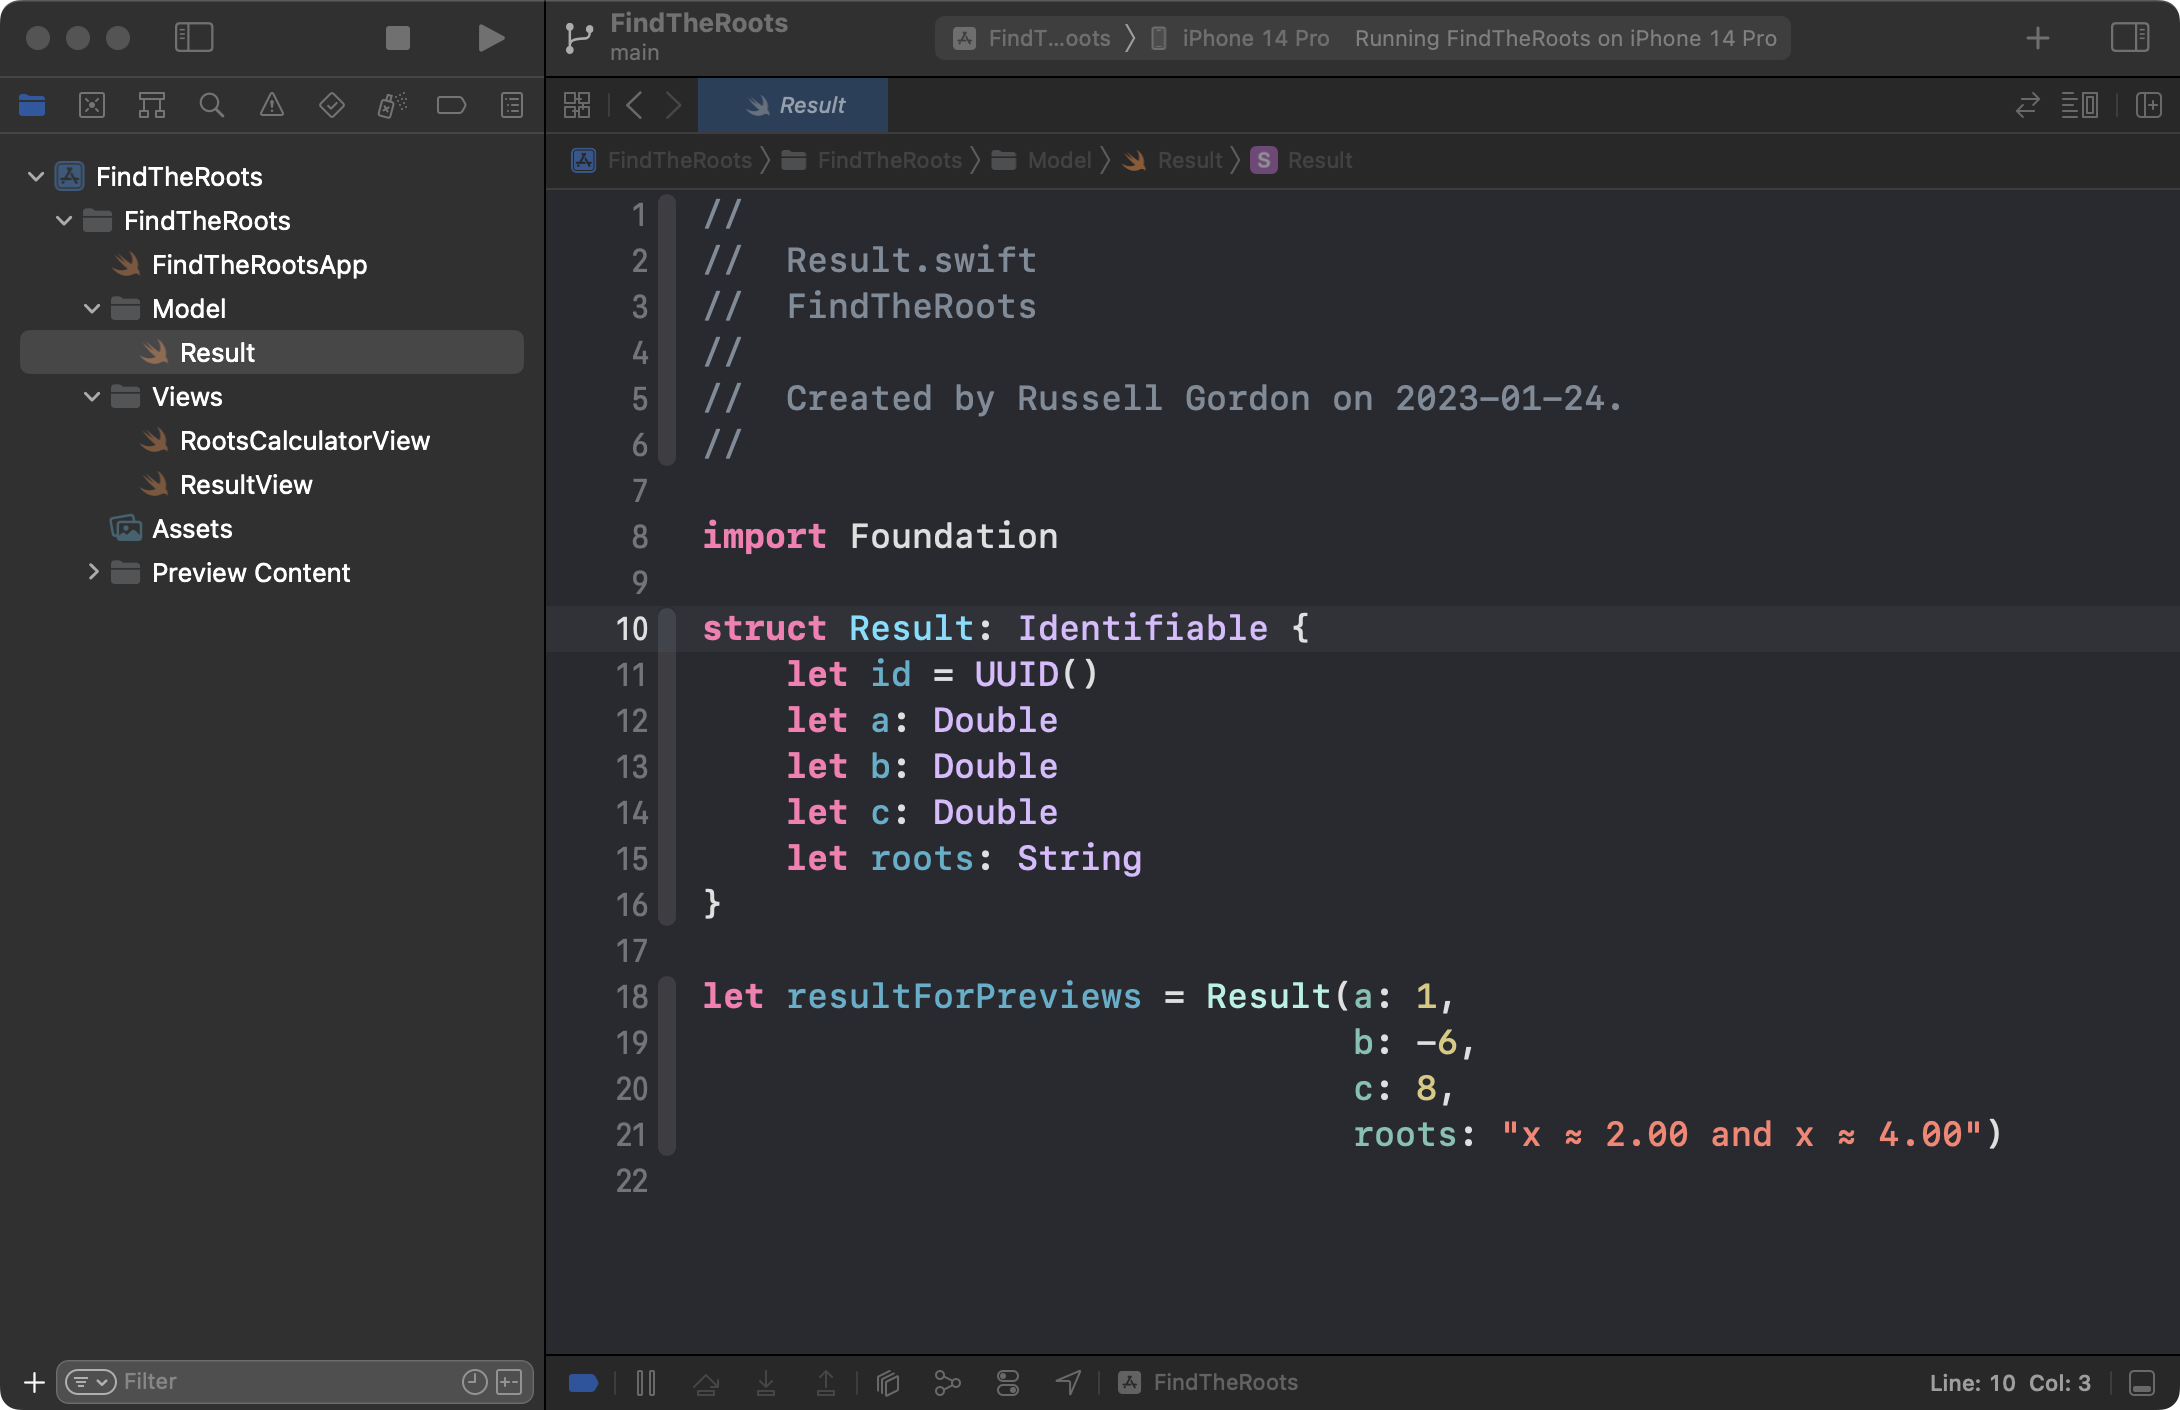
Create a structure to describe data
First, we need a structure that accurately describes the inputs and output of each calculation the user wants to save.
Add a file named Result.swift to a group named Model within your project.
Then create the structure shown below, including one instance of the structure as shown on lines 18 to 21:
Create a helper view
Since the app will show a list of prior results, all formatted the same way, we should make use of a helper view to display those results.
This is similar to when we created a single structure to render multiple buttons within the Stopwatch app.
In the Views group of your project, create a new SwiftUI view named ResultView.
Here is the basic structure of that helper view:
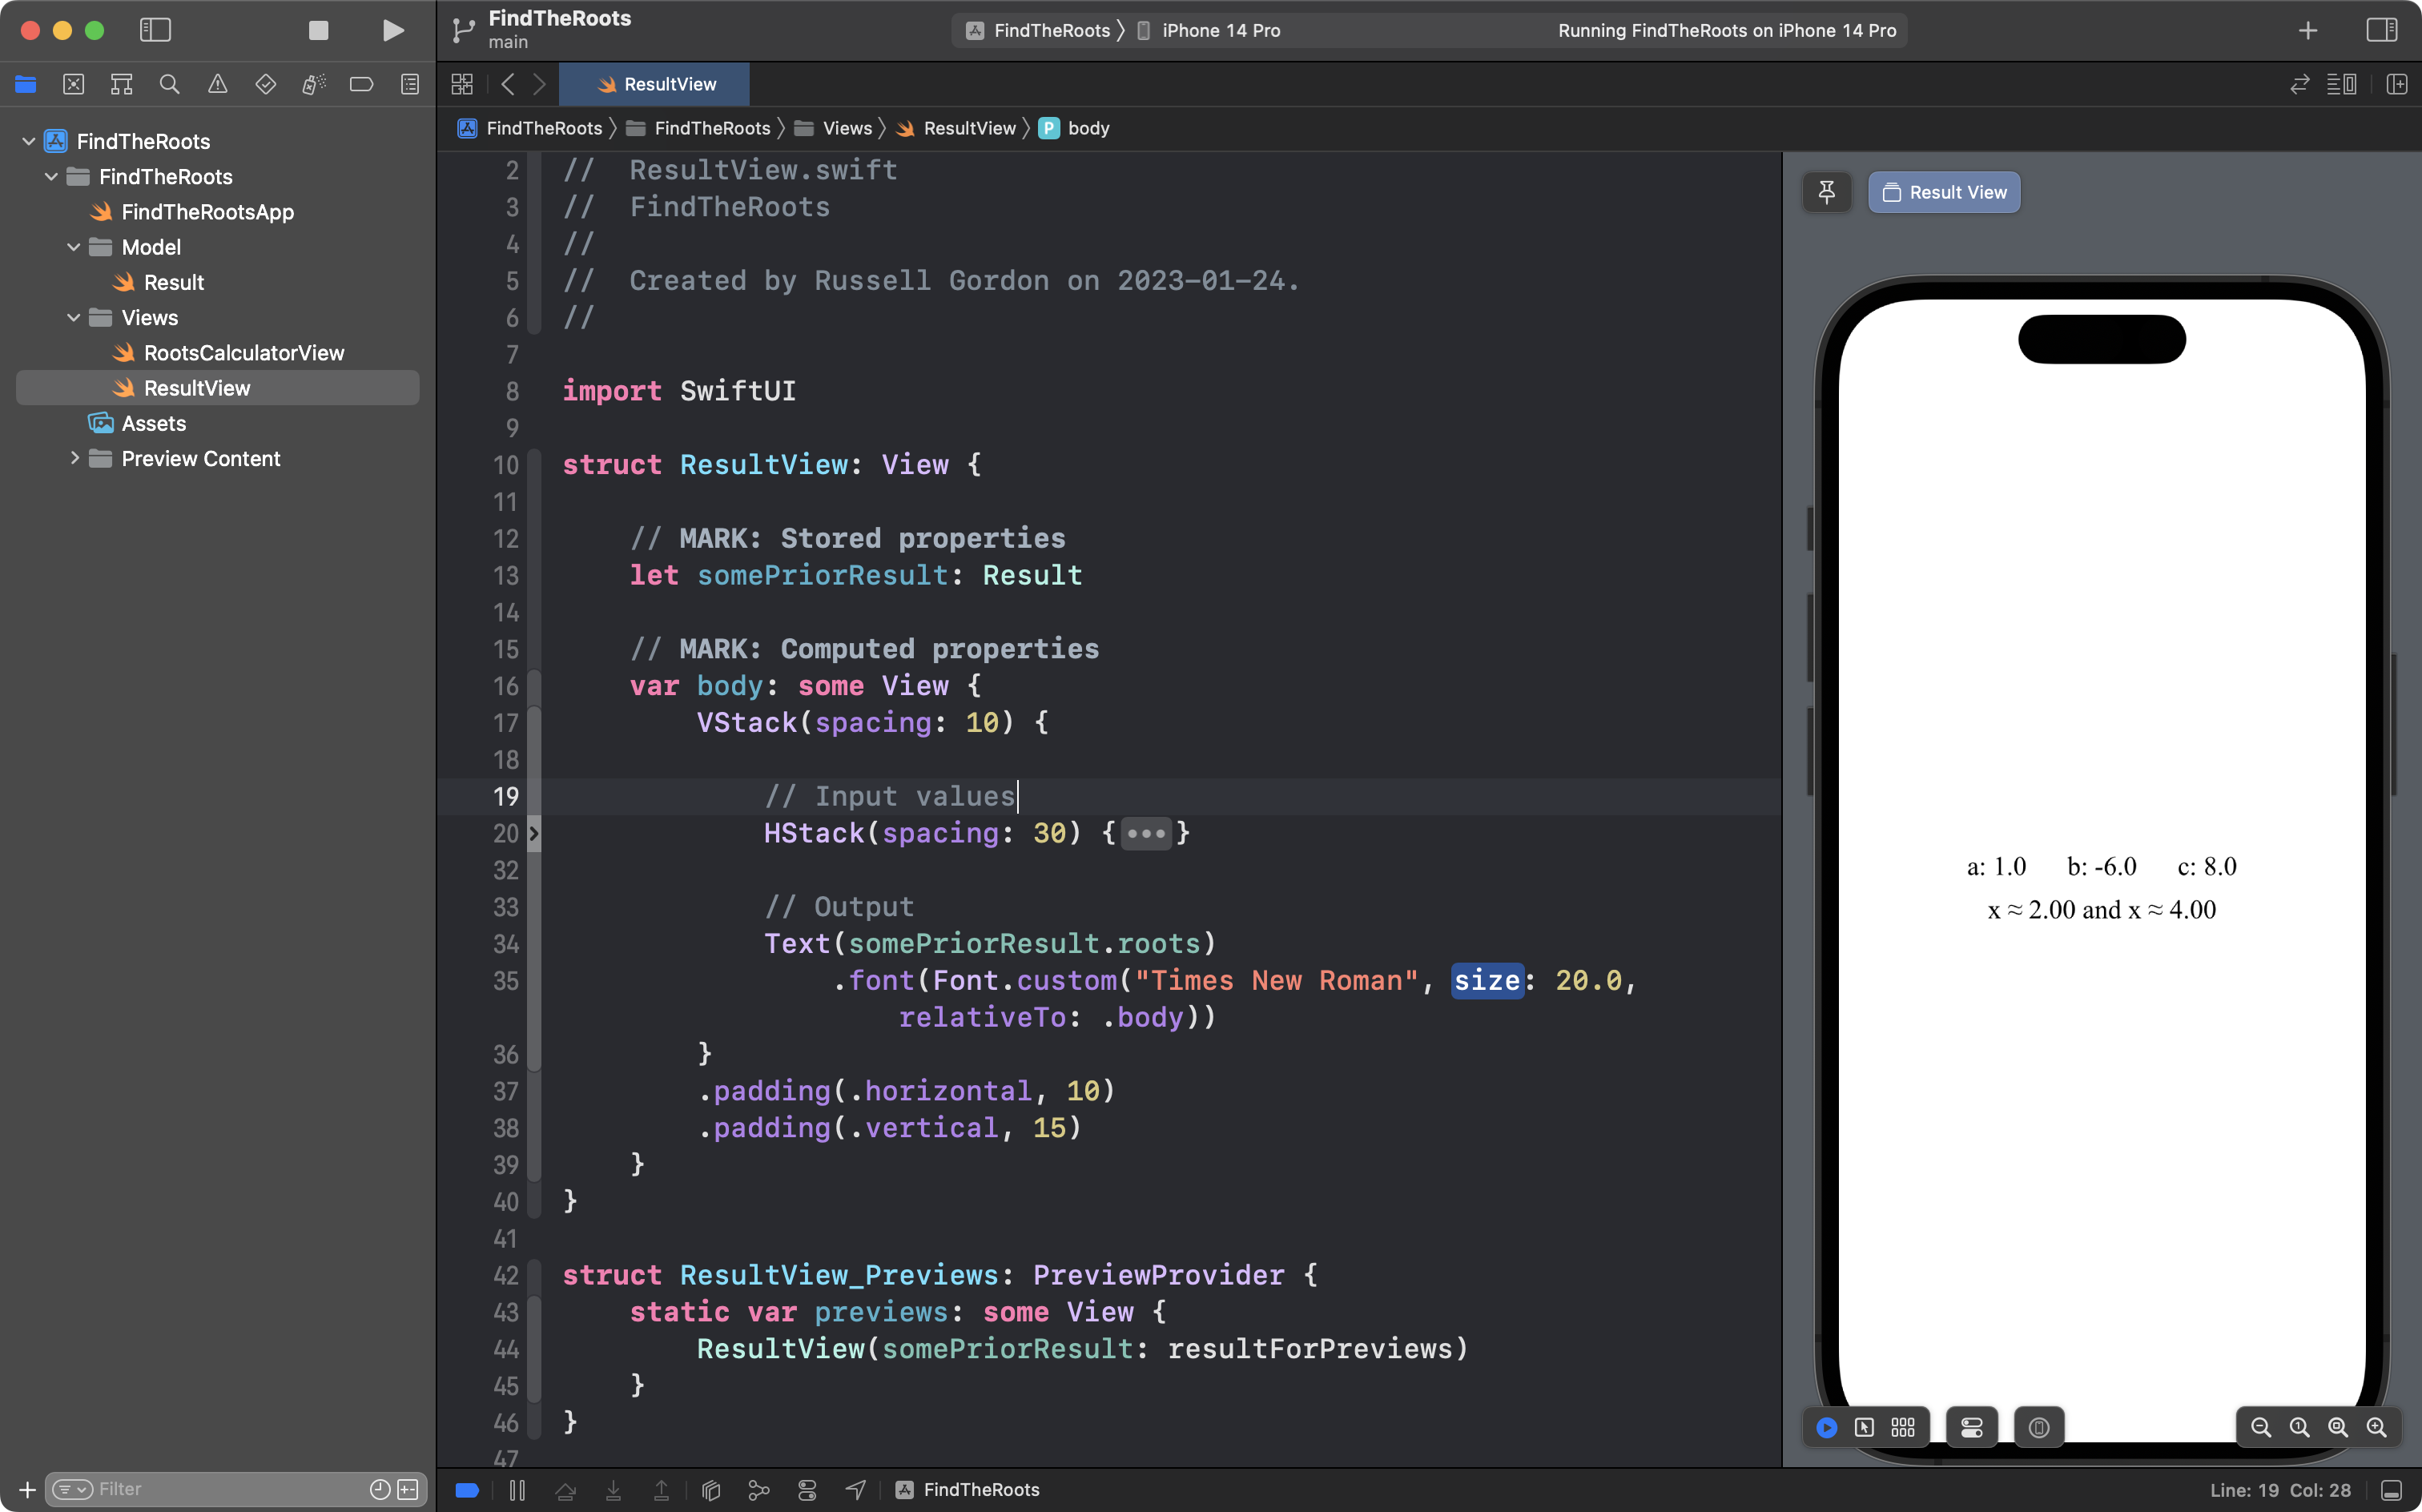
Note that the part of the user interface that shows the a, b, and c values is deliberately collapsed; completing this is an exercise for you to do.
Note that this helper view accepts an instance of the Result type on line 13.
The stored property is called somePriorResult.
In the preview structure, on line 44, we create an instance of ResultView and for the somePriorResult parameter, we provide the argument of resultForPreviews, which was an instance of the Result structure that we created earlier.
Create an array to store prior results
Back in RootsCalculatorView, we need to create a stored property that will keep track of all the prior results the user wants to save.
This stored property will be a list. Initially, this list of results will be empty.
Here is the code required to create the empty list:
    // List of prior results
    @State var priorResults: [Result] = []
As you know, square brackets are the syntax used to mark the start and end of a list.
Here is where that code should be placed within RootsCalculatorView – see line 20:
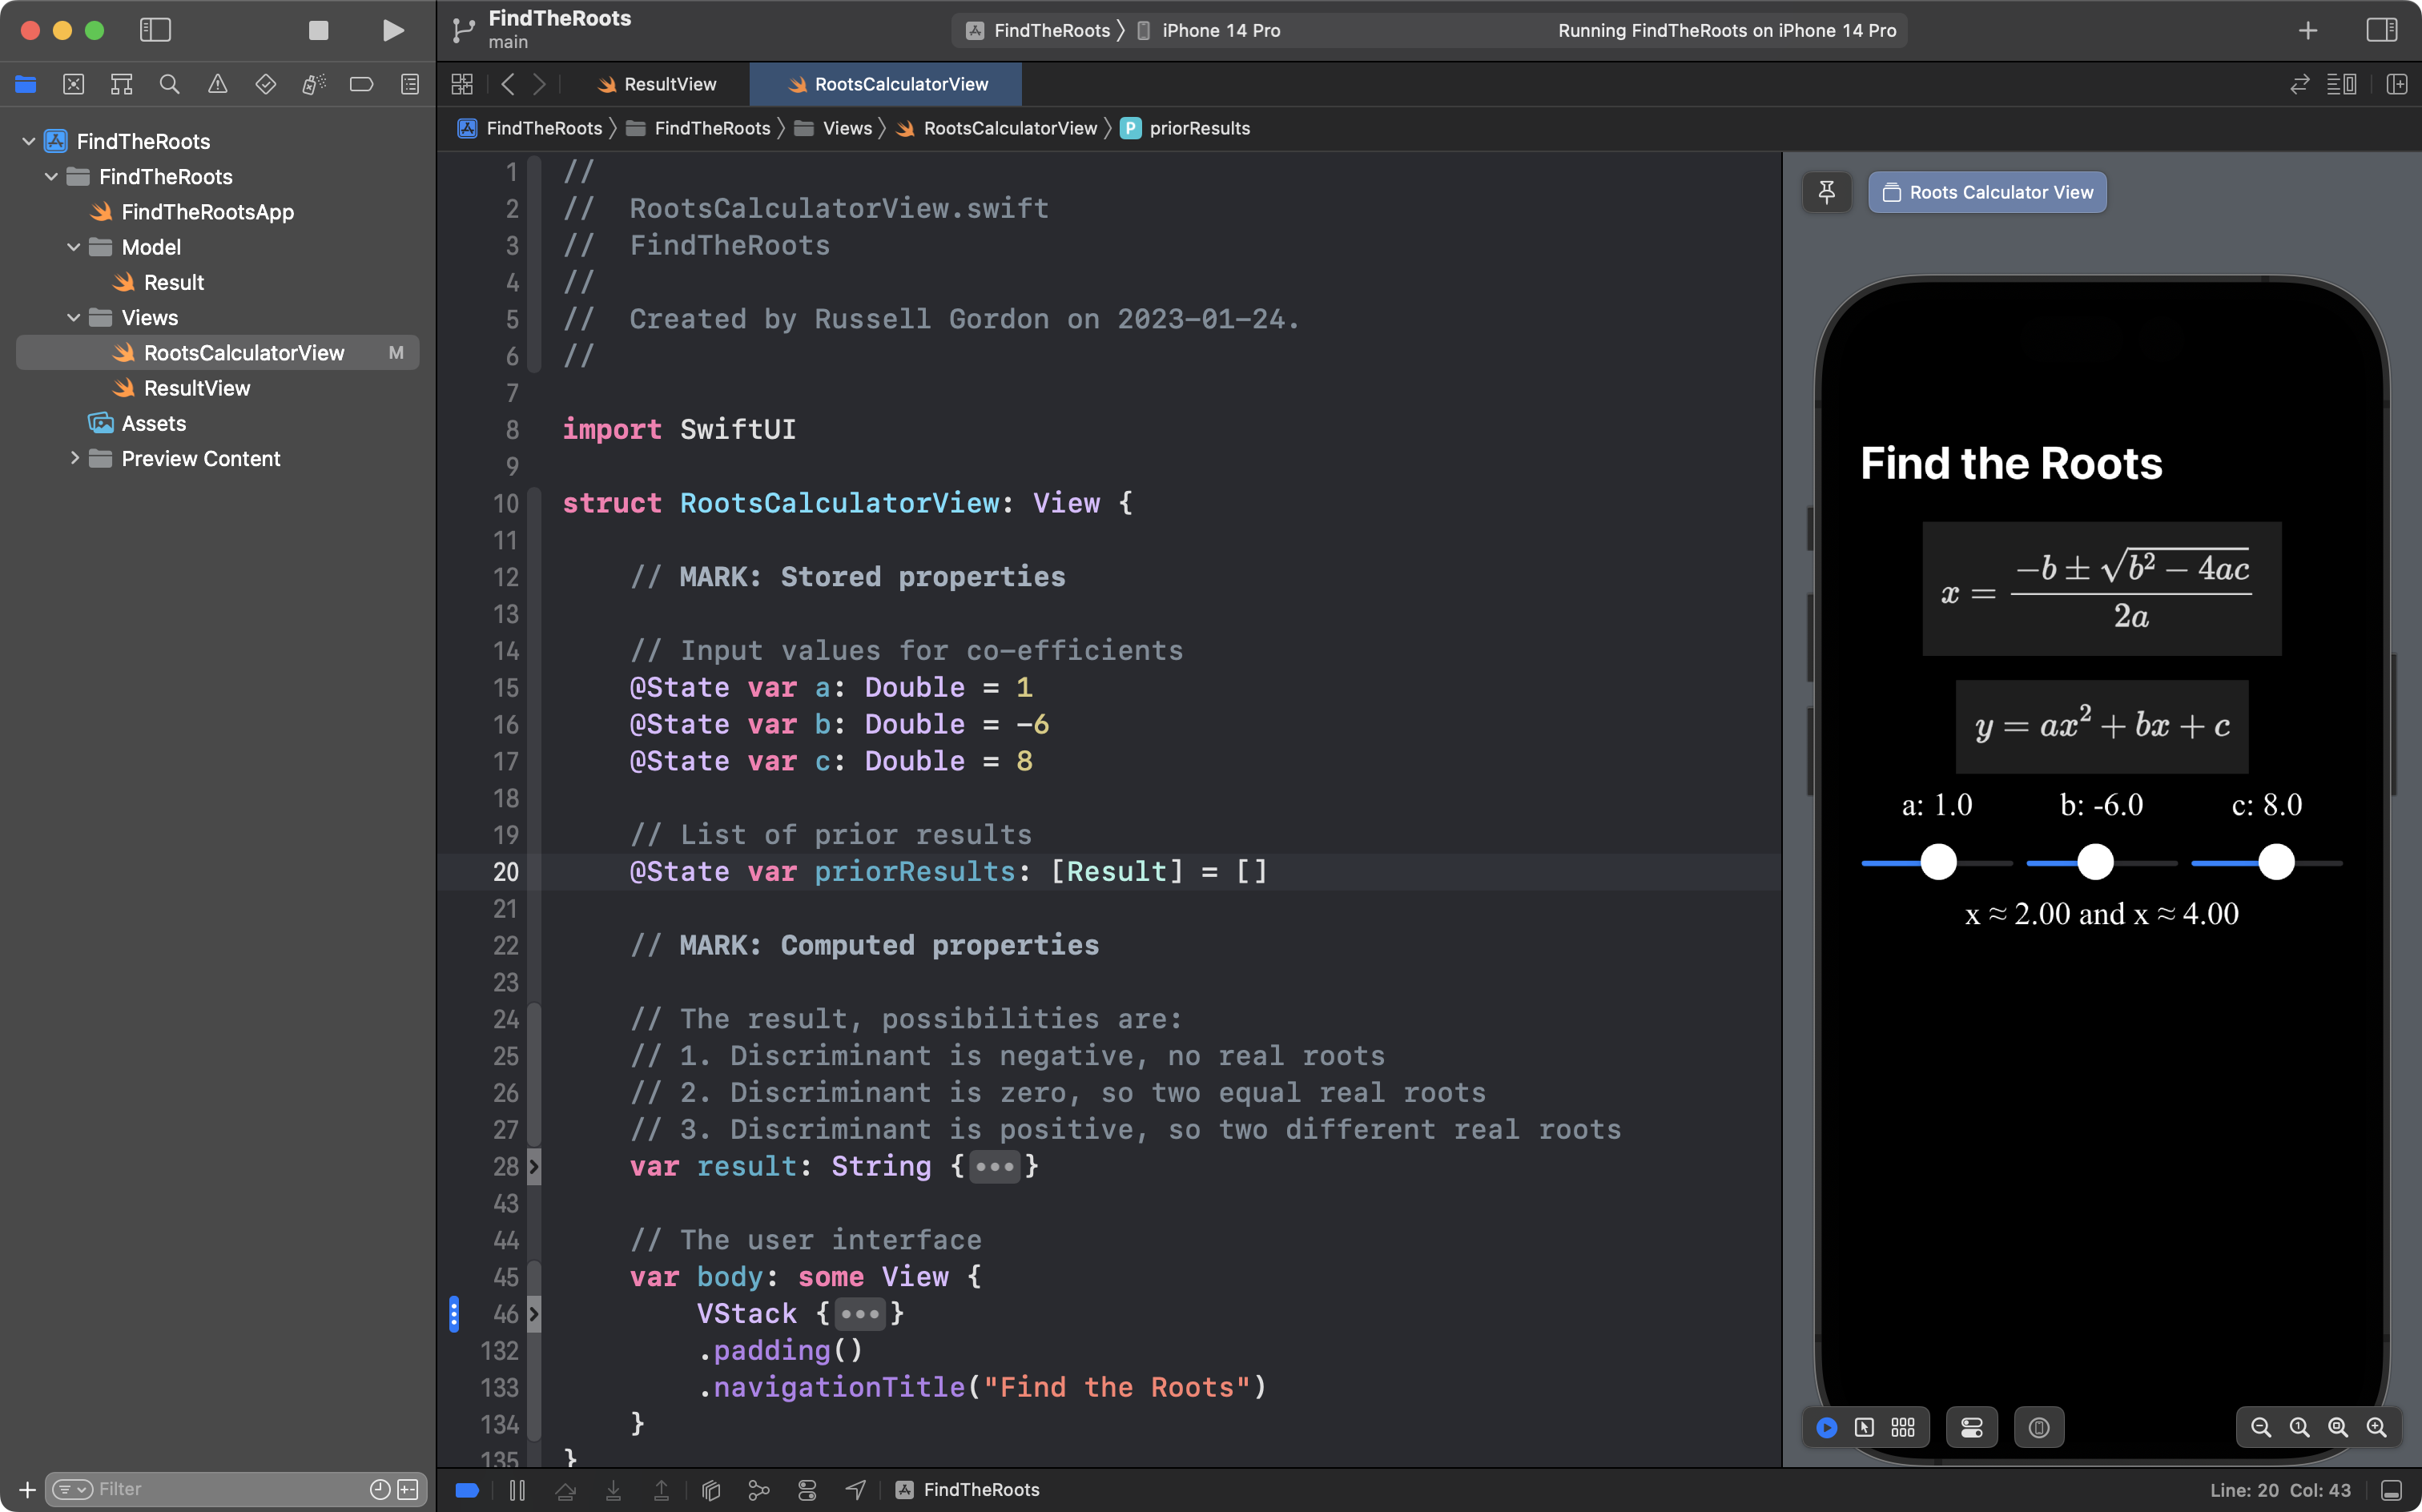
Since the stored property is marked with the @State property wrapper, when the array changes as the app is run, the user interface will be updated by SwiftUI.
Allow the user to save a result
We next need a way to let the user save a result for future reference.
This involves a Button structure.
The Button structure in SwiftUI has two parameters that accept blocks of code (closures) as arguments:
action- what code should be run when the button is pressed
label- what text should be shown on the button
Add the following code below the Text view that shows your output:
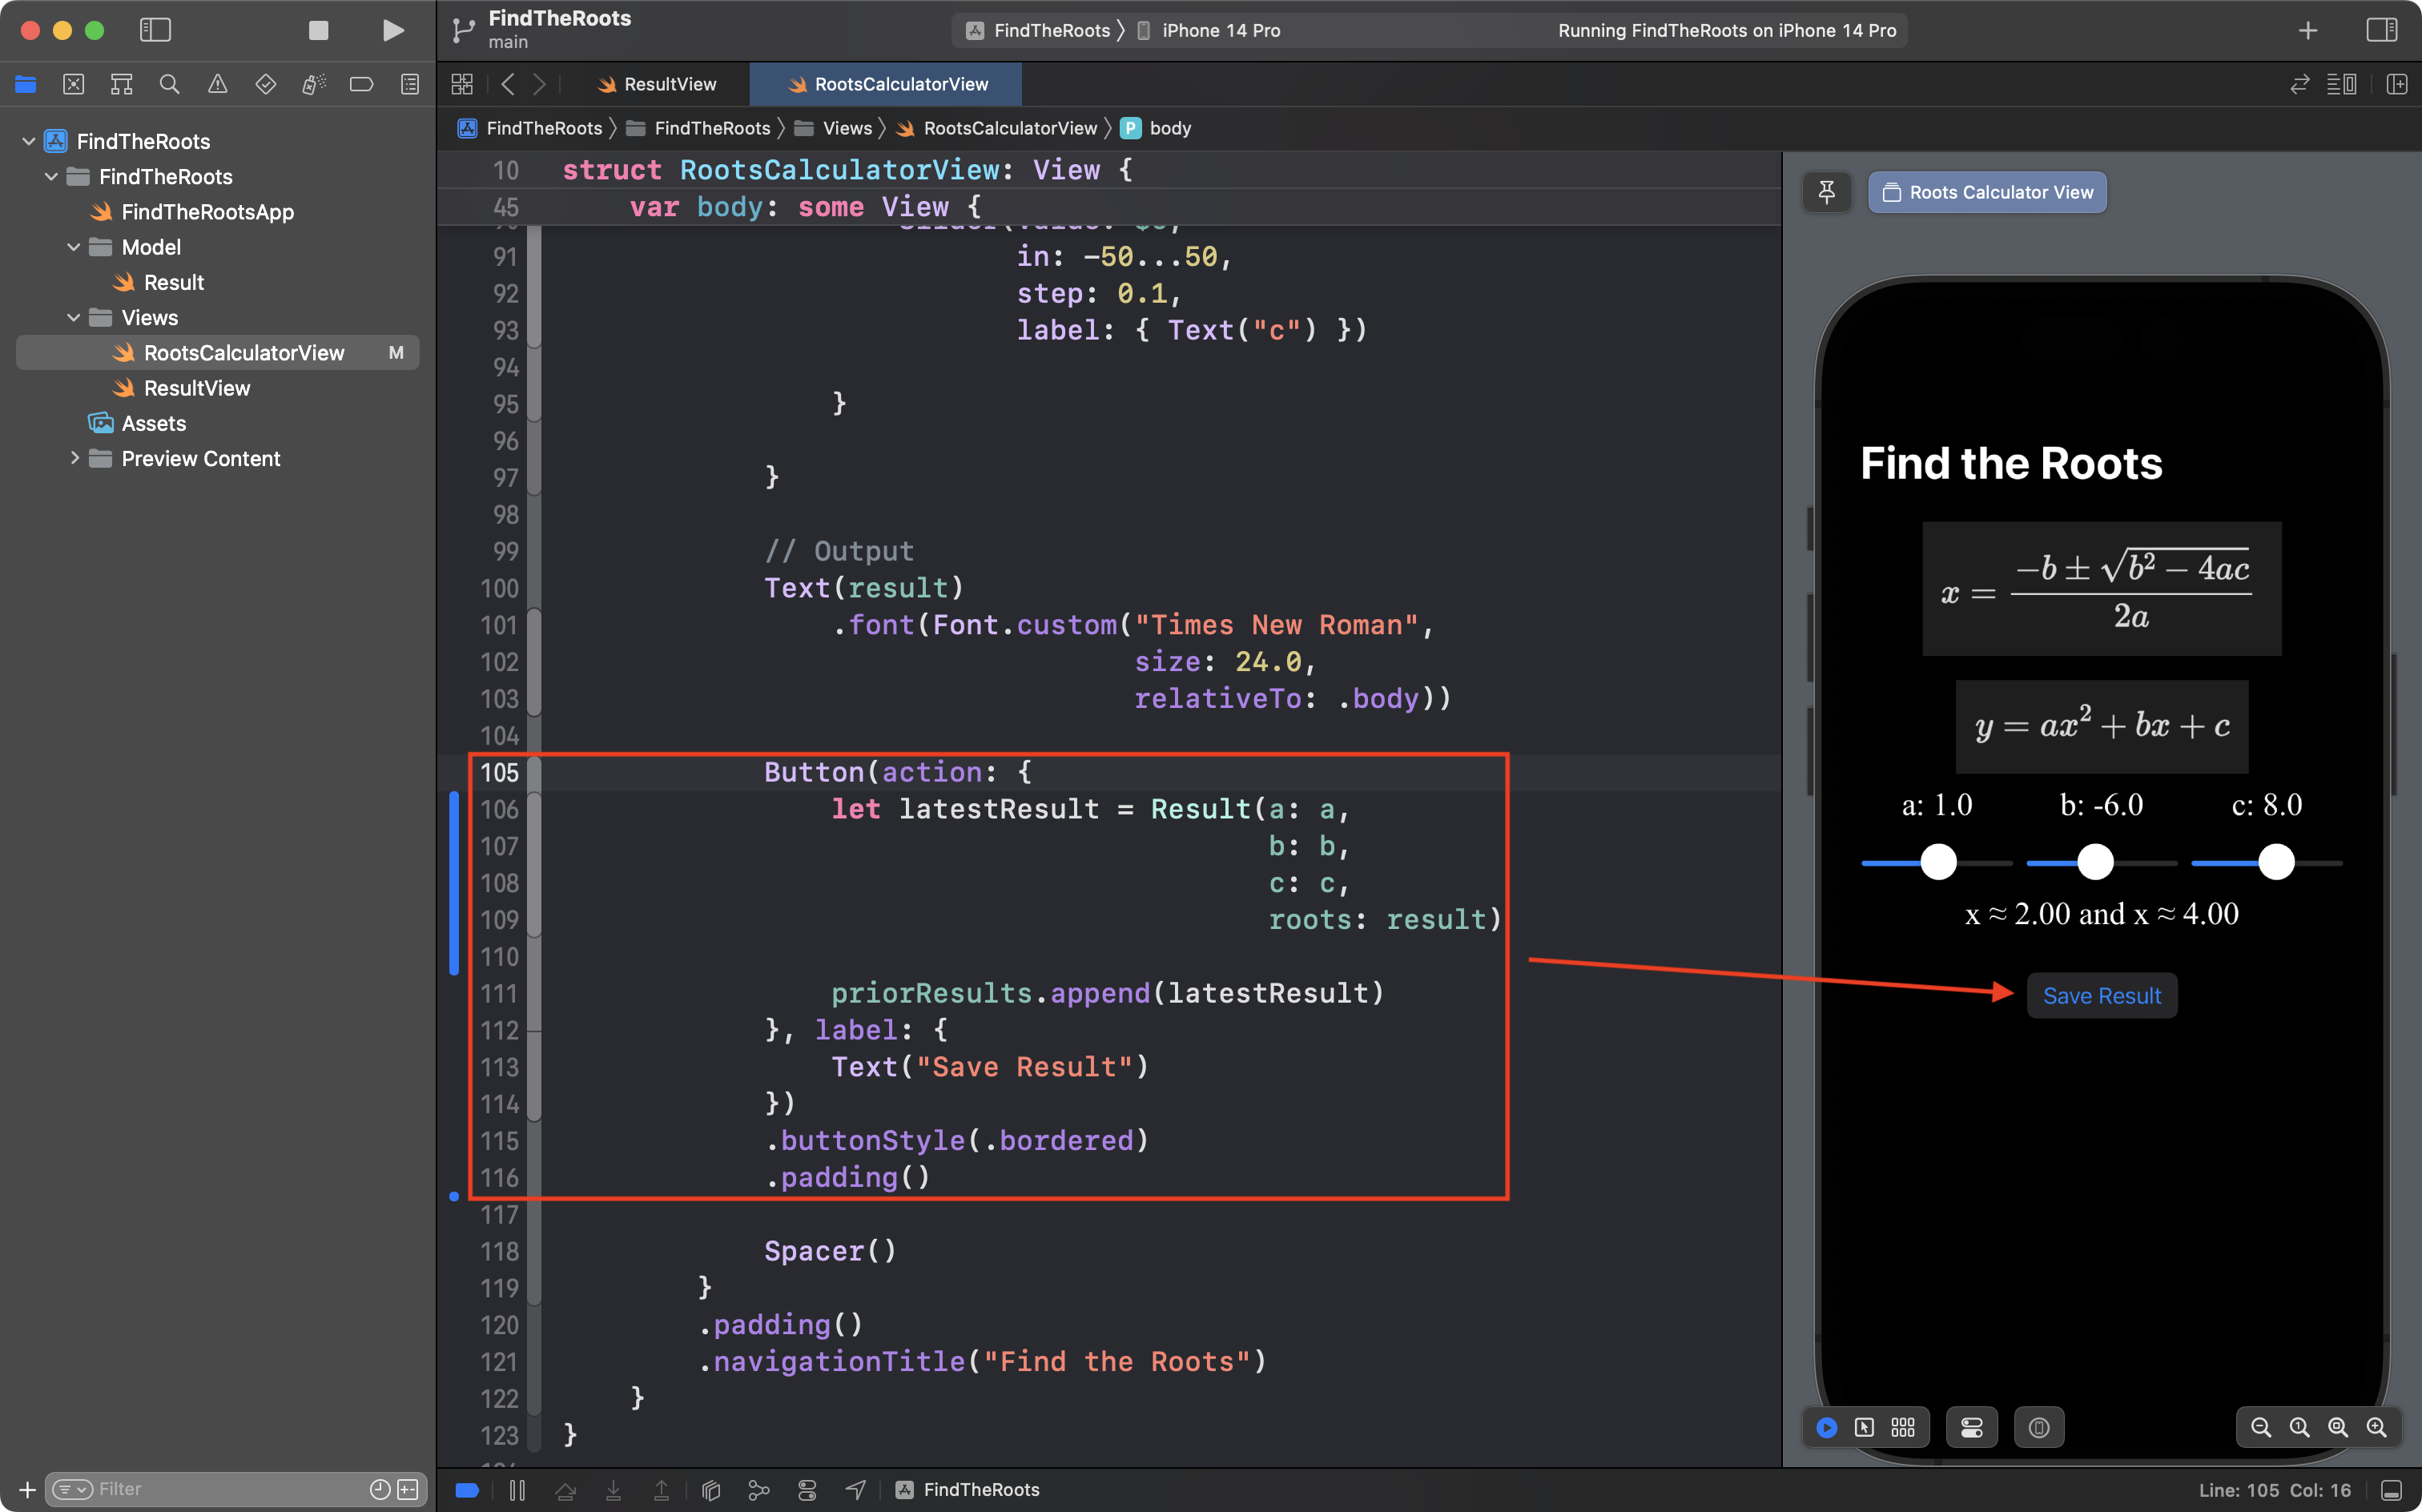
On lines 106 to 109, a temporary instance of the most recent result is created and saved in a constant named latestResult.
On line 111, the latest result is appended, or added, to the end of the array.
On line 113, the Text view specifies what text should show up on the button.
Show the history of results
Finally, we need a way to show the history of the results.
This will be done in very much the same way that you built a navigation list for your Trading Cards app:
That is to say, we will use a List structure that iterates over an array to show the output.
Add the code shown, below your button:
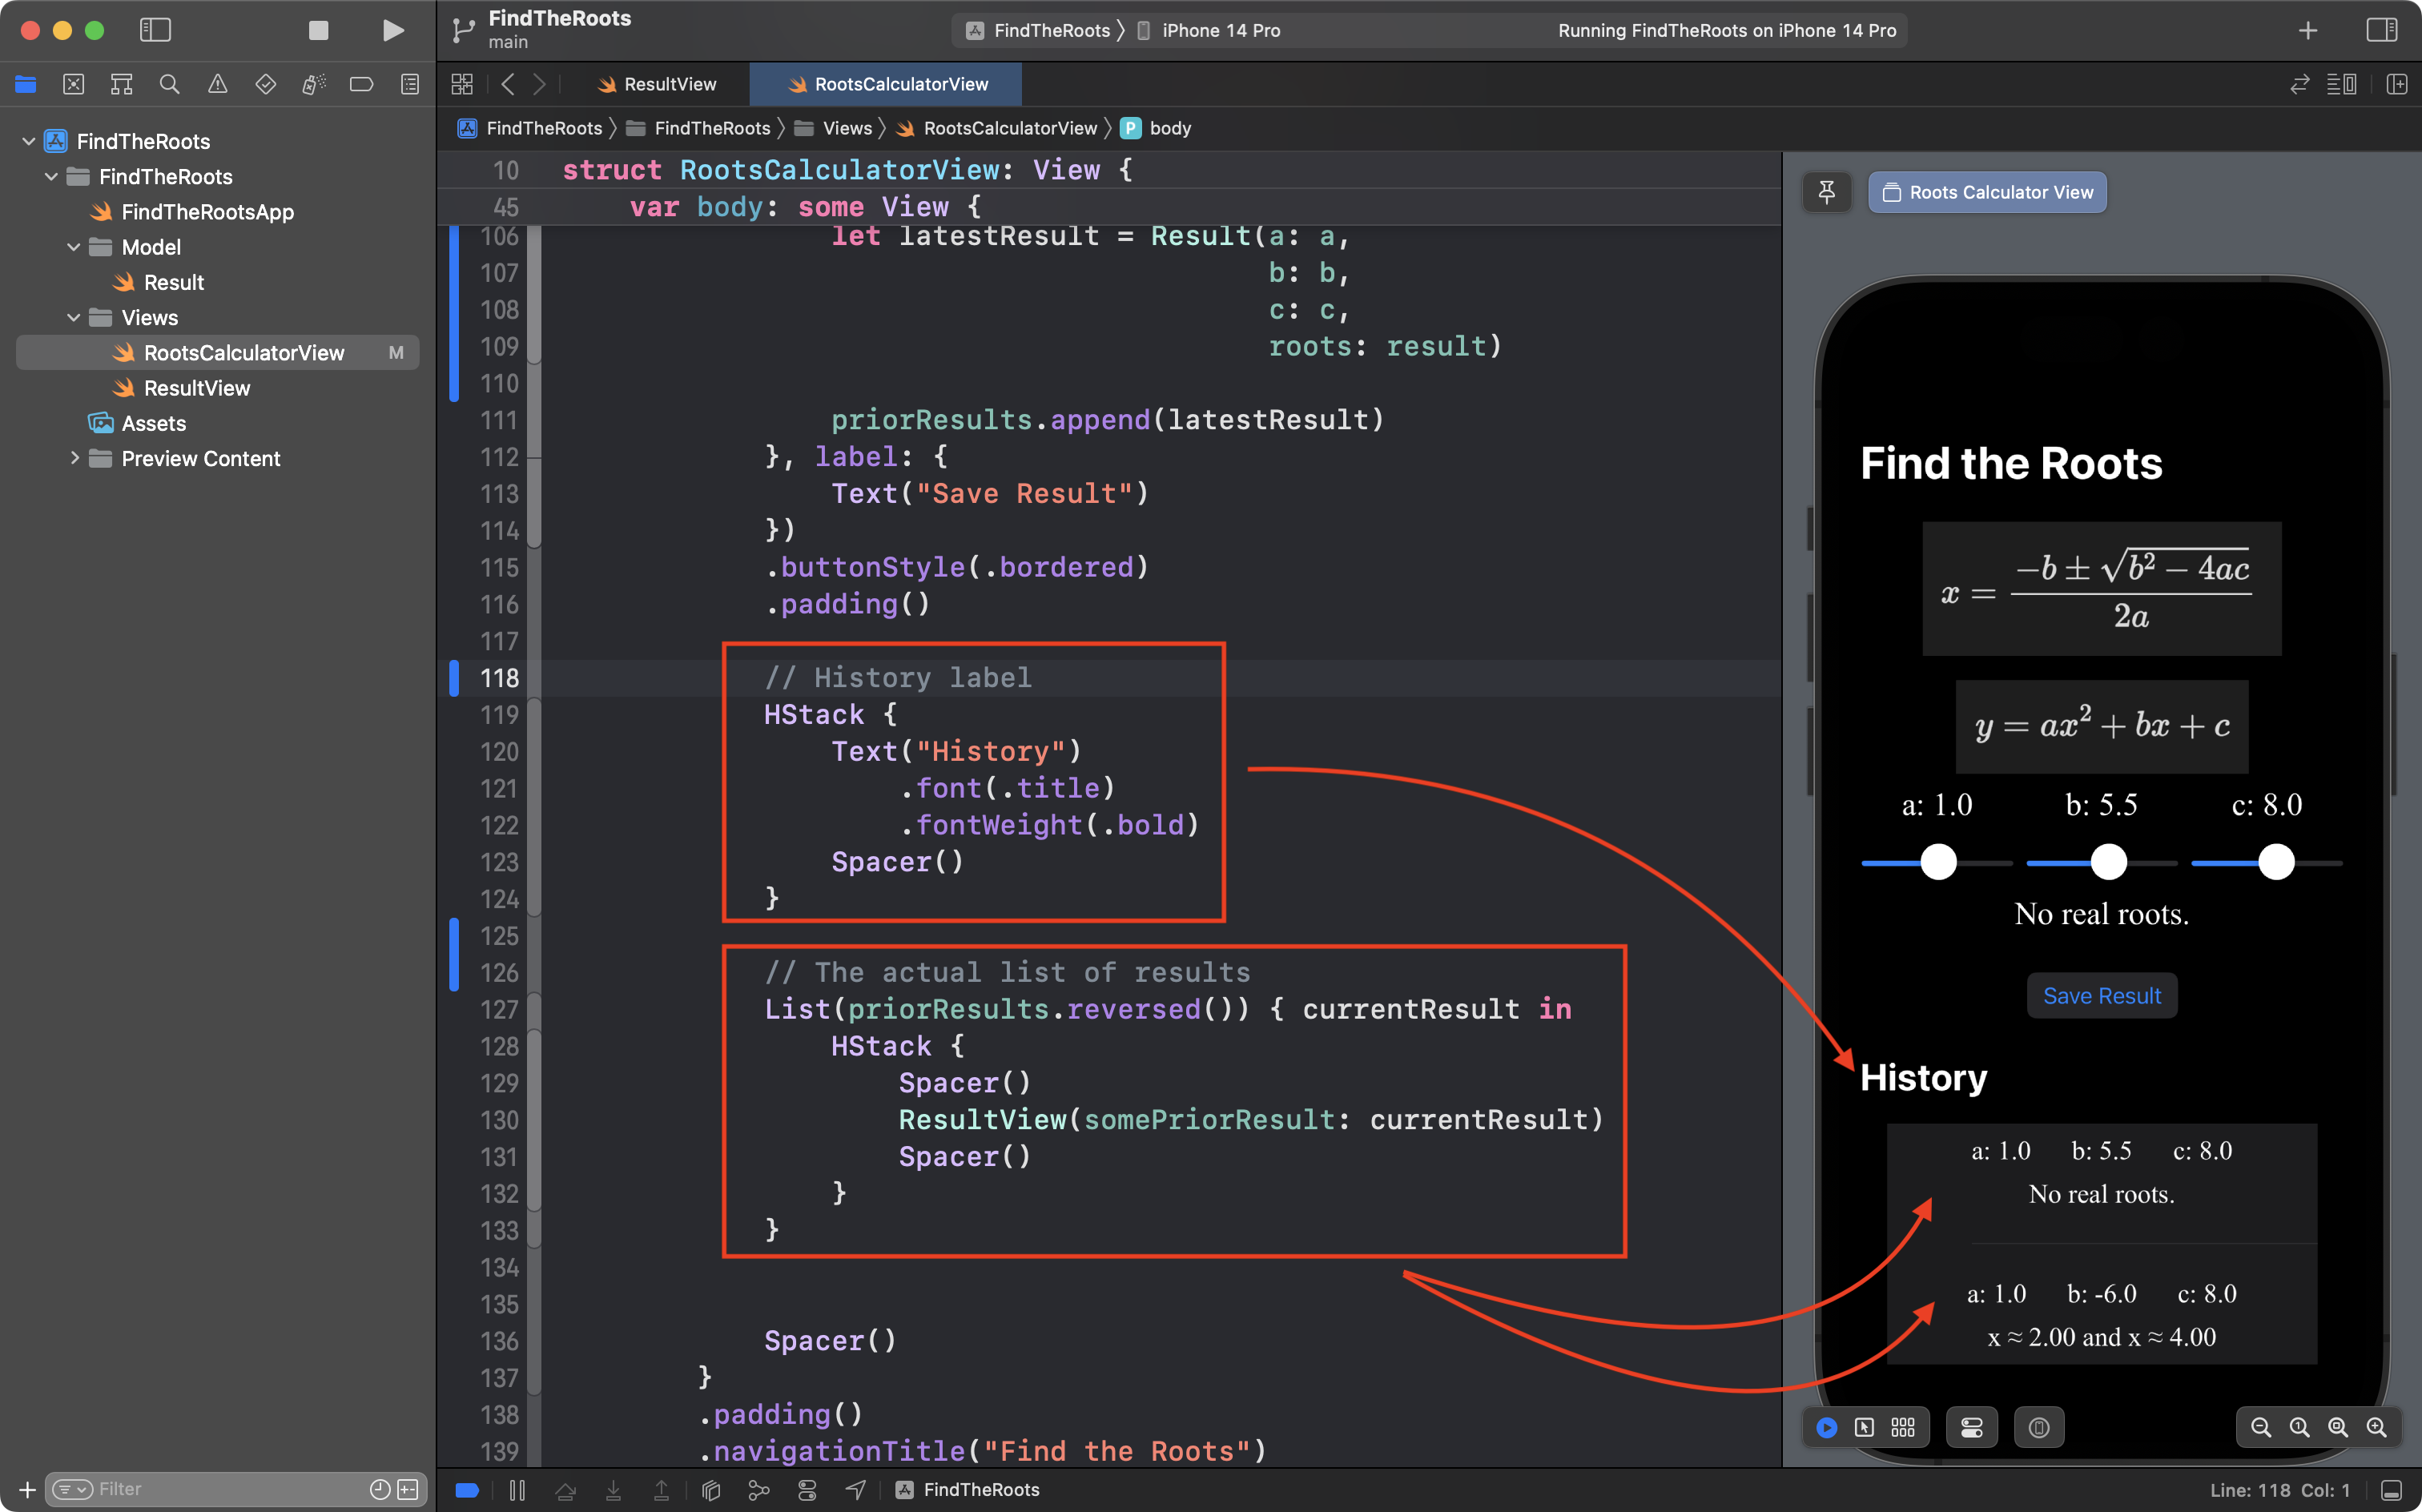
On lines 119 to 124, a label is created to display History in the user interface.
On lines 127 to 133, a List structure is used to iterate over all the results saved by the user. This creates the output seen below the History label.
The contents of the array are shown in reverse order:
priorResults.reversed()
... so that the most recent result that is saved is shown at the top of the list.
And now, you are done! 🎉